

With the Mass Email Manager, send emails of invoices, payments and many more to your subscribers easily. You can also be able to schedule sending of mass emails.
Open Mass Email
- Go to Tools > Mass Email.
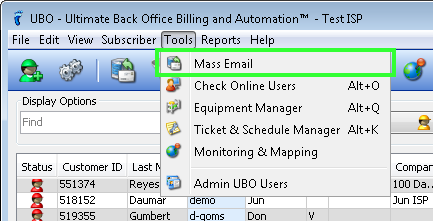
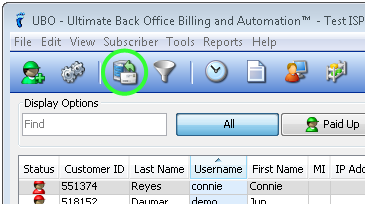
- Or simply click the Mass Email icon in the Toolbar.
Mass Email Parts
- Templates
- Mass Email Draft
- Recipients
- Lower Tabs – user can choose to show or hide this by clicking the up (show) or down (hide) arrow at the right side of Cancel
Templates
-
Go to Mass Email > Mass Email Manager .
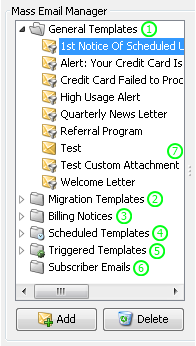
Folders:
- General Templates – custom email templates where recipients are already Filtered
- Migration Templates – emails Migrating ISPs send to their subscribers
- Billing Notices – emails that are sent regularly to remind subscribers to pay depending on their billing cycle
- Scheduled Templates – emails sent on an exact date and time every month
- Triggered Templates – emails sent when subscribers reach their limits
- Subscriber Emails – emails sent per subscriber via Email Subscriber Using UBO
- Three dots – marker which you can use to expand the Template List by dragging it sidewards
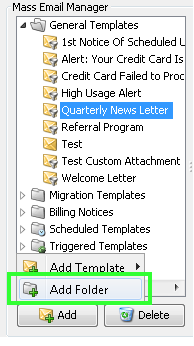
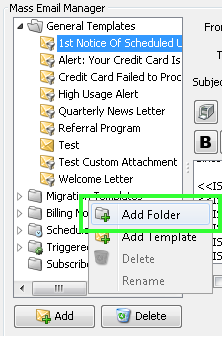
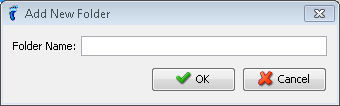
Add Folder
-
Go to Mass Email > Add > Add Folder.
- Or right-click any folder.
-
Choose Add Folder.
- Folder Name – fill this with a brief descriptive name for your new folder
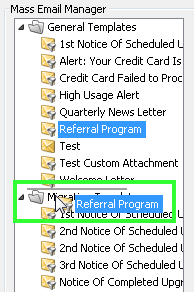
Move Template
-
Go to Mass Email.
-
Right-click the template you want to move.
-
Go to Move > [the folder where you want to move the template to]

- Or drag the template from its current folder to the folder where you want to transfer it to.
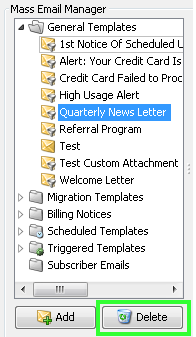
Delete Template
-
Go to Mass Email.
-
Choose the template you want to delete.
-
Click Delete.
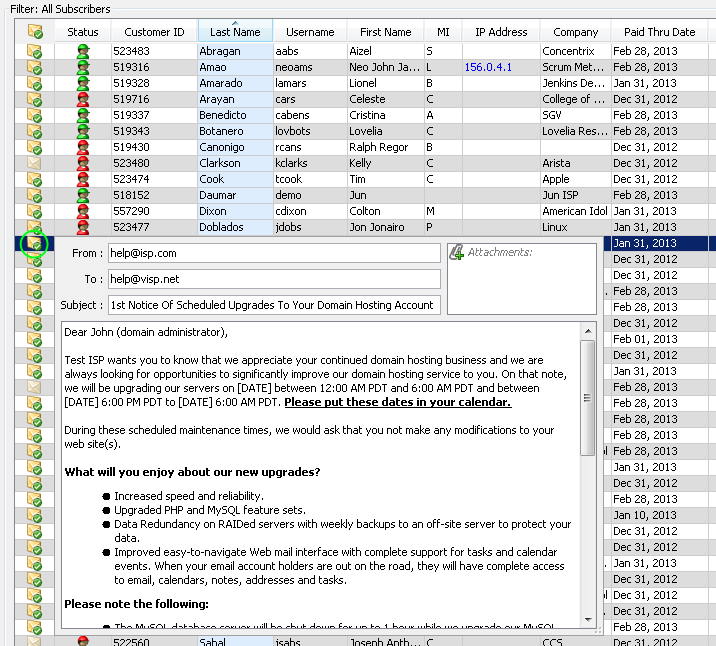
Mass Email Draft
-
Go to Mass Email > Mass Email Manager.
- Email Headers
- From – sender, who will automatically receive a confirmation email that emails have been sent; Note: pencil icon – opens the ISP Configuration > ISP Contact to edit Email field
- To – receivers, drop-down list of Filtered Subscribers
- Cc – additional receivers of the mass email
- Subject – the subject of the mass email
-
Attachments – attach statements from UBO and other supported files (“ico”, “bmp”, “gif”, “jpg”, “jpeg”, “png”, “pdf”, “doc”, “docx”, “xls”, “xlsx”, “ppt”, “pptx”, “txt”, “zip”, “rar”, “html”, “htm”)
-
Print – print email template
-
Basic tools in creating an email
-
Body – where you write your email draft
-
Sets the exact time and day of the month when the email will be sent
-
Insert – inserts specific values, which are represented by variables, in the email
-
Save As – saves the email as a new template
-
Save – replaces the current email template being edited with the recent changes made to it
-
Send – immediately sends the email to the subscribers specified
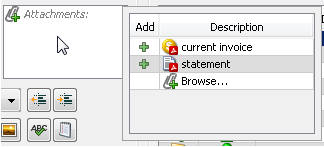
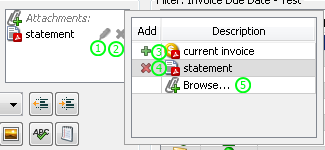
Add an Attachment
-
Go to Mass Email > Mass Email Manager > Attachments.
-
Hover on the Attachments box.
-
pencil icon – edit Statement Date Range (Note: no pencil icon would appear if the attached file is not a statement)
-
x – detach file from the email
-
+ – attach file to the email
-
x – detach file from the email
-
Browse… – attach files that are not UBO-generated
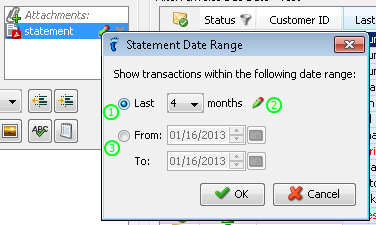
Edit Statement Date Range
-
Go to Mass Email > Mass Email Manager > Attachments.
-
Attach a statement.
-
Click the pencil icon aligned with the statement in the Attachments box.
-
Last – shows transactions for the last n months; (Note: where n can be any whole number from 1 to 24)
-
pencil icon – edits the Default statement date range in ISP Configuration > Billing Options > Accounting Controls > Statement Options
-
From – To – shows transactions within a specific date range
Insert Merge Fields
-
Go to Mass Email > Mass Email Manager
-
Click Insert at the bottom of the panel.
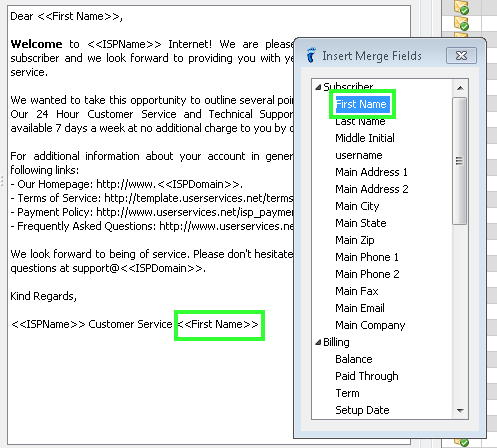
- Position your cursor in the body of the email template where you want to insert specific values represented by variable fields.
-
In the Insert Merge Fields window, click the field you want to insert in the email.
Note: You can insert anywhere in the body of the email template as many fields as you want.
Preview Emails Per Subscriber
-
Go to Mass Email > Filter: [To field].
-
Hover on the green-checked yellow envelope on the first column of the subscriber whose email you want to preview. (Note: it’s a read-only pop-up)
Note: Most, if not all, features (sort, choose cols, ping, etc ) that you use in the main table are also available in this table.
Close the Mass Email window
Just click on the Mass Email toolbar icon again and your main screen will go back to displaying your main table in full.