ReadyNet provides a tool that uses the TR-069 standard to allow you to manage TR-069 devices. This is a huge improvement to the subscriber’s experience and lowers the ISP’s overhead. Visp supports quick access to these devices right from your Visp Equipment Manager.
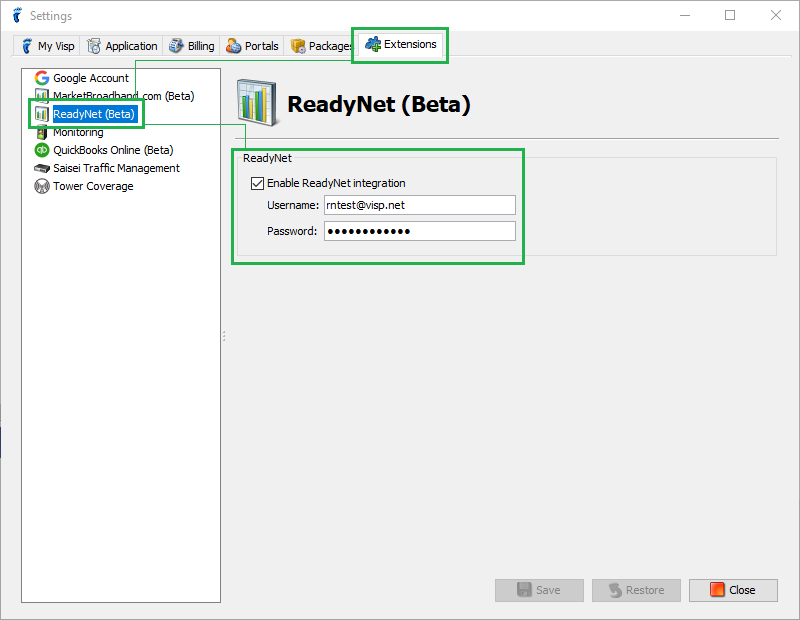
To start connecting ReadyNet to UBO, open the Settings window -> Extensions tab -> ReadyNet (Beta) panel. Then, check the Enable ReadyNet integration option, enter your ReadyNet username and password, and click Save to enable integration.
Once ReadyNet integration is enabled, the TR-069 Managed Router option, in the Type field of the Receive Inventory window, will be made available for selection.
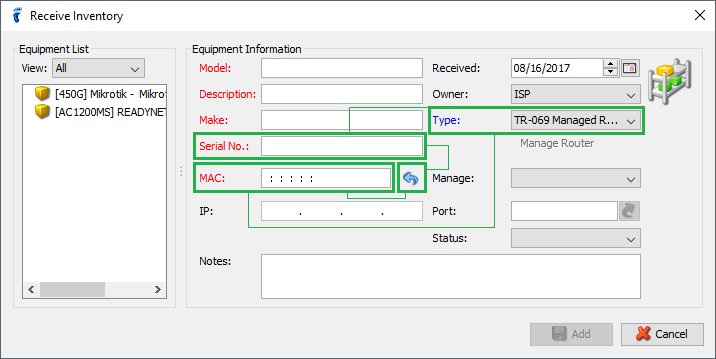
When the equipment type is set to “TR-069 Managed Router”, you will have the option to either enter the equipment’s Serial No. or its MAC. After entering either data, click on the arrow button next to the MAC field to trigger a search on the ReadyNet sidefor the provided equipment information.
If the search finds a match, the corresponding Model, Make, and Serial No. (if the search used MAC) or MAC (if the search used Serial No.) values are automatically populated into their respective fields.
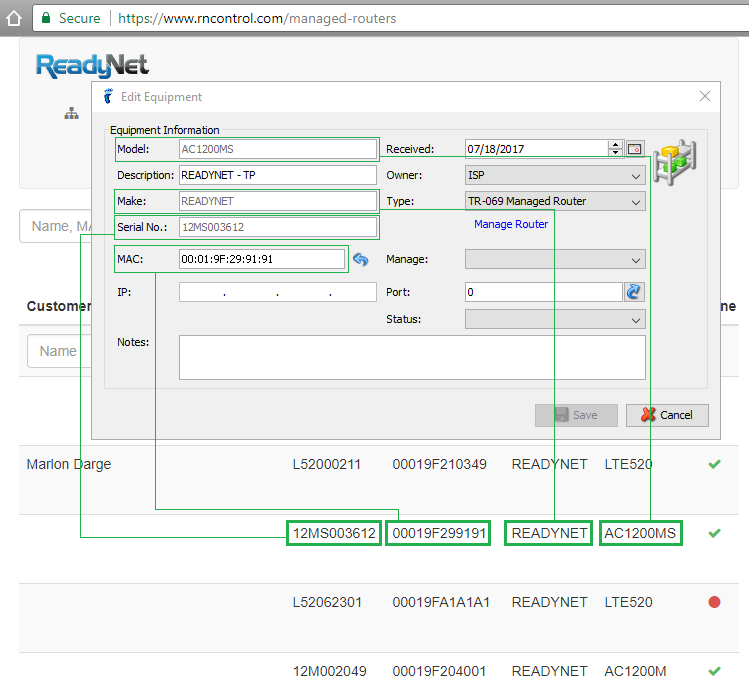
The Customer Name field on the ReadyNet side is also automatically synced with the name of the subscriber to whom the corresponding ReadyNet equipment has been assigned.
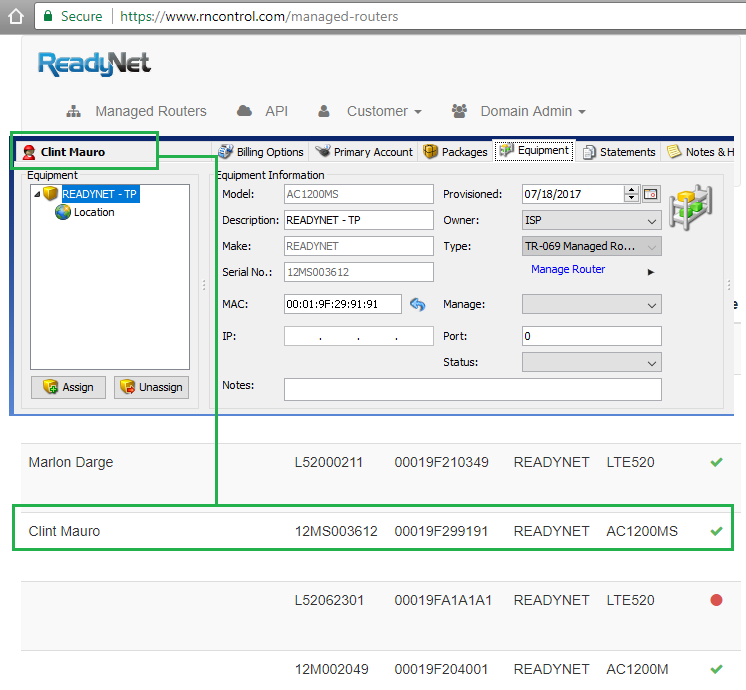
To access the router management tool on the ReadyNet site, you can click on the Manage Router link found in the equipment’s main panel.

1-541-955-6900

success@visp.net
Login