Documentation Series

Learn About VISP App Dashboard

Help Documentations / Package Setup, Billing, and Activation

Package Setup, Billing, and Activation

Welcome to this comprehensive guide on creating and activating packages with multiple services in Visp. This guide is designed to provide a clear, step-by-step walkthrough of the entire process, from package creation to service activation.

Whether you’re a seasoned Visp user or new to the platform, this guide will equip you with the knowledge and tools to efficiently bundle your services, customize billing options, and streamline customer onboarding.

By following the instructions outlined in this guide, you’ll be able to:

  • Create packages that include various combinations of services.
  • Configure billing options, including setup fees, recurring charges, and custom pricing.
  • Add and manage services within a package.
  • Set up tax rules and automate tax calculations.
  • Customize package options, including online signup settings and device management.
  • Add packages to customer accounts and activate the included services.

Creating the Package
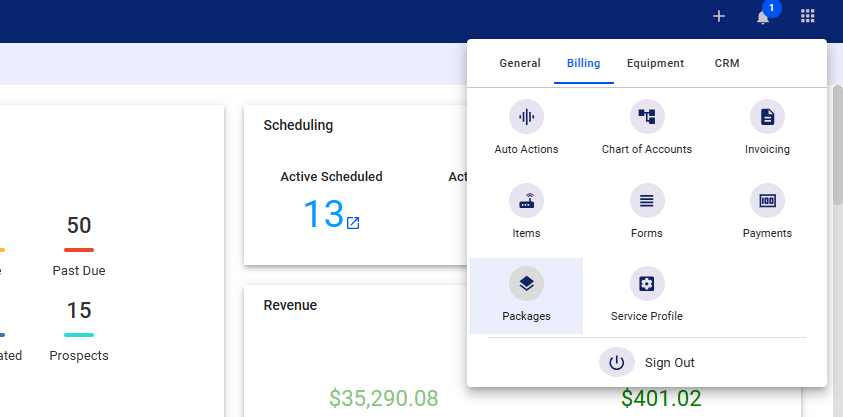
1. Navigate to Package Settings

  • Click on the nine-dot menu located in the upper right corner of the app.
  • Select the “Billing” tab.
    • Choose “Packages”

2. Add a New Package
Click on the “Add New” link in the upper right corner of the packages page

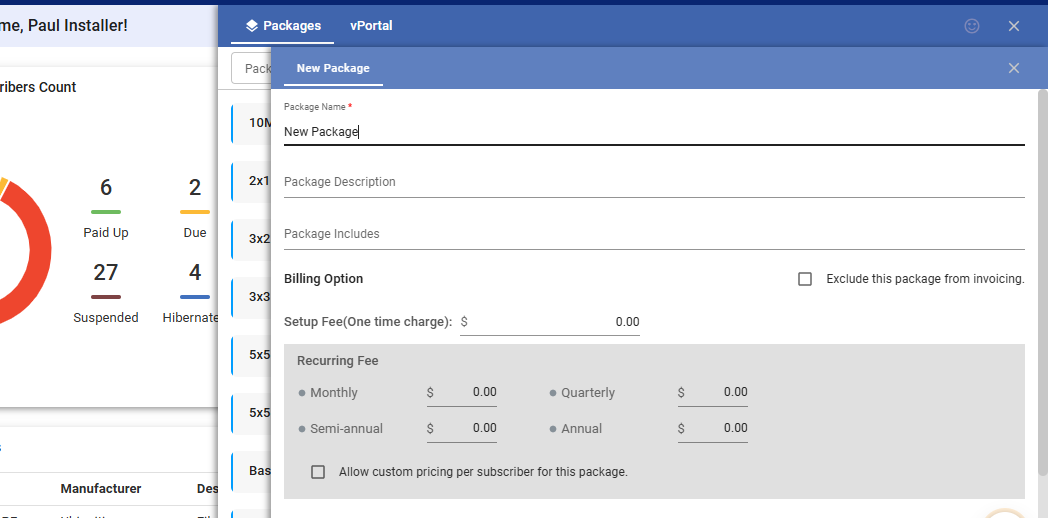
3. Enter Package Details

  • Package Name: Provide a clear and descriptive name for the package (e.g., “Bundled Service or Triple Play”). Your customers will see this name in their account manager and on the sign-up page.
  • Package Description: Write a concise description that outlines the key features of the package (e.g., “Triple play package with Internet, phone, and streaming services”).
  • Package Inclusions:
    • In the “Package Includes” field, specify any additional items or services included in the package. These can be free or subject to a recurring monthly charge.
    • Examples include a free router, a range extender, or value-added service.
  • Billing Options:
    • Exclude from Invoicing: If you toggle this option, the package will not be charged on the customer’s account and skipped during invoice generation.
    • Setup Fee: Specify a one-time charge for setting up the service.
    • Recurring Fees: Set prices for different billing cycles (monthly, quarterly, semi-annual, and annual).
    • Allow Custom Pricing: Enable this option if you want the flexibility to set a different price for individual customers, overriding the default recurring fees.
  • Add Services:
    • Click on the “Add/Remove Services” link.
    • Select the services you want to include in the package. You can choose from options such as Internet, TV, VoIP, and independent email (external email hosting). You have several services to select from.
    • Once you have selected the services, click on the gray “X” icon to close the services page.
  • Edit Service Details:
    • In the list of services, you can edit the following for each service:
      • Label: Customize the name of the service as it will appear to the customer or on the customer’s invoice.
      • Quantity: Specify how many service instances will be provided (e.g., two wireless internet connections).
      • FCC Tech Code: Enter the appropriate FCC tech code for each service, if applicable.
    • You can also remove a service from the package by clicking on the gray “X” icon next to it. Note that you can only remove services if no customer is actively using them .
  • Save the Package:
    • Scroll down to the bottom of the page and click the “Save” button to create the new package.

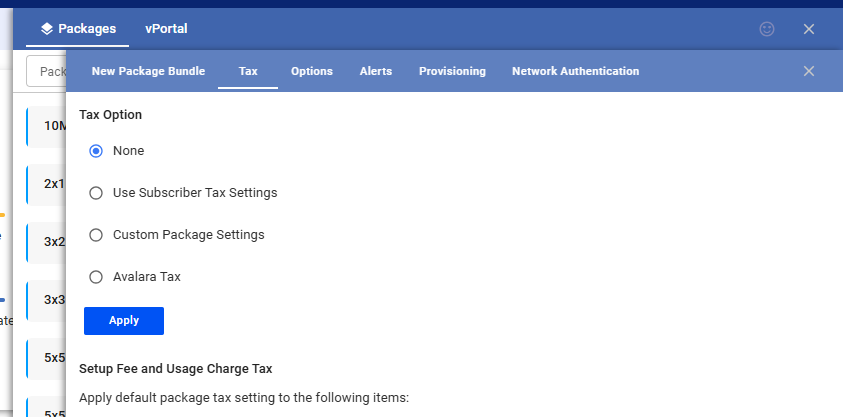
4. Configure Tax Settings

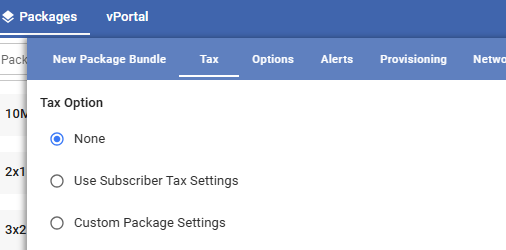
  • Click on the “Tax” tab.
    • Choose the appropriate tax option: None, Use subscriber tax settings, or Custom package settings.
    • If you select custom package settings, you can set a tax percentage or a flat rate for different billing cycles and the setup fee.
    • Consider using Avalara for automated tax calculation based on location and updated tax codes.
    • Click “Apply” to apply tax settings to all active users of this package with the tax option enabled.
  • Click “ Save ” to save the tax configuration.

5. Configure Options

  • Click on the “Options” tab.
    • Set the package type (Residential or Business).
    • Enable “Signup Server” if you want the package to be available on your online signup page.
    • Configure other options like requiring a credit card or payment on signup, participating in the ACP, requesting additional information, activating the package and services after signup, invoicing the package after signup, location ID, account manager visibility, package devices settings, and package hibernation settings.
  • Click “Save” to save the options configuration.
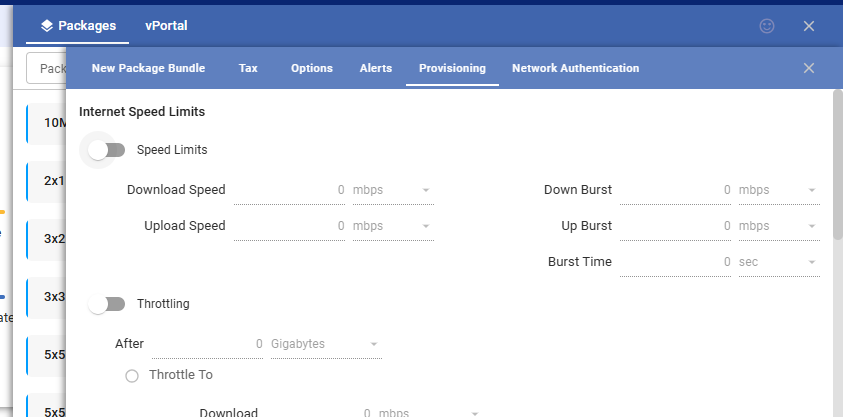
6. Provisioning
Click on the “Provisioning” tab: After saving the options in the “Options” tab, navigate to the “Provisioning” tab within the package configuration.

Internet Speed Limits:

  • Toggle the “Speed Limits” option to enable speed restrictions.
  • Set the desired download and upload speeds in Mbps or Kbps.
  • Configure burst settings (downburst, upburst, and burst time) to temporarily allow higher speeds for specific durations.

Throttling:

  • Enable the “Throttling” toggle to implement bandwidth usage restrictions.
  • Specify the data limit (in gigabytes) after which throttling or disconnection will occur.
  • Set the throttled download and upload speeds.
  • Choose whether to disconnect the customer completely upon reaching the limit.

Additional Options:

  • “Allow speed limits and throttling to be modified per subscriber”: Enable this to customize speed limits and throttling settings for individual customers.
  • “Use Visp Hyperages to set the speed attribute in the MikroTik Simple Queues”: Utilize Visp Hyperages for advanced speed management within MikroTik Simple Queues.

Internet Usage-Based Billing:

  • Set data limits and billing options for usage-based billing.
  • Choose to limit by hours or by megabytes/kilobytes per month.
  • Specify the charges per hour or per MB/KB.
  • Optionally, disconnect customers who exceed their data limits.
  • Configure other settings such as showing subscriber usage on invoices and allowing custom usage-based billing settings per subscriber.

    Data Accounting:

    • Configure data accounting exclusion settings to define how upload traffic is handled for free or throttled services.
    • Note that the detailed configuration of data accounting will be covered in a separate guide.

    Save Changes: Once you have configured all the provisioning settings, click the “Save” button to record your changes or “Restore” to revert to default settings.

    • Close the package window by clicking the “X” icon in the upper right corner.
    • Close the package’s main list by clicking the “X” icon.

    Adding the Package to a Customer’s Account and Activating It

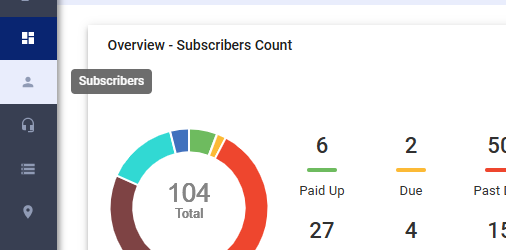
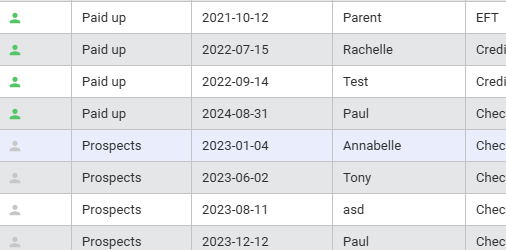
    7. Go to the “Subscribers” list.

    8. Choose the customer to whom you want to add the package.
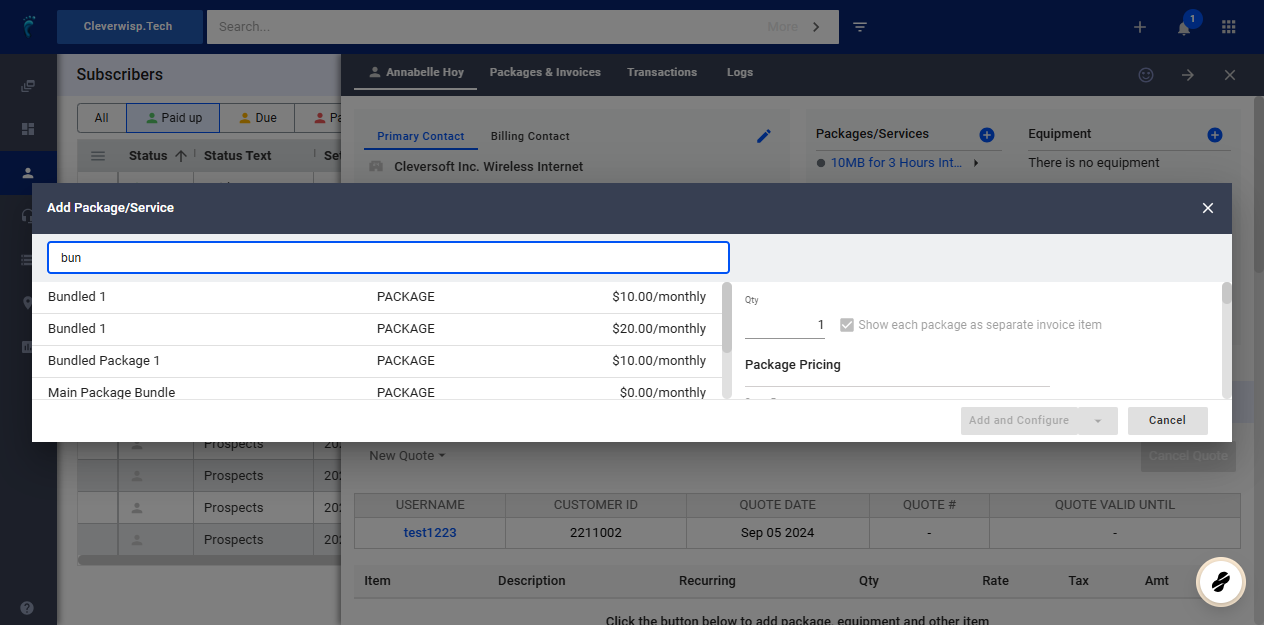
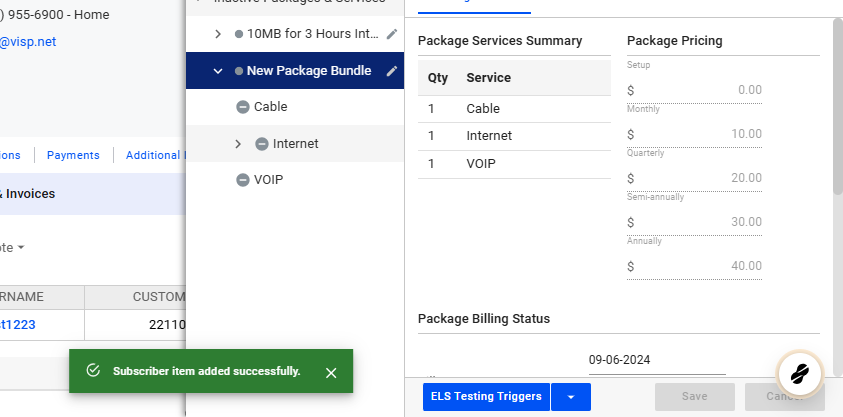
    9. Add the Package

    • In the customer’s profile, under the “Packages and Services” section, click the plus sign.
    • Search for the package you created and select it.
    • Review the pricing and quantity and click the “Add and Configure” button.

    10. Configure Package Billing

    • In the “Package Billing Status” section, set the bill start date and other relevant billing details.
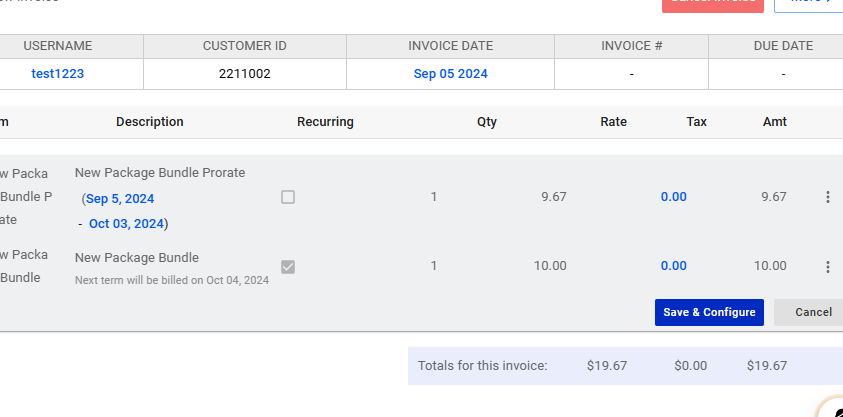
    • Click the “Invoice Now” button to charge the customer.

    11. Review the charges and click “Save and Configure.”

    12. Activate Services

    • In the “Packages and Services” section, activate each service included.
      • Click on the service you want to activate.
      • Click the “Autofill” button to populate the username and password automatically.
      • Click the “Activate” button to activate the service.
    • You’re Done: The package is now added to the customer’s account, and the included services are activated. The customer can now start using the services.

    💡 For more information about this and all other features in Visp, reach out to your Visp Client Success Team today.
    Phone: 541-955-6900

    Email: success@visp.net

    Open a ticket via www.visp.net/ticket

    1. Enable Automatic Payment of Invoices to VISP.net

    To enable the automatic payment of your invoices to Visp.net, go to the menu in VISP and select My VISP. Scroll and expand Payments. Add the person’s email address who will receive your billing reminders or notifications from Visp.net. Add an amount to the Balance…

    2. Taxes

    VISP supports integration with Avalara for automated taxation. It’s also designed to manage tax settings that support multiple criterias for every transaction. To add a tax setting, go to Main Menu > Invoicing > Taxes and clicking on the plus sign or Add New…

    3. Supported Merchant Processors

    Choose the processor that works best with your billing operations; many of the top gateways integrate with VISP. Payment Solutions is a “white-glove concierge” service that ensures you get the best rates and features for your ISP. You’ll work with professionals that…

    4. Late Fee or Re-billing Fee

    Late fees and re-billing fees are charges that may be added to your subscribers when they have been past due for a specified number of days. They encourage your subscribers to pay on time to avoid paying late or re-billing fees. Go to Main Menu > Invoicing >…

    5. Update Billing Cycle

    For UBO or desktop (Java) version, refer to this link. To change or update the billing cycle of a subscriber, first click and open your subscriber’s list. Click on a subscriber’s account. Click on the Billing Options tab. In the section labeled Cycle, you can click…

    6. Refund Payments

    For UBO or desktop (Java) version, refer to this link. Whether it’s a mistake in receiving payments or a discount you forgot to enter, the Refund feature is your life-saver. To process a refund, you first need to have the Payment refunding function enabled in your…

    7. Receive Payments

    Let’s say your subscriber has seen the invoice you sent and has already paid. You need to acknowledge that payment and record it in that subscriber’s register: this is “posting a payment” in the software To receive payments from subscribers, first go to your…

    8. Print Invoices

    For UBO or desktop (Java) version, refer to this link. In VISP, you may print invoices individually or by batch. Here’s how to print it individually: Click on a subscriber’s account. In the Transactions section, click on the invoice you want to print. Once the…

    9. Add Scheduled Actions (Reschedule Late Fee / Suspension)

    To reschedule suspensions and late fees to another date, go to your subscribers’ list and pick a subscriber. In the subscriber’s profile, go to the Logs section. Click on the vertical ellipsis ⋮ or the three dots . on the account

    10. Enable and Set Paper Invoices

    For UBO or desktop (Java) version, refer to this link. Some of your subscribers may want to have printed invoices. The Paper Invoice Fee feature allows you to set a default value and setting when Paper Invoice is enabled for your subscribers. To set up or configure…

    11. Enable and Set Grace Periods

    For UBO or desktop (Java) version, refer to this link. A grace period is the amount of time you give your subscribers so they can pay their balance due without getting suspended. For example, if payment is due on the 10th of the month and the grace period was set for…

    12. Edit an Invoice

    For UBO or desktop (Java) version, refer to this link. To edit an invoice in an account, first go to your subscriber list. Click on a subscriber’s account and do the following: In the Transactions section, select the invoice you want to edit. Or under Packages and…

    13. Delete an Invoice

    For UBO or desktop (Java) version, refer to this link. To delete an invoice, first go to your subscriber list. Click on a subscriber’s account, and do the following: In the Transactions section, click on the invoice you want to delete. If you want to delete the…

    14. Add Equipment Charge to an Invoice

    For UBO or desktop (Java) version, refer to this link. A Credit Memo reduces the Accounts Receivable (AR) from a subscriber. Use a credit memo when adding a one-time credit (discount) to an account, or reversing a charge. To add a credit or debit memo to an account,…

    15. Add a Custom invoice

    For UBO or desktop (Java) version, refer to this link. Each of your subscribers already has an automatically generated invoice based on the package services he/she is availing from you. However, if a subscriber has additional items to pay for (like rented or purchased…

    16. Adding a Credit or Debit Memo

    For UBO or desktop (Java) version, refer to this link. A Credit Memo reduces the Accounts Receivable (AR) from a subscriber. Use a credit memo when adding a one-time credit (discount) to an account, or reversing a charge. To add a credit or debit memo to an account,…

    17. Bill-to-Another Feature

    Use the Bill-to-Another feature to pay for an item on another customer’s bill. Customer A (Parent Account) is paying for an item on Customer B’s (Child Account) invoice. First, go to Customer B (Child Account), and hover over the item. Click on the vertical ellipsis…

    18. Add Scheduled Actions

    To reschedule suspensions and late fees to another date, go to your subscribers’ list and pick a subscriber. In the subscriber’s profile, go to the Logs section Click on the vertical ellipsis ⋮ or the three dots . on the account Click on Add Scheduled Action On the…

    19. Credit Memo Redesigned

    In VISP, a credit memo or a credit note is a commercial document issued by an ISP to a subscriber account that reduces the amount of money the subscriber owes. It is used when services are canceled, when products (devices) are returned or not delivered, or when a…

    20. Chart of Accounts

    1.Click the nine-dot menu in the upper right corner to open the VISP Admin Page. 2. Click on Billing. 3. Select Chart of Accounts 4. Click on “Add New Account” 5. Enter a Chart of Accounts code. 5. Enter a Chart of Accounts code. 6. Use the dropdown to select a Chart…

    21. Add and Configure Taxes

    1. Click the nine-dot menu in the upper right corner to open the VISP Admin Page. 2. Click on Billing. 3. Select Invoicing 4. Select Invoicing 5. Enter a new label for taxes. 6. Toggle “Require selection upon adding new subscriber.” to require the selection of a tax…

    22. Add and Configure Taxes

    1. Click the nine-dot menu in the upper right corner to open the VISP Admin Page. 2. Click on Billing. 3. Select Invoicing 4. Select Invoicing 5. Enter a new label for taxes. 6. Toggle “Require selection upon adding new subscriber.” to require the selection of a tax…

    23. Bundled Charges – Packages and Items

    1. Click the nine-dot menu in the upper right corner to open the Visp Admin Page 2. Click on Billing. 3. Select Items 4. To create a new custom item that will be bundled or included in a package, follow these steps: Click on Add New Item Enter a unique item code From…

    24. Lock Transactions: Activate and Configure

    1. Click the nine-dot menu in the upper right corner to open the Visp admin page. 2. Click Billing. 3. Select Invoicing. 4. Click on Accounting Controls. 5. In “Warn Users on Closed Books,” toggle, “Automatically warn users on closed books.” 6. Set a “Closing Date” 7….

    25. Enable and Configure the Auto-Bad Debt Write-Off Feature

    1. Click the nine-dot menu in the upper right corner to open the VISP Admin Page. 2. Click on Billing 3. Select Auto Actions 4. Scroll to the Write-Off Settings 5. Toggle to enable the, “Auto bad debt write-off for archived subscribers.” 6. Click on “Balance…

    26. Set Manual Invoice Dates

    1. Click on Subscribers 2. Search for the subscriber or select from the list. 3. Click on Packages & Invoices 4. Click on the three dots (vertical ellipsis) 5. Select New Invoice 6. Click to set a new date. ⚠️ Invoice dates must be set ON or PRIOR to the bill…

    27. Setup Your Merchant, Autopay, and Payment Retry Settings

    Configure Your Payment Gateway 1. Click the nine-dot menu in the upper right corner to open the VISP Admin Page. 2. Click on Billing 3. Select Payments 4. Click on Payment Gateways 5. Select a Payment Gateway 6. Enter the API or credentials for your Merchant Account…

    28. Setup Your Merchant, Autopay, and Payment Retry Settings

    Configure Your Payment Gateway 1. Click the nine-dot menu in the upper right corner to open the VISP Admin Page. 2. Click on Billing 3. Select Payments 4. Click on Payment Gateways 5. Select a Payment Gateway 6. Enter the API or credentials for your Merchant Account…

    29. How to Create a New Invoice and Add Invoice Items

    1. Click on Subscribers 2. Search for the subscriber or select from the list. 3. Click on Packages & Invoices 4. Click on the three dots. 5. Select New Invoice Add Custom Invoice Items 💡 Add a new invoice or edit an open invoice in order to add new items. 6….

    30. How to Void an Invoice?

    1. Click on Subscribers 2. Search for the subscriber or select from the list. 3. Click on Transactions 4. Select an Invoice. 5. Click on the three dots. 6. Select, “Void this Invoice.” 7. Read and acknowledge the pop-up message. Click, “Yes,” to continue. 8. Invoice…

    31. How to Add a Credit Memo?

    1. Click on Subscribers 2. Search for the subscriber or select from the list. 3. Click on Packages & Invoices 4. Click on the three dots. 5. Click on “New Credit Memo.” 6. Input a Memo description. 7. Choose an invoice to apply this credit memo. 8. Or set the…

    32. Add a One-Time Discount

    1. Click on Subscribers 2. Search for the subscriber or select from the list. 3. Click on Open 4. Select a current invoice. 5. Click on + Other Item 6. Search an item or select from the list. 7. Click on Add new item… 8. Input “Discount” for the Item Type. 9. Input…

    33. Configure Invoice Defaults

    1. What are Invoice Defaults? Invoice Defaults lets you set the global invoicing schedule and triggers for customer statutes and automation in Visp. How to Access Invoice Defaults? 2. Click the nine-dot menu in the upper right corner to open the VISP Admin Page. 3….

    34. Process Payments to Visp

    This feature or section lets Application Users pay their Visp bill and save their cards or bank accounts for one-time or recurring payments. You can also view your items and balance due in the account information. 1. Click the nine-dot menu in the upper right corner…

    35. Configure Primary, Billing, and Contact Us Information

    There are three essential areas in Visp.net that must be initially configured: the primary contact, billing contact, and the Contact Us information in your CRM’s brandable portal settings. Primary Contact Contains the email address used when sending customer…

    36. Credit Memo

    Use Cases for Credit Memo: If you made an invoice error like overcharging or listing incorrect quantities, issue a credit memo to fix the mistake, keep accurate records, and avoid customer issues. Some customers prefer account credits over refunds. Apply a credit memo…

    37. Grace Periods and Grace Amount Settings

    This covers the activation of the Grace Period and Grace Amount. It also covers the sequence that triggers an account’s grace periods and grace amounts. Activate and Set the Global Grace Period and Grace Amount Settings. Grace Periods are fixed periods where you can…

    38. Account History and Payments

    The account history shows your financial transactions, such as invoices and payments to Visp. Additionally, the invoices in the Account History show your subscribers’ growth or decline over time. This guide covers making payments and setting up auto-payments to Visp….

    39. Recurring Discount

    To enable the automatic addition of a line item on future invoices, simply create a CUSTOM type and activate the “Recurring” option. How to Create an Invoice and Add a Custom Line Item 1. Click and open the Subscribers’ table. 2. Search for the subscriber or select…

    40. Forms

    Building Brand Recognition and Improved Customer Experience Adding logos can help create a professional look. Custom design makes invoices unique and memorable, increasing brand recall and recognition. Including marketing messages or promotions for other products and…

    41. Refunds

    To process a refund, you must wait at least 24 hours after the payment was made or ensure the payment has settled. If you need to refund immediately after a transaction, simply log into your merchant portal and choose to void the transaction there. Voiding the payment…

    42. Taxes and Fees

    The Taxes and Fees feature lets you apply taxes to invoices- items, and packages. Here, you can set up tax rates, a critical step in the billing process. Configure Tax Labels 1. Click the nine-dot menu in the upper right corner to open the Visp Admin Page. 2. Click on…

    43. Setup Multiple Payment Gateways for Different Billing Methods

    Customers may choose from various payment methods including credit cards, cash, or checks. To accommodate this, enabling several payment gateways in your system might be necessary. Ideally, your primary gateway should handle both credit card and eCheck transactions….

    44. Bill All to Another

    The “bill all to another” feature streamlines the billing process by allowing all invoices and item charges to be transferred from one account to another, such as from a child to a parent account. 1. Click and open the Subscribers list. 2. Search for the subscriber or…
    ?