The auto-responder feature allows you to create and present a user-friendly self-service menu for your customers who communicate via text or SMS. This feature allows your customers to get more information, list tickets, do essential account management, and access other services without the need to list or remember complicated commands or keywords.
To start using the feature
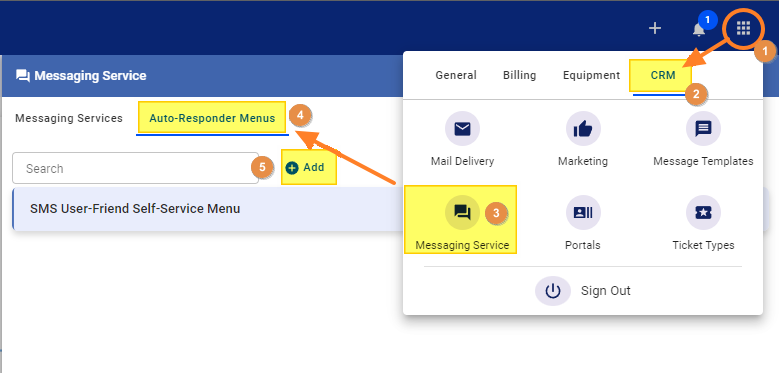
- Go to the
Main Menu. - Click on the
CRMtab, and then go to theMessaging Servicetab - Click on the
Auto-responder Menustab - To create a new user-friendly, self-service menu, click on the Add link
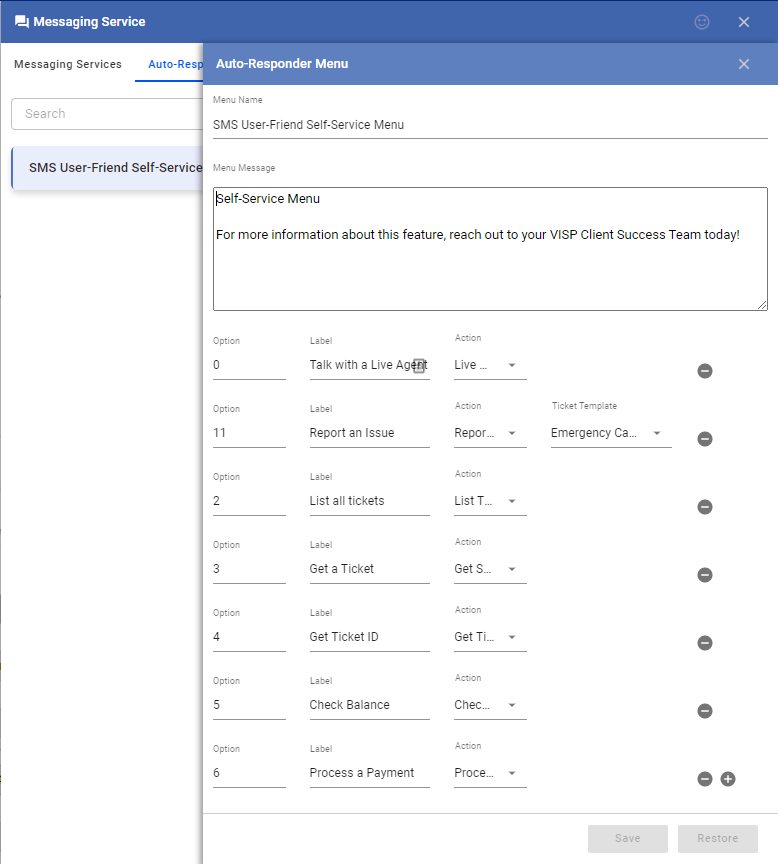
Setting Up the Auto-Responder Menu

-
- Add a name to the menu.
- You can use your Menu Message box to provide important information about your service.
- Below, you will find three different columns:
- The first one is for the Option or shortcode to use. This can be a single-digit or double-digit number.
- The Label field allows you to add a user-friendly description for the action.
- Lastly, the Action dropdown allows you to pick the intended result or process you want the command to perform.
- To add more actions, click on the plus sign
+on the right. To remove actions, click on the minus-sign. - Click on Save when you’re done.
Now, when customers send messages to your Twilio number the first thing they’re going to see is the self-service menu.
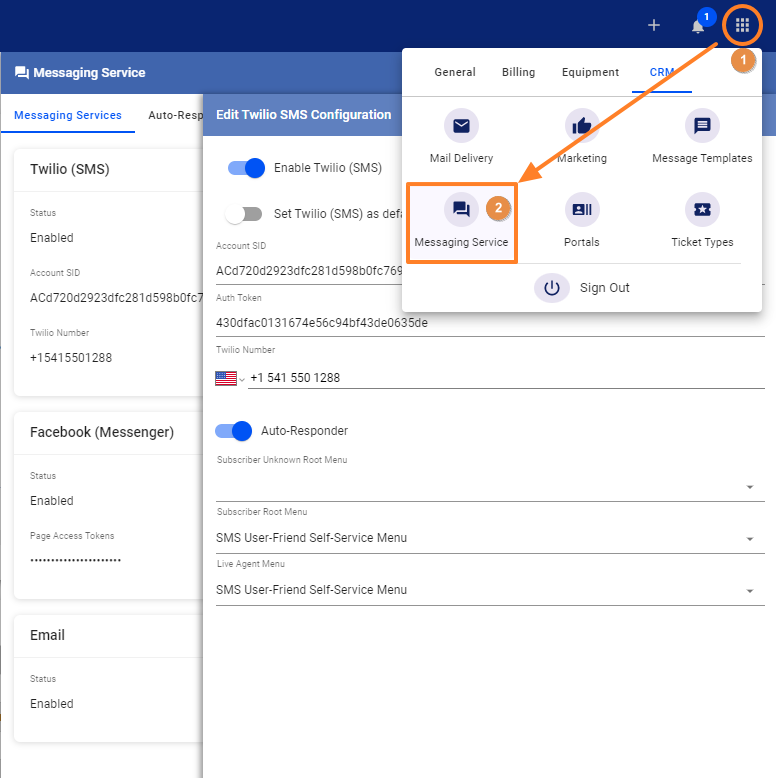
Enable the Auto-Responder Feature

To enable the auto-responder feature in VISP
- Click on the menu and go to the
CRMtab - Select the
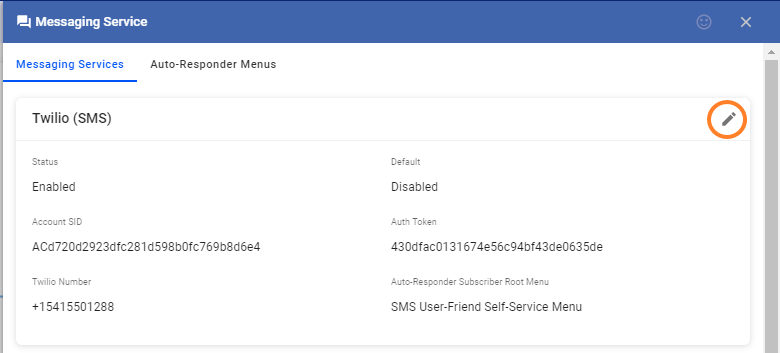
Messaging Service - In the Twilio card, select the pencil icon to edit the settings
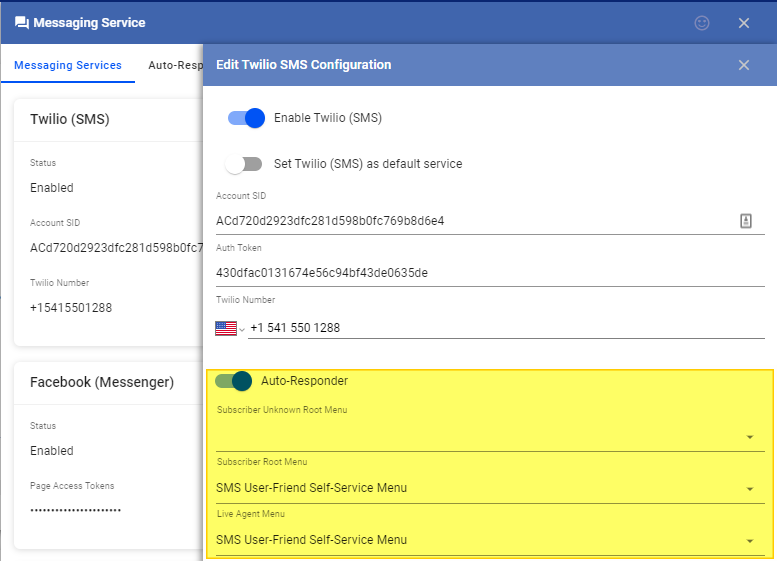
- Enable the
Auto-Responderhere


Auto-Responder Menus
You’ll find three dropdown fields where you can select the self-help menu to display. The first one here can be used for customer identification and can contain actions to help customers quickly identify or manage their accounts.
The subscriber root menu can be used for customer support and contain actions like opening a specific ticket or listing all available tickets for an account.
Lastly, for reaching out to a live agent you can create a specific self-help menu and select it from this dropdown field. This can contain actions related to interactions with customers.
For more information about these features in VISP, reach out to your VISP Client Success team today.