

To add and configure the basic settings for a package in VISP:
-
-
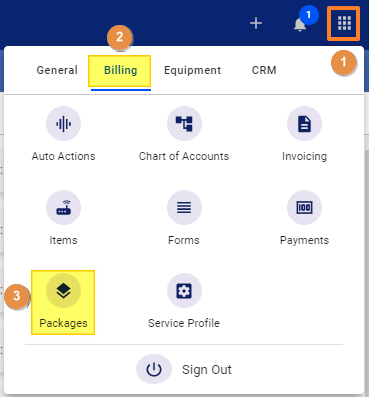
- Go to the
Menu. - Select the
BillingCategory - Click on Packages
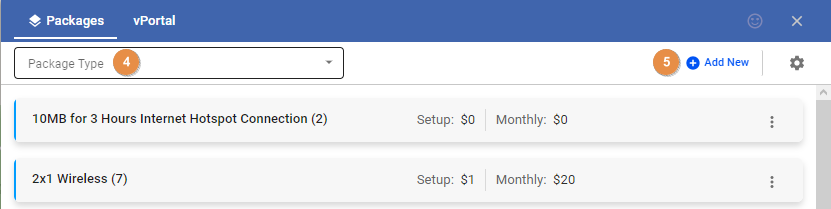
- The dropdown you see here allows you to sort the packages into Residential or Business
- To the right, click on
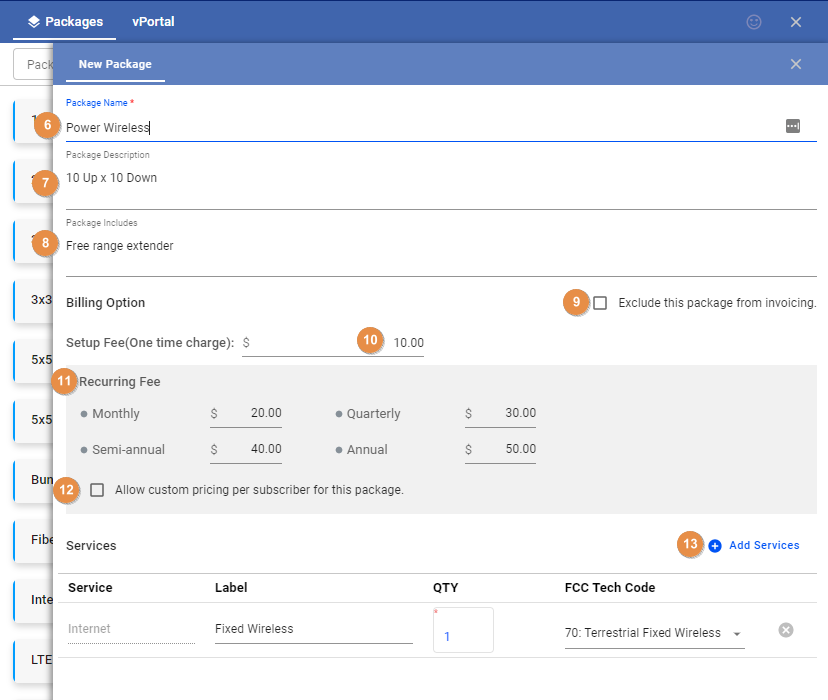
Add New. - Enter a Package Name.
- Add a description. In this field, you may enter the download and upload speeds for the package.
- In the Package Includes field, type the information or additional hardware and accessories that go along with your package or service.
- You may toggle “exclude this package from invoicing” if this package applies to trade or free accounts or is used for testing purposes only. Otherwise, leave the box unchecked.
- Next, add the
Setup/Installation feesfor the package - Add the recurring term fees based on the customer’s available term or billing cycle.
- Toggle Allow custom pricing per subscriber if you want to set a different rate for specific customers.
- In the section here, click on Add Services. Now, select the services you offer with this package.
- For Fixed Wireless, select Internet. Your changes are saved automatically.
- Close the Window when you’re done.
- Now,
saveyour work.
- Go to the
-
Additional tabs are now available, for you to fully customize the package.
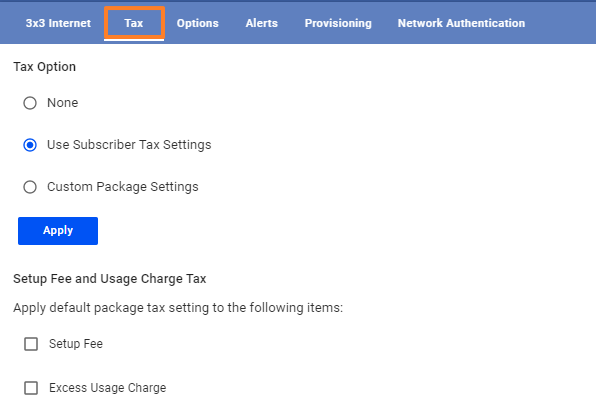
Taxes Tab
-
-
- In the
Taxtab, you can choose whether taxes are omitted or not applied on the package, if you want rates based on the subscriber’s default tax setting, or if you want a custom percentage or flat rate to be applied on the setup and recurring term. - Hit Apply to save any changes on the panel.
- Setup fees and usage taxes can be also be enabled here.
Saveyour work when done.
- In the
-
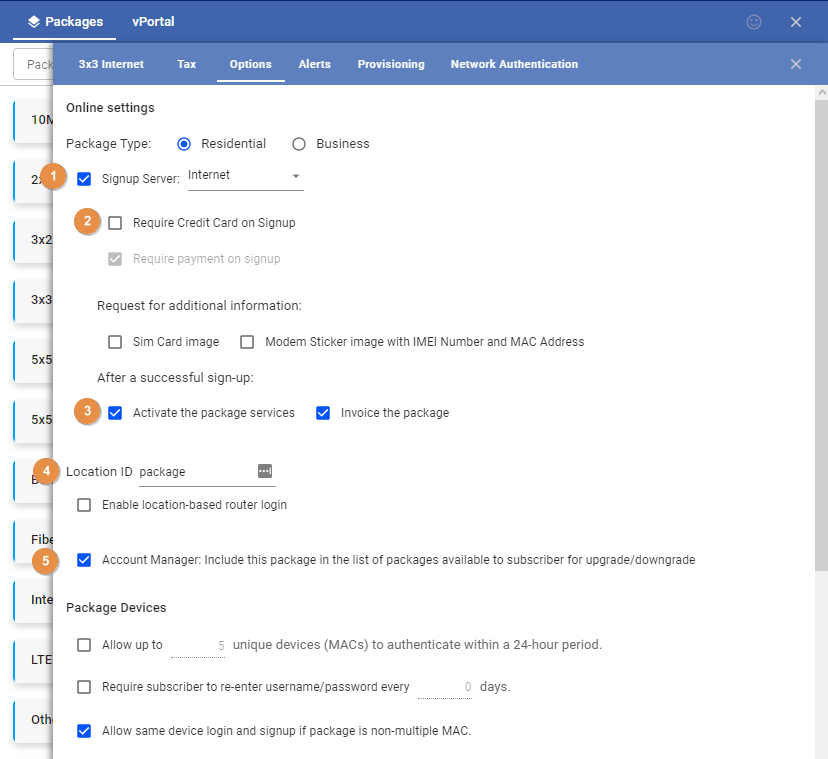
Options Tab
In the Options tab, you can set whether the Package is a Residential or a Business type.
-
-
- To display a package on your account portal and signup server, do the following:
- Enable this option. Set the dropdown selection to, “Internet”.
- If you want to capture your prospect or customer’s card information and / or payments, then toggle these options here.
- If you want to activate the package services and / or invoice the customer after signing-up, put a check on either or both of the boxes here.
- The Location ID field allows you to add a label or a name for a specific location of a tower or site, where the package is displayed. The field can also create a custom signup link for the package for your signup form.
- (Account Manager) Put a check on this field, if you want the package to be listed as an option for customers to upgrade or downgrade to in the Account Manager.
-
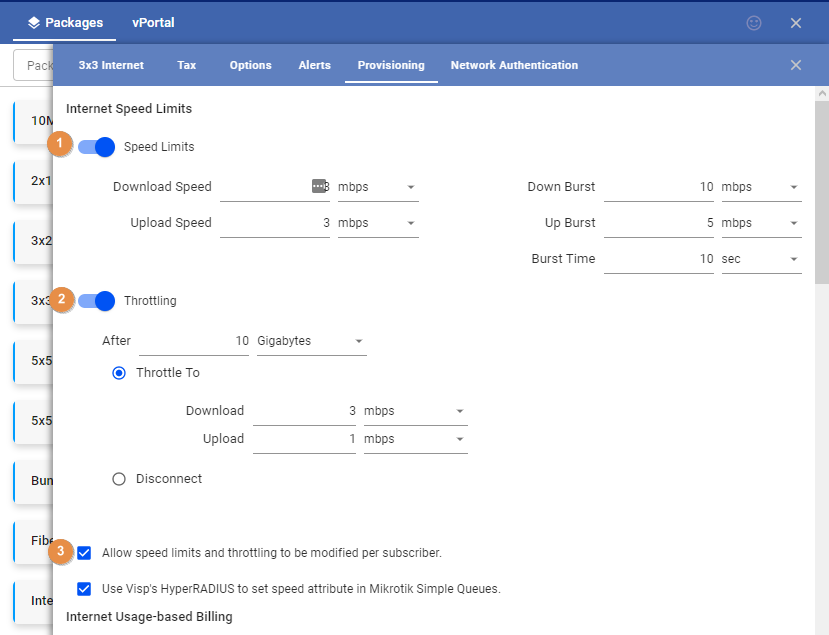
Provisioning Tab
-
-
- To configure your packages speeds and throttling:
- Enable Speed Limits and set the download, upload, down burst, up burst and burst time for the package.
If you want to throttle or disconnect customers when they hit a certain usage level, enable this optio. Set the download and upload speeds to throttle the customer or disconnect to terminate the connection. - Enable the option to set the speed limits and throttling to be modified per subscriber, if you want to customize these settings, instead of applying a global speed or usage settings.
Saveyour work when done.
-
A separate video or article is available to fully discuss the Package Hibernation, Package Alerts, and Network Authentication features.
For more information about this, and all other features in VISP, reach out to your VISP Client Success Team today.