Assigning Equipment
1. Using the Equipment Manager
-
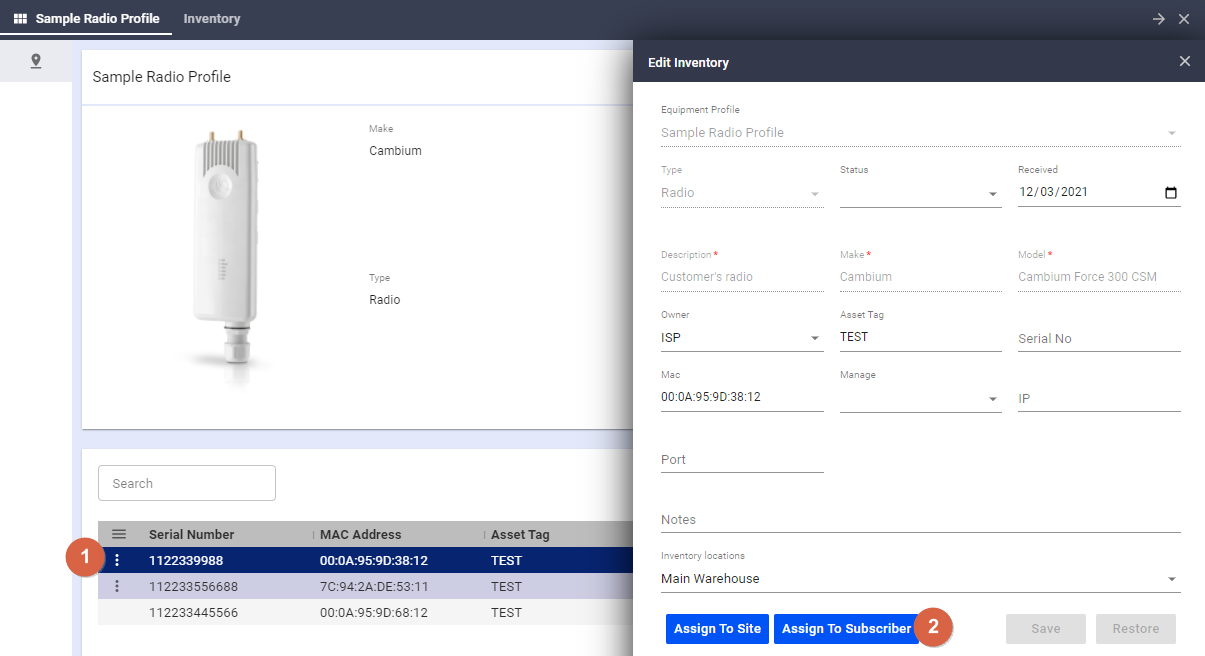
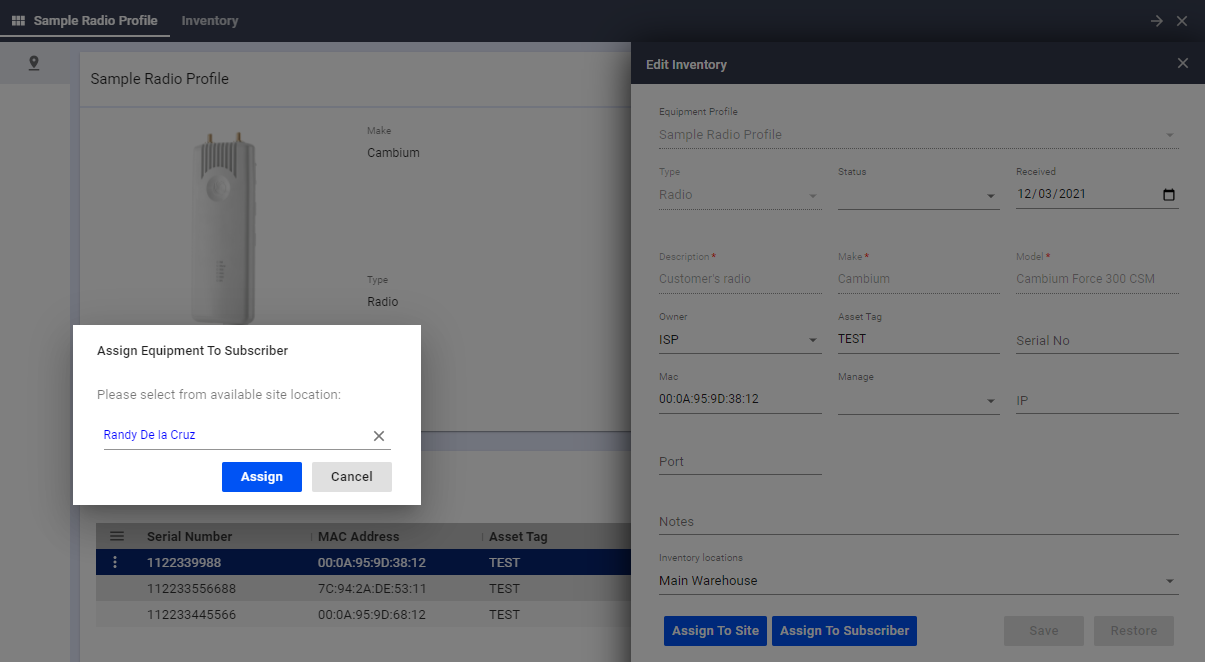
- Open the Equipment Manager and go to the Inventory tab. Select the equipment profile you’d like to assign.
- On the equipment profile, search and select the equipment, then click on the “Assign to Subscriber” button.

- Once the “Assign to Subscriber” button is clicked, a pop-up window will appear, which allows you to search and select the preferred subscriber. Select the subscriber and click the “Assign” button.

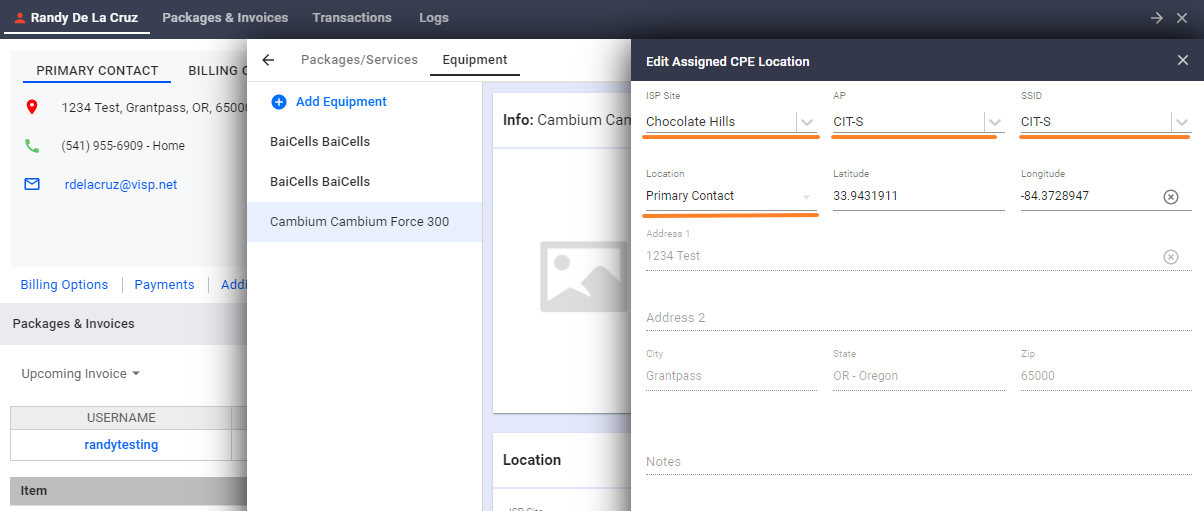
- In the subscriber’s Equipment tab (presumably after you’re done adding the equipment), you can then edit the details associated with the newly assigned equipment. These include the following:

- ISP Site – Select the ISP Site where the equipment is installed.
- AP – Associate the device with a particular Access Point.
- SSID – Select the SSID to which the subscriber is connected.
- Location – If you want to change the location of the equipment, choose from the Location dropdown menu. You can choose between the subscriber’s Primary and Billing addresses, or you can choose New Address if you want to specify the location yourself.
2. Using the Subscriber tab
In this method, first, go to your subscriber’s list and click on a subscriber’s account. Then, do the following:
- Click on the plus sign in the Equipment Section.
- Select the equipment you want to add.
- You’re presented with two options. In both, you have the option to set a recurring charge for the equipment.
- Add and Configure
- This means that you will configure the equipment first, before charging for it.
- After clicking on Add and Configure, you will be brought to the equipment section for the subscriber’s account. Here you can edit certain information and fields related to the equipment.
- After you’re done, click on the vertical ellipsis in the Info section and choose Invoice Now.
- This adds an equipment item charge to any new or open invoice.
- You may toggle the recurring box if the equipment is going to be charged on a recurring basis.
- Here you must also set the quantity, tax, and rate for the equipment.
- When you’re done, click on Save and Configure.
- Add to Invoice
- This means that you will add a charge to the invoice before you configure the item.
- After selecting the item and choosing to Add to Invoice first, when clicking on the Save button, you will be brought back to the invoicing section.
- You may toggle the recurring box if the equipment is going to be charged at a recurring rate.
- Here you must also set the quantity, tax and rate for the equipment.
- When you’re done, click on Save and Configure.
- Add and Configure
- Edit the details in the Equipment (as described in the previous method).
- Don’t forget to click Save when you’re done.
Unassign Equipment
To unassign equipment, please follow these steps:
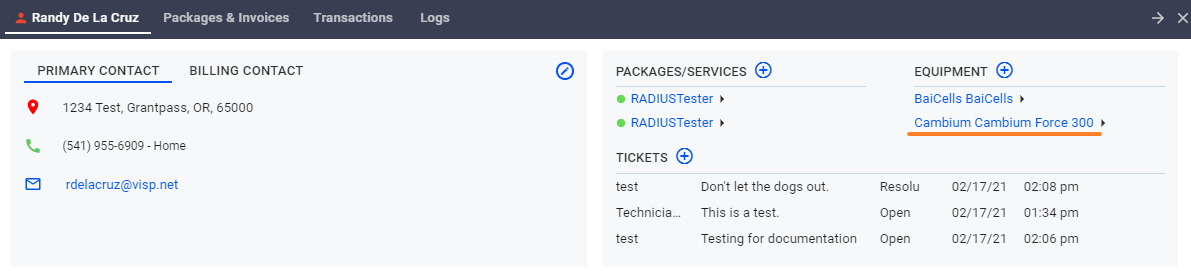
- Click on a subscriber’s account.
- Select the equipment you want to remove.

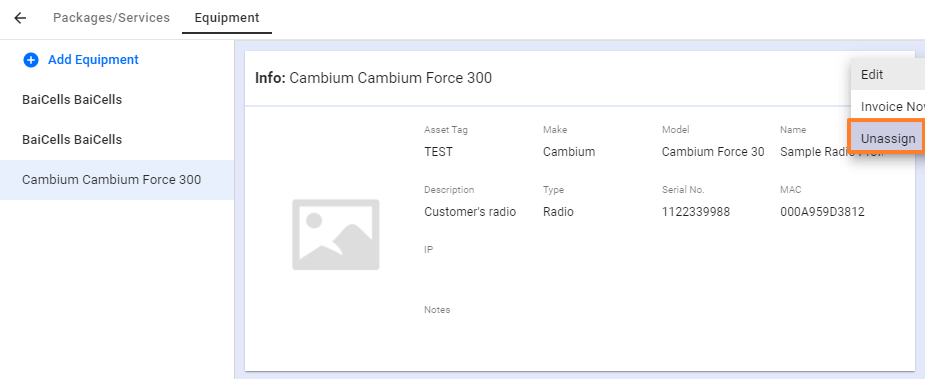
- Once the equipment is selected, click on the edit option then click Unassign.

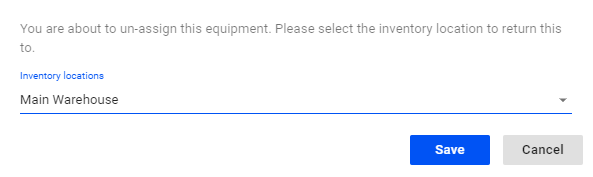
- Please select the inventory location it will be returned to in the equipment inventory list.