

The feature simplifies order creation, invoice tracking, and vendor management.
Key Features and Workflow:
- Purchase Order Creation : Users can create purchase orders within the software. This typically involves entering details like vendor information, items to be purchased, quantities, prices, and order status.
- Visp generates a unique purchase order number for each order.
- Vendor Management: Create a database of suppliers with details such as contact information, inventory listing, and order status.
- Purchase Order Dispatch : POs can be sent via email to suppliers. This can be done manually from the software (via email) or automatically through integration (with ISP Supplies).
- Receiving and Matching : When goods or services are received, fields are available where users can record details. The actual receipt is matched against the PO and the supplier’s invoice.
- Users can monitor the progress of each order. Users can search and filter purchase orders based on various criteria (e.g., vendor, date range).
- Integration with Inventory : For ISPs that manage stock, PO management is often linked with the Infrastructure Resource Management or the IRM feature in Visp to update or monitor stock levels automatically.
1. Purchase Order Management Feature
(This is an intro image for the website documentation)

Access the Purchase Order Feature
2. Click on IRM
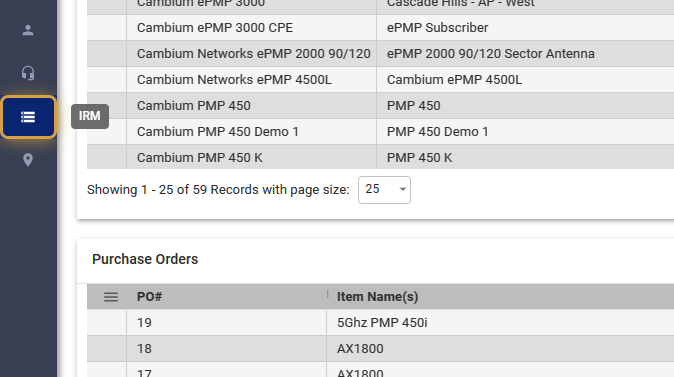
3. Select Purchase Orders
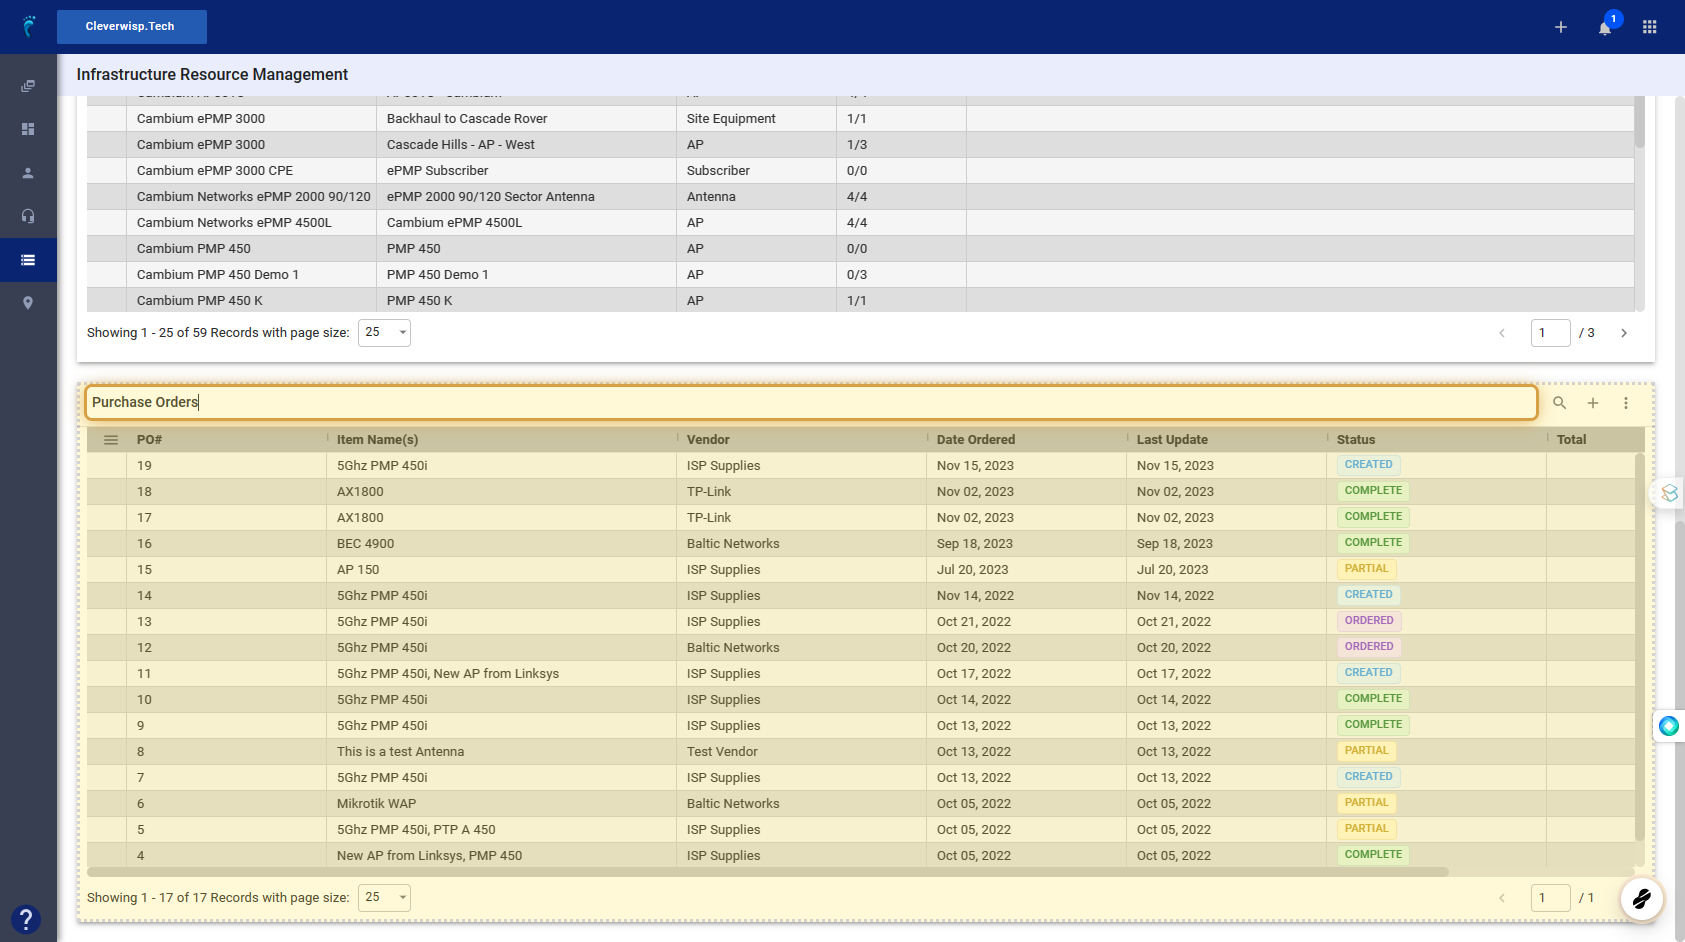
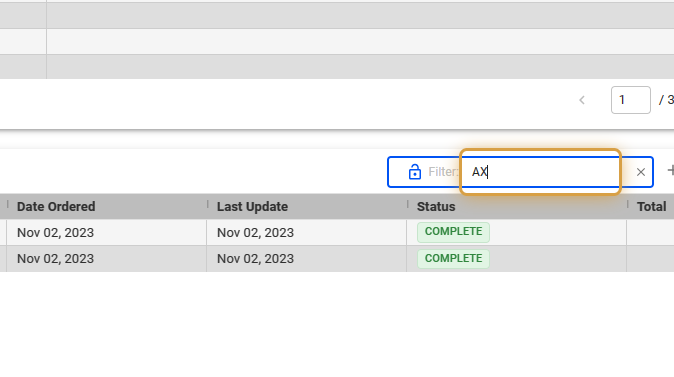
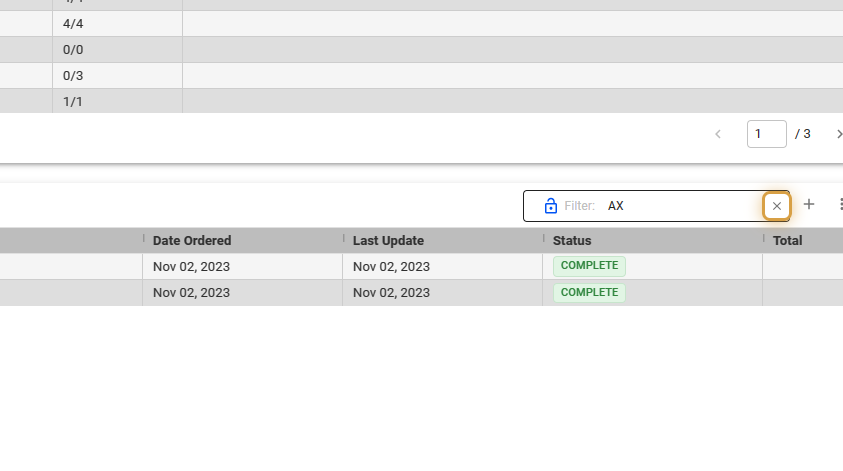
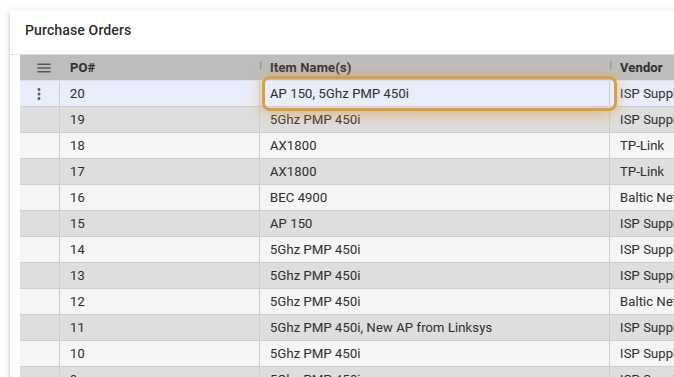
4. Click on the Search icon to find a specific entry or PO from the list.

5. Enter the item’s search term.
6. Click on the X icon to close the search.
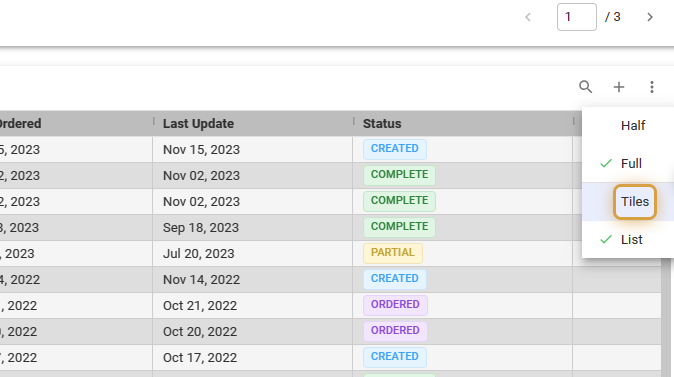
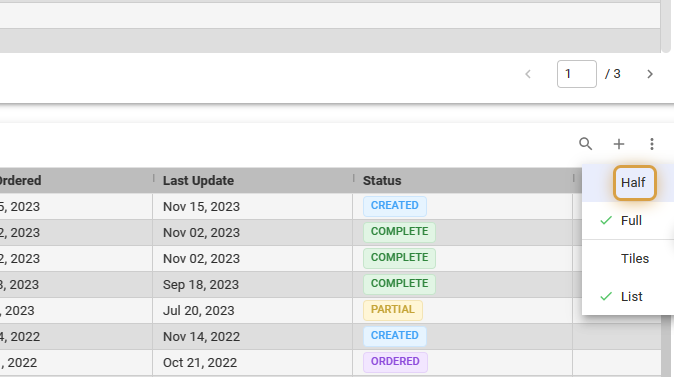
Change the Current Layout
7. Click on the three dots in the upper-right corner of the section.
This opens additional options for the section.
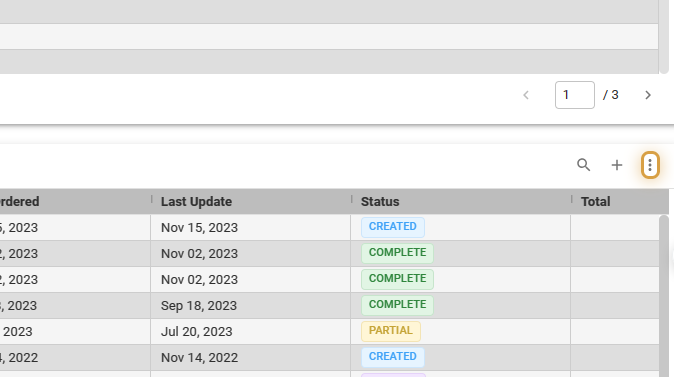
8. Switch between Tiles and List view.
9. Use the selection to switch between Half and Full view.
💡 Requisite Before Adding a New Purchase Order
Before creating or adding new purchase orders in Visp, remember that for an equipment’s inventory profile, you must either create a new vendor profile or assign or attach an existing one under the vendor tab. This step is essential before you generate purchase orders in Visp.
Assign Vendor to Inventory Profile
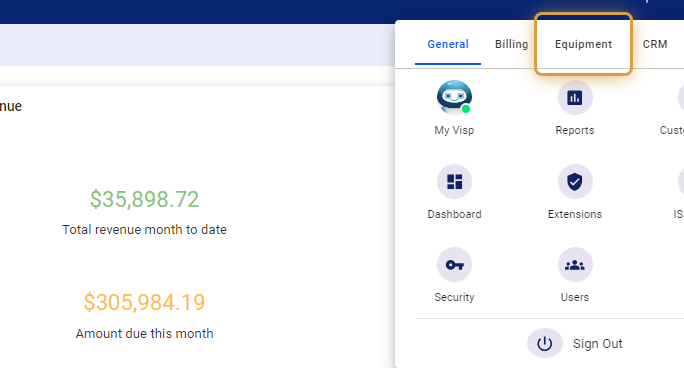
10. Click the nine-dot menu in the upper right corner to open the Visp Admin Page.
11. Click on Equipment
12. Select Inventory Profile
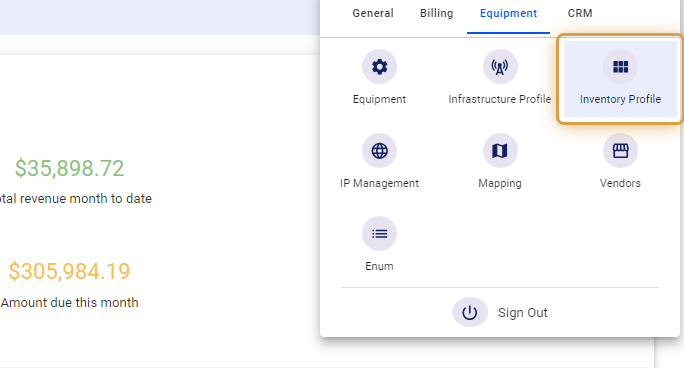
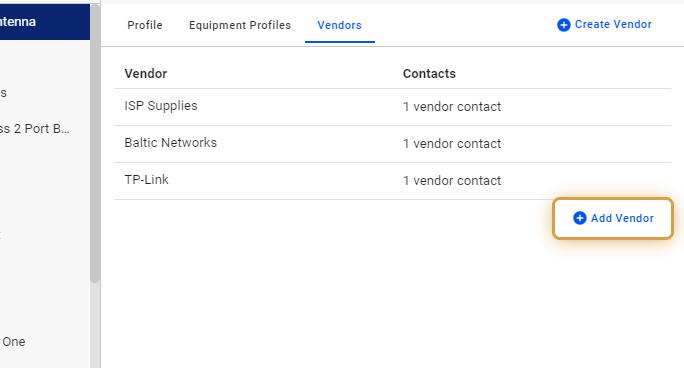
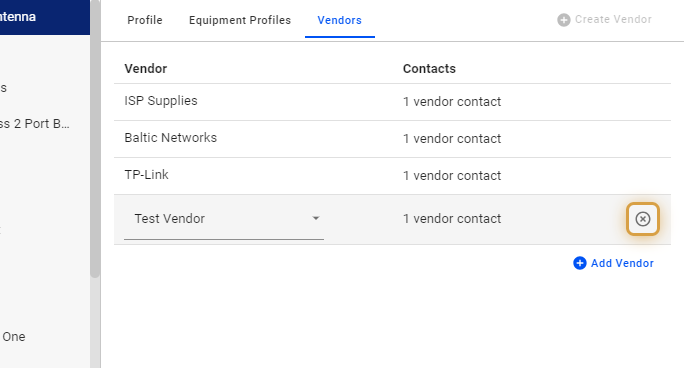
13. Click on Vendors
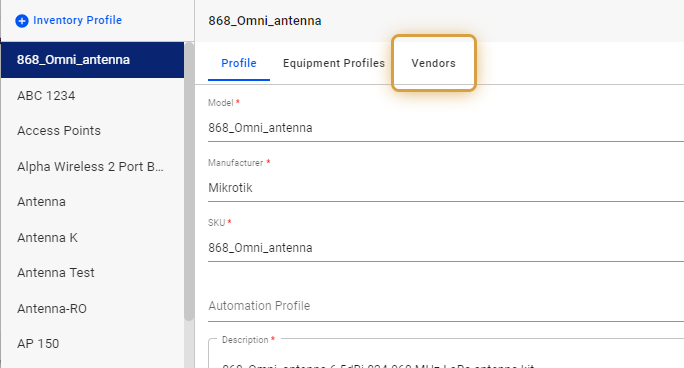
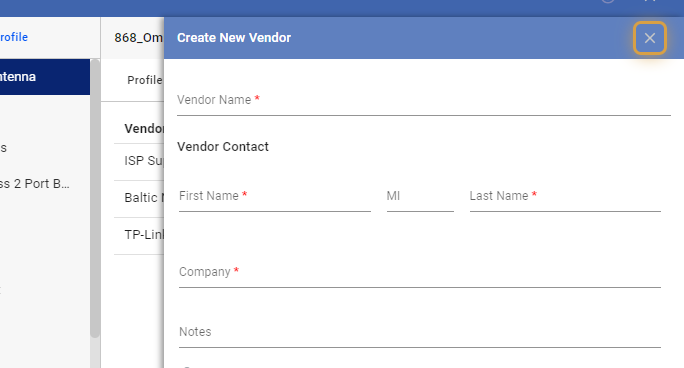
14. Click on Create Vendor
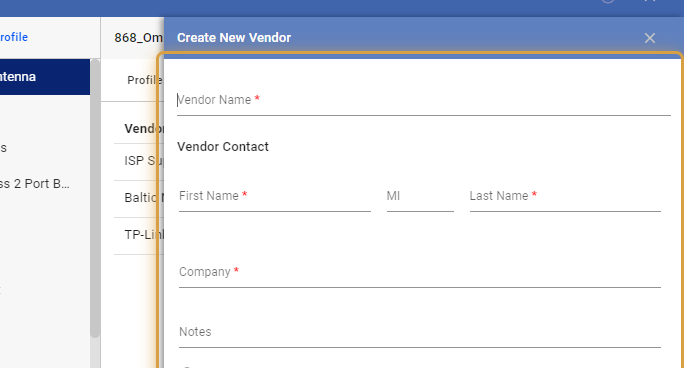
Create a new vendor to add to the Inventory record.

15. Fill out the details for the new vendor.
16. Click on the X icon to close the panel.
17. Click on Add Vendor
Enables you to link an existing vendor to your Inventory Profile.
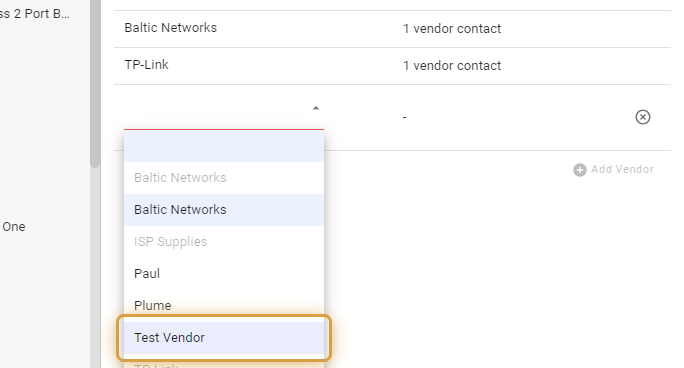
18. Use the dropdown to select the vendor from the list.
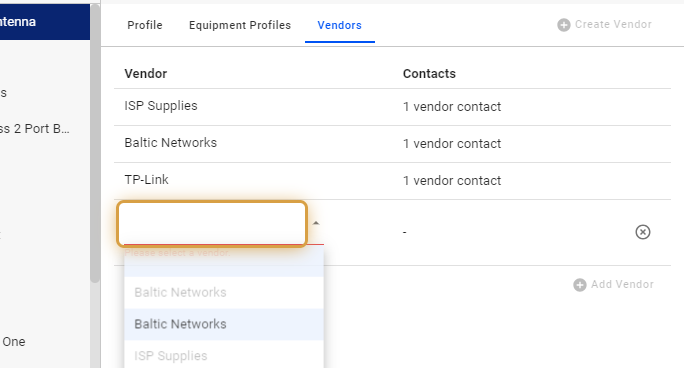
19. Select a vendor.
20. Click on the gray X icon to remove an item.
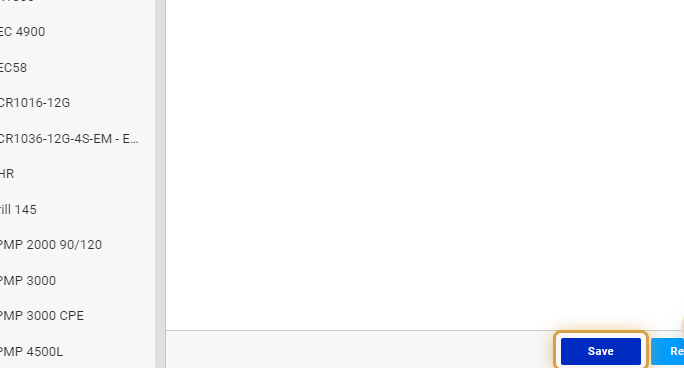
21. Save your work when done.
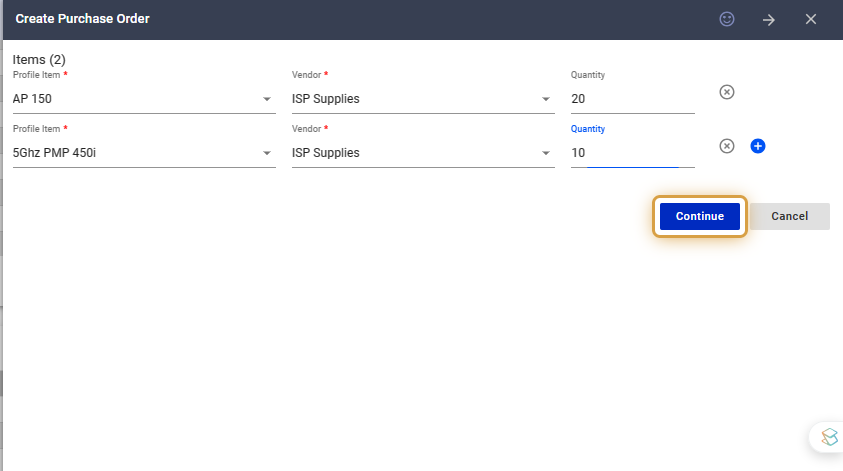
Add a New Purchase Order
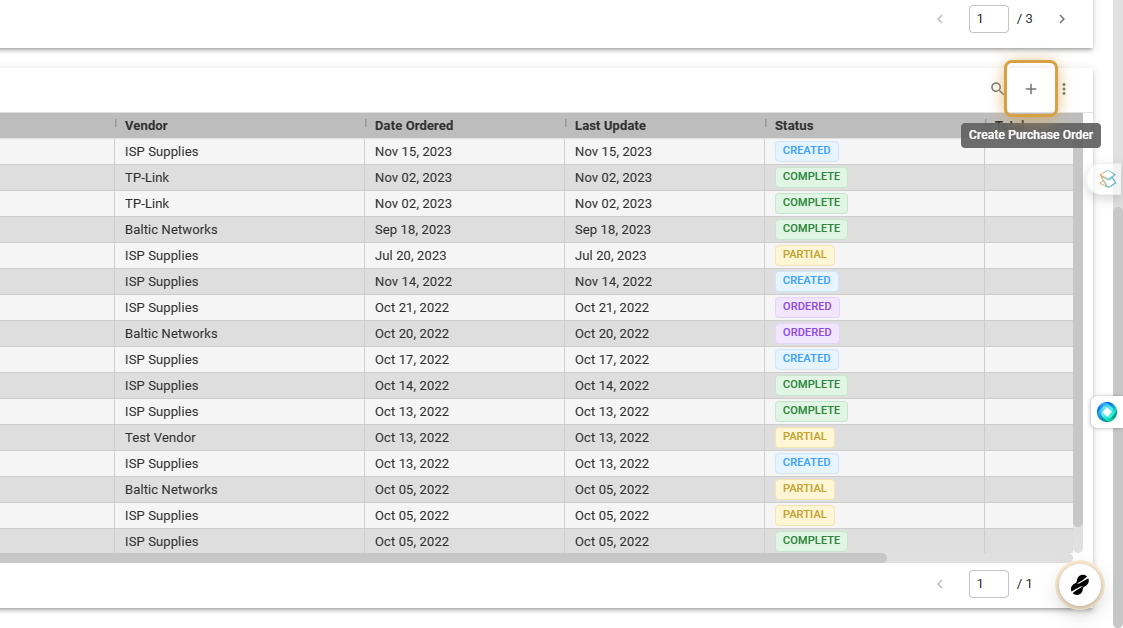
22. Click on the gray plus icon to Create a Purchase Order.
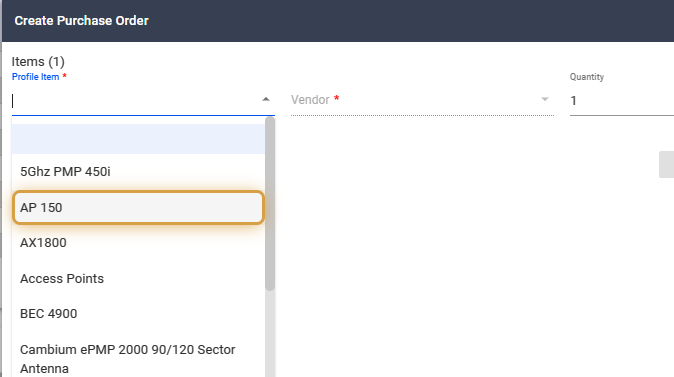
23. Click on the Profile Item field.
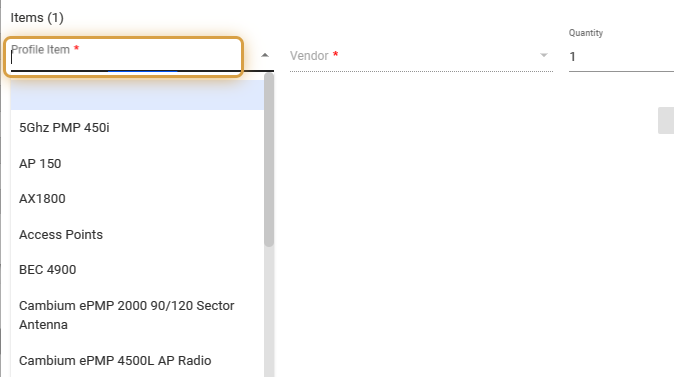
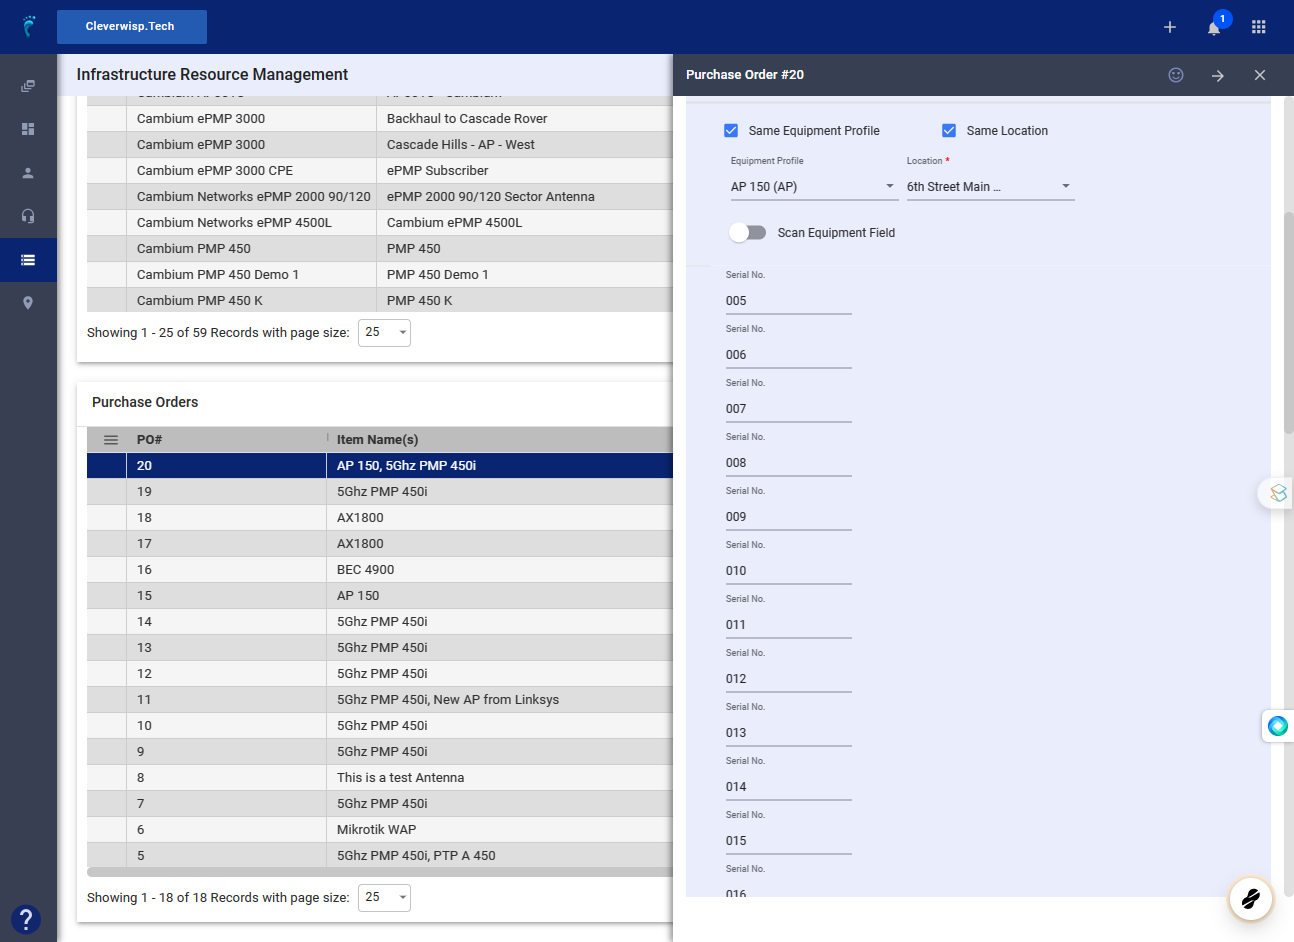
24. Use the dropdown and select an item.
If the item isn’t on the list, the Vendor details are missing from its profile.\
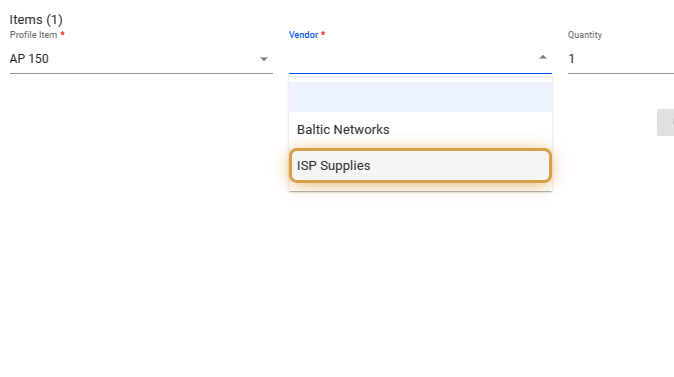
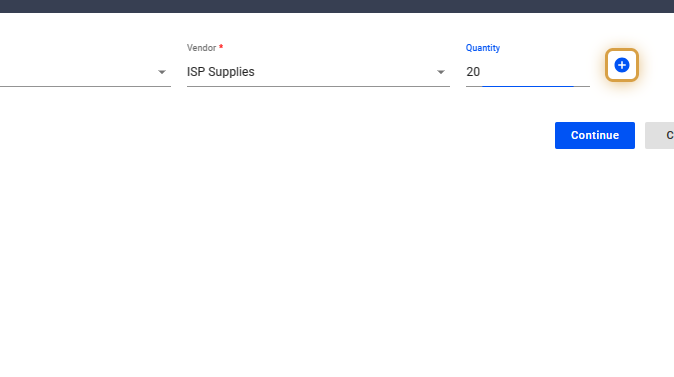
25. Click on the Vendor field.
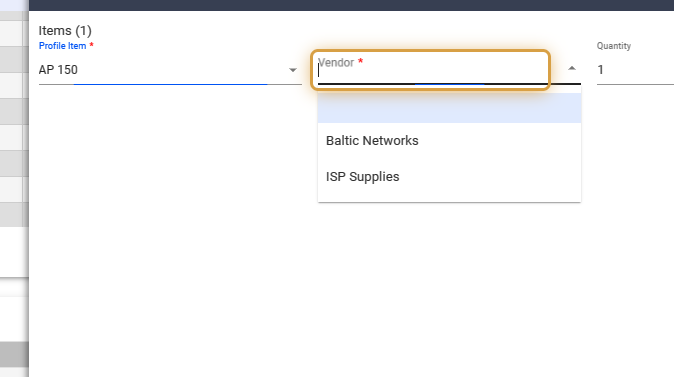
26. Use the dropdown to select the Vendor.
27. Click on the Quantity field and input a number.
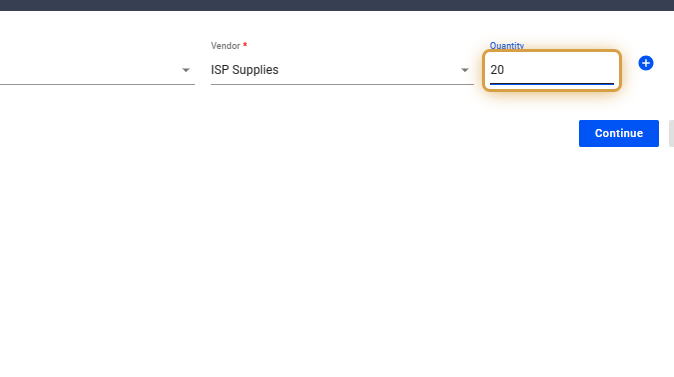
28. Click on the blue plus icon, to add more items.
29. Click on Continue to create the Purchase Order.
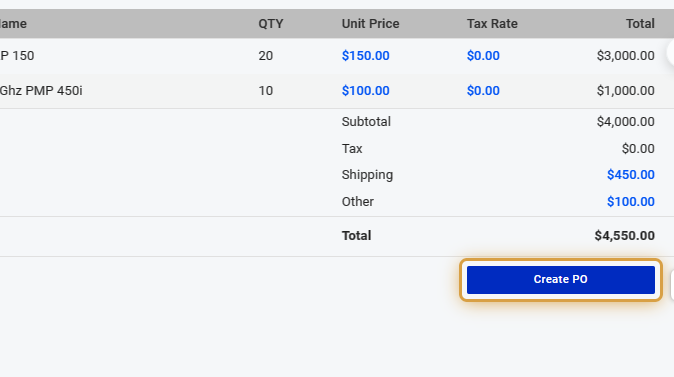
Configure Items on the Purchase Order
30. Review the Vendor and Business Information
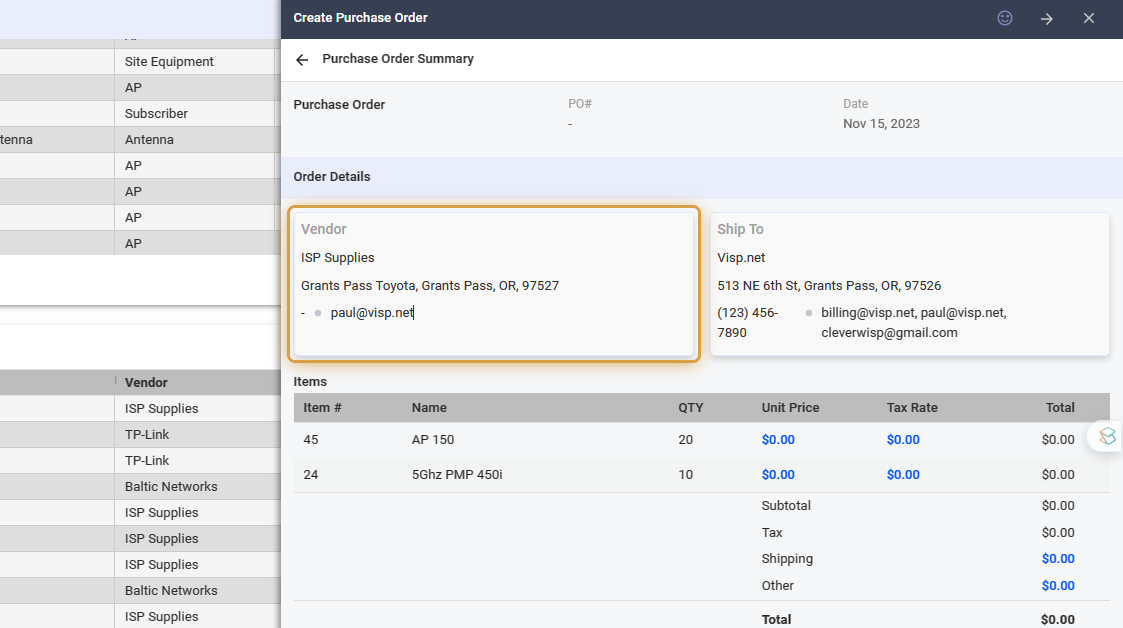
31. Set the Unit Price, Tax Rate, Shipping Fees, and Other (Misc.) Fees related to the order.

32. Click on Create PO when you’re done.
33. Acknowledge the message, and click on the X icon to close the panel.

Manually Update Purchase Order Status
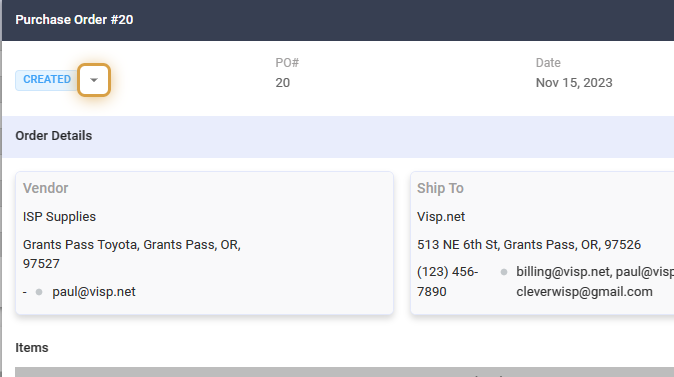
34. Click on the Purchase Order entry.
35. Use the dropdown in the Status, to select the status of the order.
36. Acknowledge the pop-up message when changing the status.
Click on Yes, to save the changes.
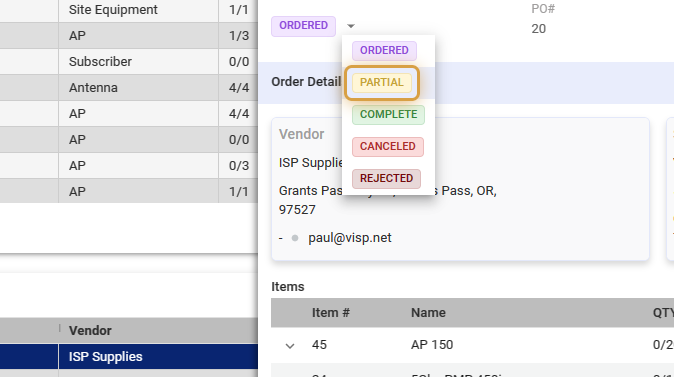
37. Click on PARTIAL

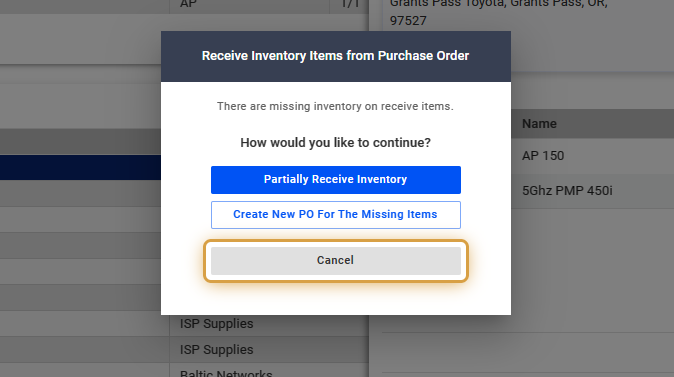
38. If the order is incomplete, missing Items can be added to a new PO.
A partial receipt of the current order can also be done.
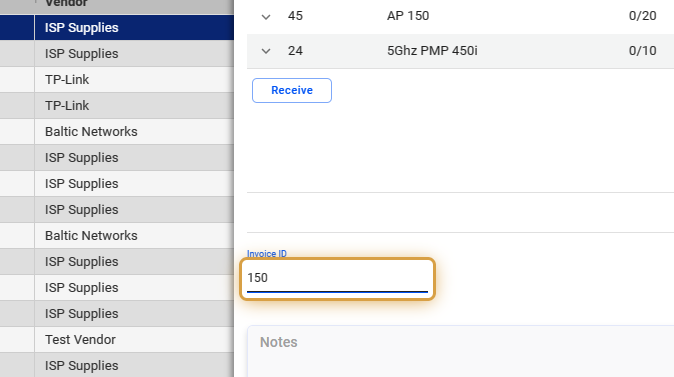
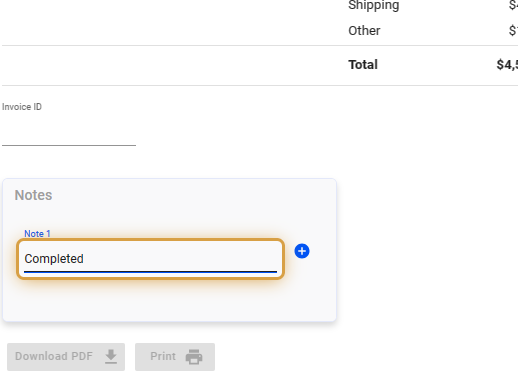
39. Record the Invoice ID from the vendor, for your orders.
40. Click on COMPLETE if the Order is completed.

Transfer Equipment to Inventory
41. Use the dropdown beside the Item count to expand the item list.
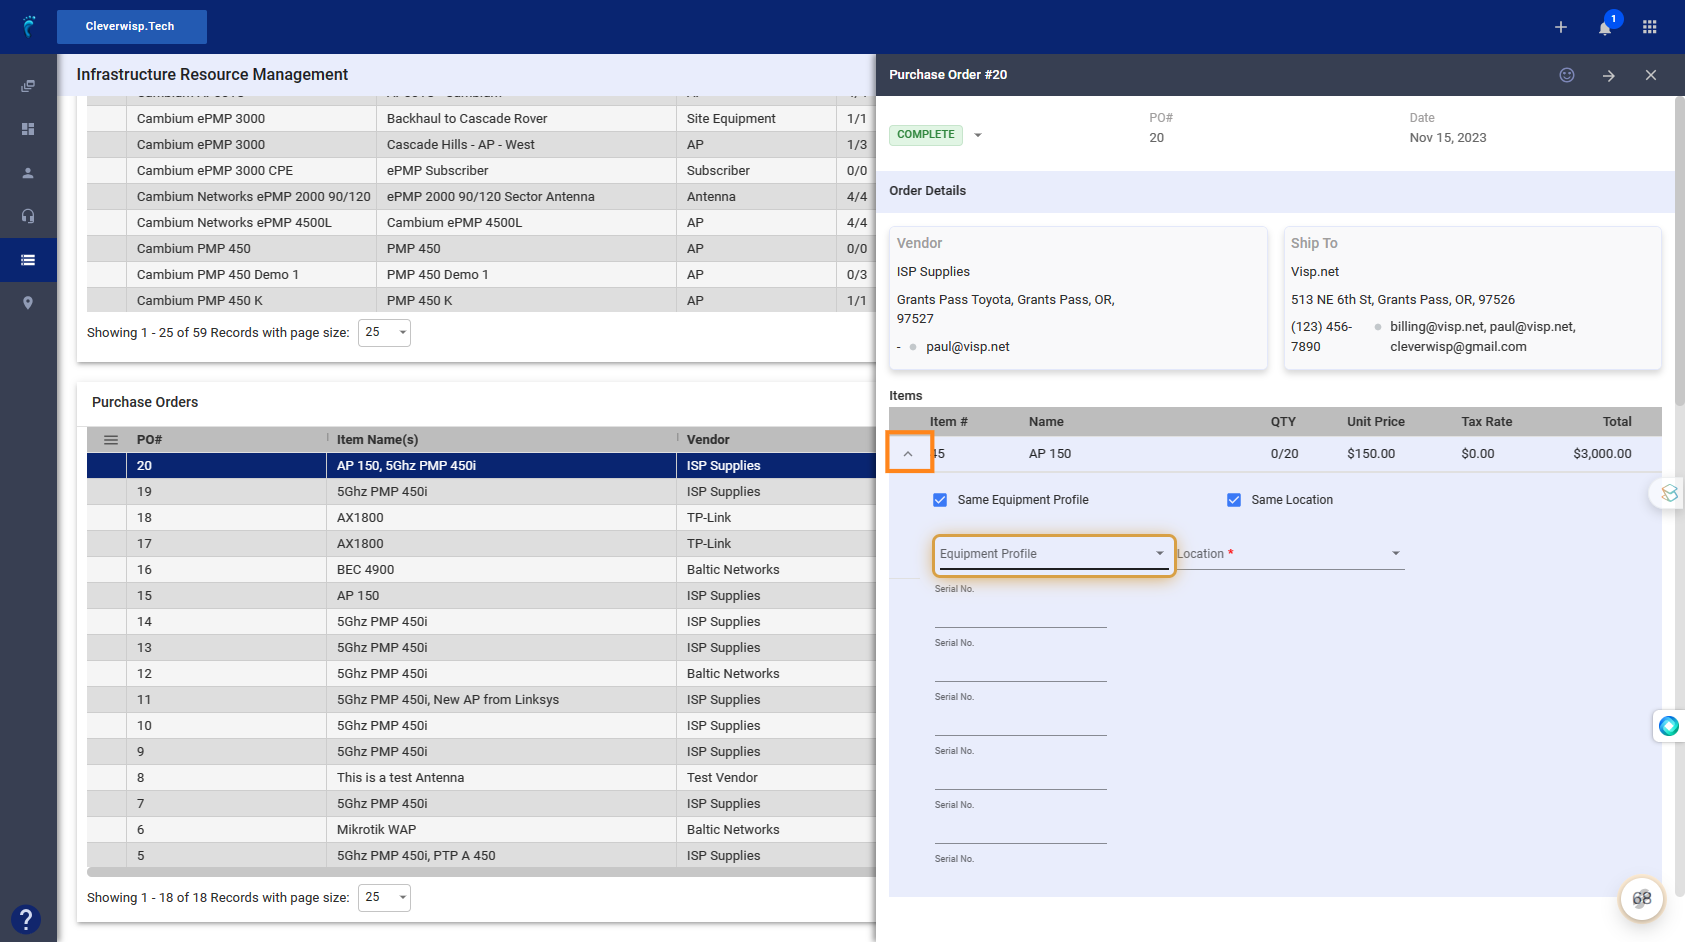
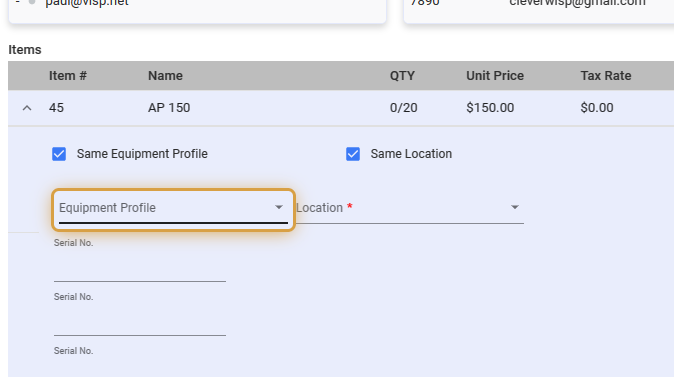
42. Toggle the Same Equipment Profile and Same Location options to use the same profile information for all the newly ordered items.
The “Same Location” option lets you assign a new order to the same stock location. If not selected, items can be assigned to multiple locations.
43. Input the serial numbers.
This is required.
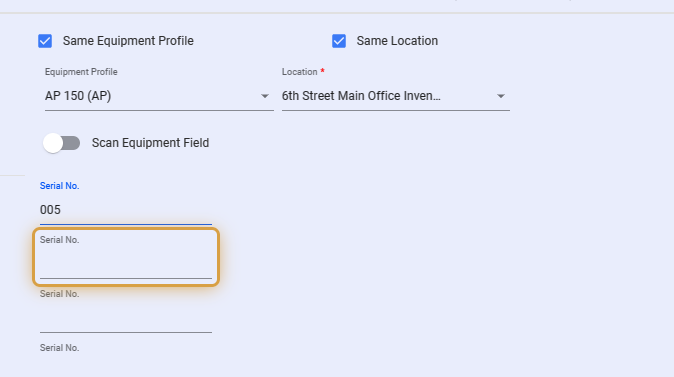
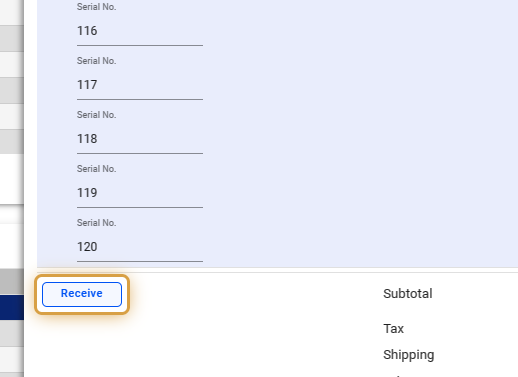
44. Fill out all the serial number fields.
45. Click on Receive when you’re done.
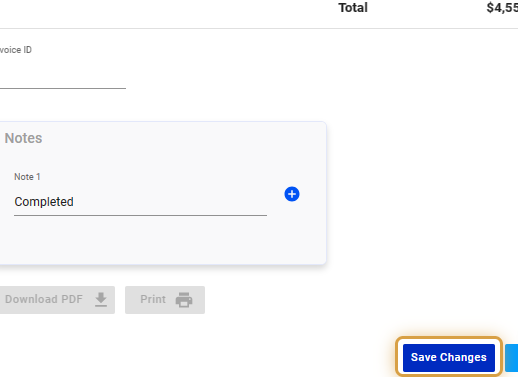
46. Use the Notes field to leave a log about the order.
47. Click on Download PDF to get a PDF copy of your purchase order.
Select Print if you want a paper copy of your purchase order.
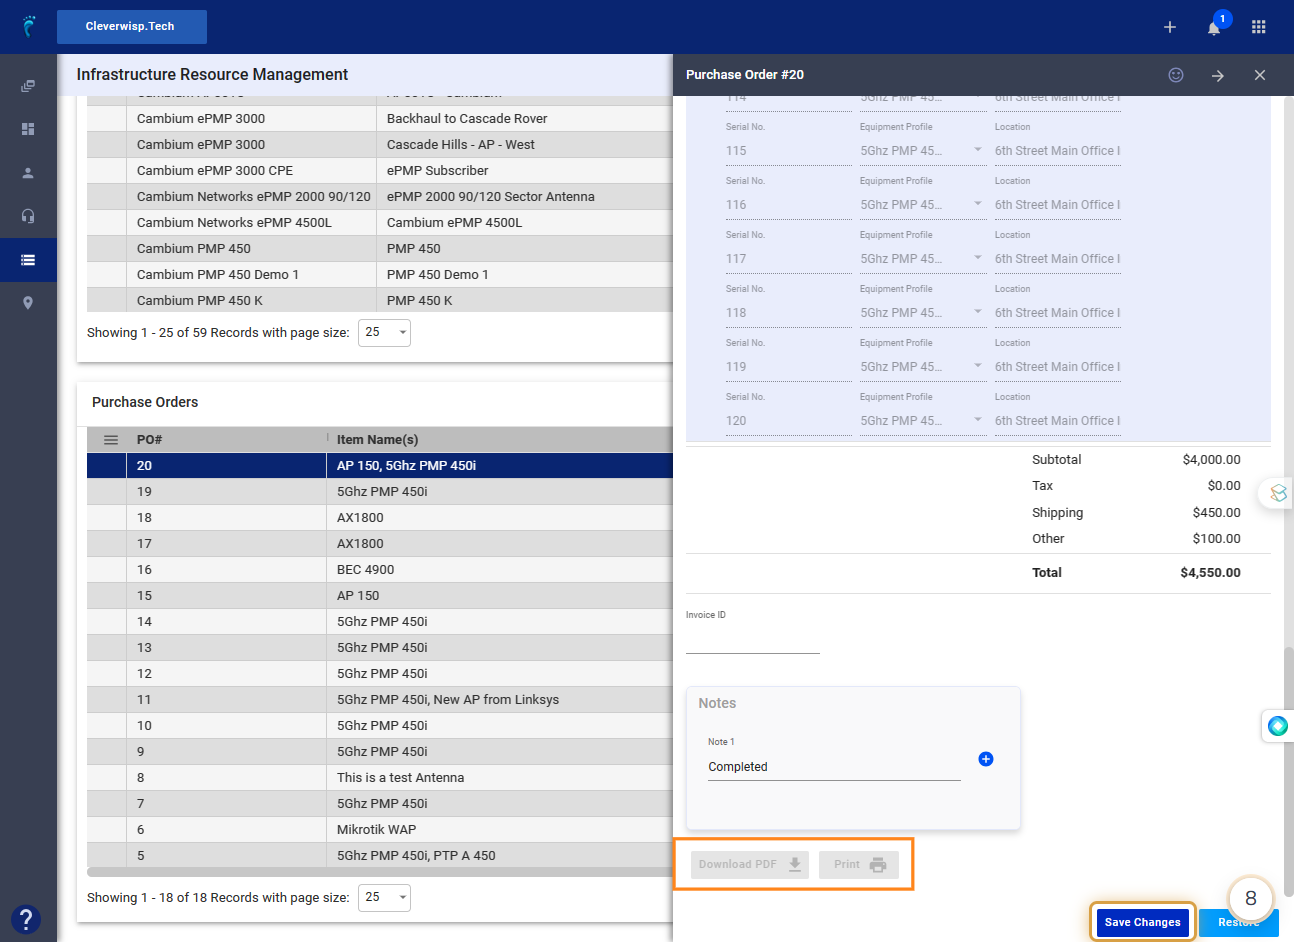
48. Click on Save Changes when done.
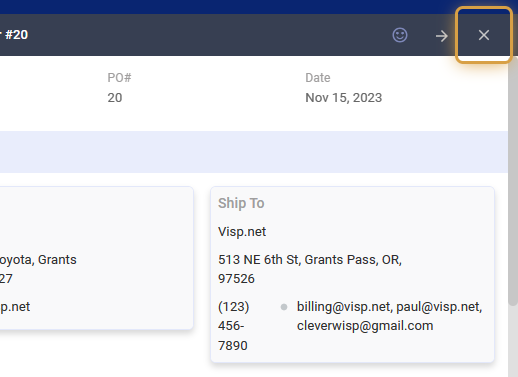
49. Click on the X icon to close the panel.
Roadmap
50. Feature Requests
- User/Admin Acknowledges and Approves Issued PO : An Admin User acknowledges and approves the issued PO.
- Supplier Acknowledges and Approves the PO : The vendor acknowledges and approves the issued PO.
-
- View Item Pricing : The ISP can check device prices through the PO.
💡 For more information about this and all other features in Visp, reach out to your Visp Client Success Team today.
Phone: 541-955-6900Email: success@visp.net
Open a ticket via www.visp.net/ticket