

To enable the automatic payment of your invoices to Visp.net, go to Main Menu > General Tab > My VISP.

Scroll and expand Payments.
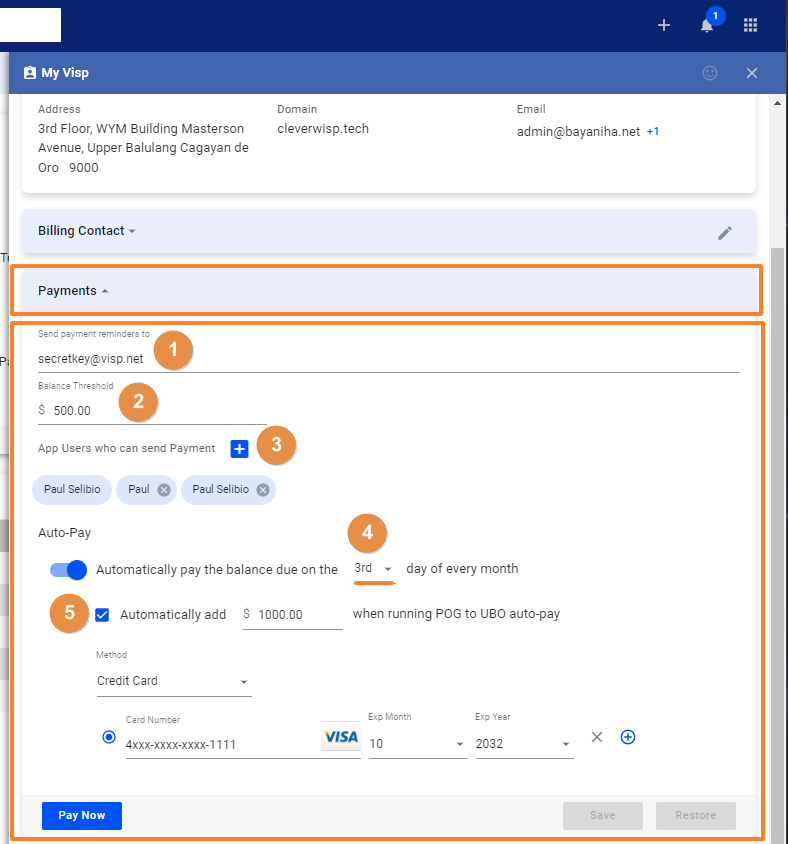
- Add the person’s email address who will receive your billing reminders or notifications from Visp.net.
- Add an amount to the Balance Threshold setting if you want to have a credit balance after your scheduled payment date. If there is an increase in the number of subscribers in your system, or you want to send subscriber invoices to the print house, the balance threshold ensures your account has enough funds and stays in good standing.
- You may assign specific Application Users the ability to process your payments in VISP. Click on the plus sign to update a user’s permission.
- Autopay allows you to schedule a specific day of the month for the system to process your payments to Visp.net.
- To use the print house to send paper copies of invoices to subscribers, you will want to be sure you have a credit equal to the number of invoices you plan to send. Adding funds to your account ensures enough credit to cover the printing of subscriber invoices through the outsource Print house partner. The system will generate the overage invoice if your printing charges go beyond your available credit balance.
Note that open print house invoices can impact your billing status and turn your account to Due or Past Due in the system. Be sure you have enough funds to prevent Late fees and blocked access to your billing system.
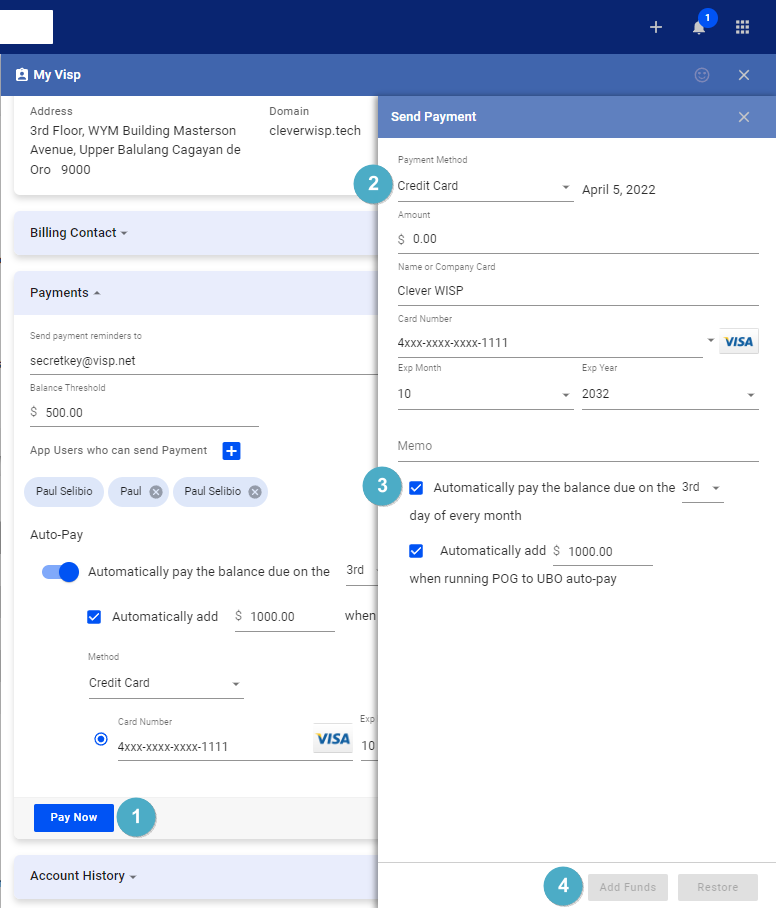
- You can use the Pay Now button to satisfy any open invoices using your card on file in VISP.
- You can add your credit card information to the system. In the Send Payment window, provide additional information about your credit card or e-check.
- Set the date when you want the autopay or automatic billing to happen, and remember to add a credit to your account if you’re going to send invoices to the print house.
- Add your Funds, when done