

VISP’s HyperRadius boasts numerous advanced capabilities, including the Smart Session™️ feature.
Using Mikrotik Routers for subscriber authentication, Smart Session™️ facilitates real-time changes to connected clients, like instant disconnects and upgrades or downgrades to client speeds, directly within Visp.
⚠️ Smart Session™️ is only compatible with Hotspot and PPPoE authentication methods.
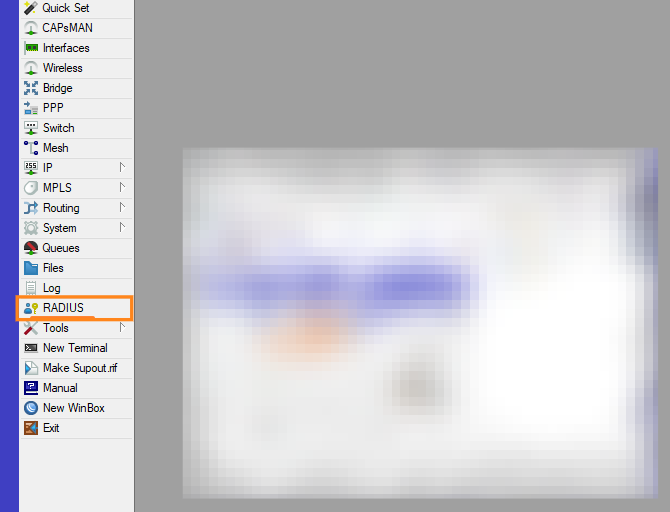
Update RADIUS Settings via Your Mikrotik Router
1. Click on RADIUS
2. Click on Incoming
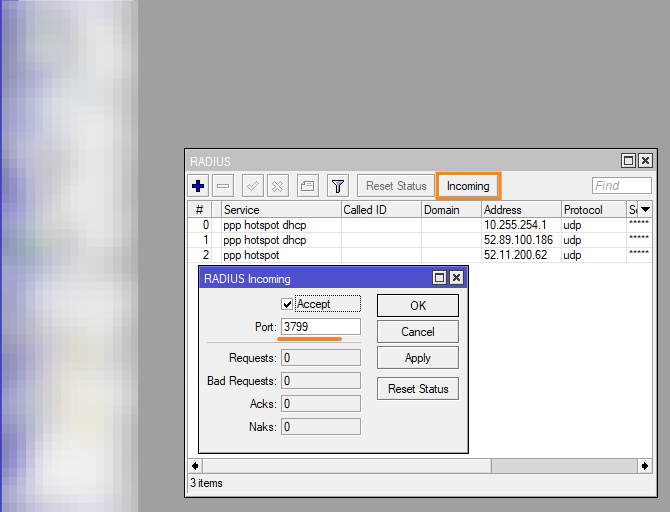
3. Toggle “Accept,” and set the Port to 3799
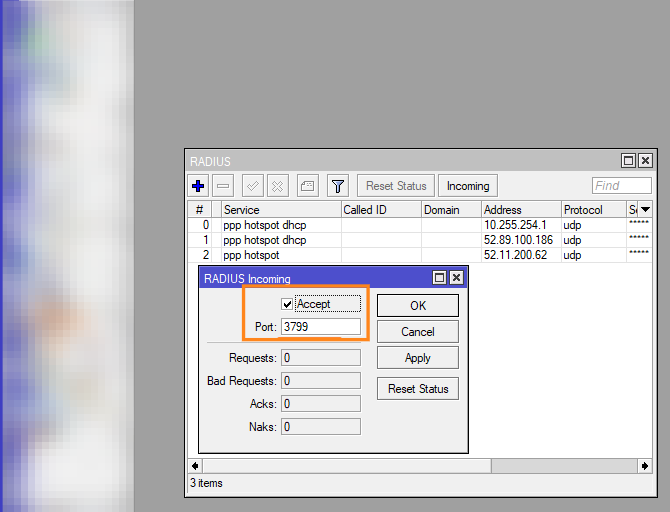
Hit Apply and then OK.
Configure the Access Controller in IRM
- Navigate to IRM > Equipment.
- If the Access Controller (MikroTik Router) doesn’t exist yet, click the + icon to add a new one.
- Select an Equipment Profile and assign it to the correct tower/site.
- Add a Description, then Save.
Enable Smart Session™ on Your Router
- In IRM, select the tower/site where the router is added.
- Go to Site Equipment and click the router.
- Click the pencil icon (top-right).
- Add the router’s public IP address.
- Enable Smart Session™, then Save.

Subscriber devices must be authenticated on the router for RADIUS to capture the IP address of the Access Controller (MikroTik Router) where the user is authenticated. If a device was authenticated before the SmartSession-related changes, it must be re-authenticated at least once to ensure proper session tracking.
💡 For more information about this and all other features in Visp, reach out to your Visp Client Success Team today.
Phone: 541-955-6900Email: success@visp.net
Open a ticket via www.visp.net/ticket