

To add or edit the Ticket Types or templates added in VISP
-
-
-
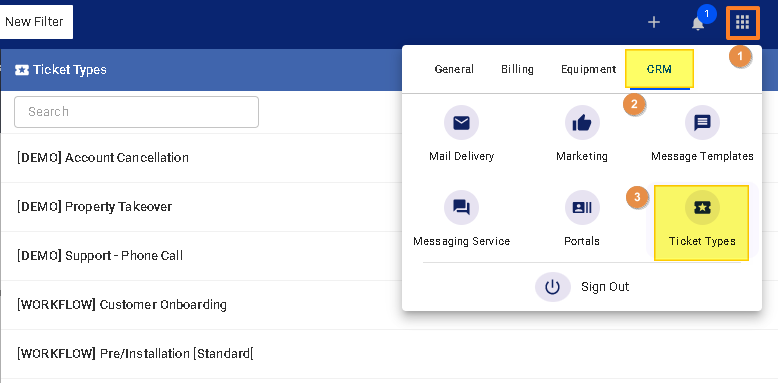
- Go to the
menu. - Click on
CRMtab. - Go to
Ticket Types - Select a Ticket Type or Click on Add to create a new one.
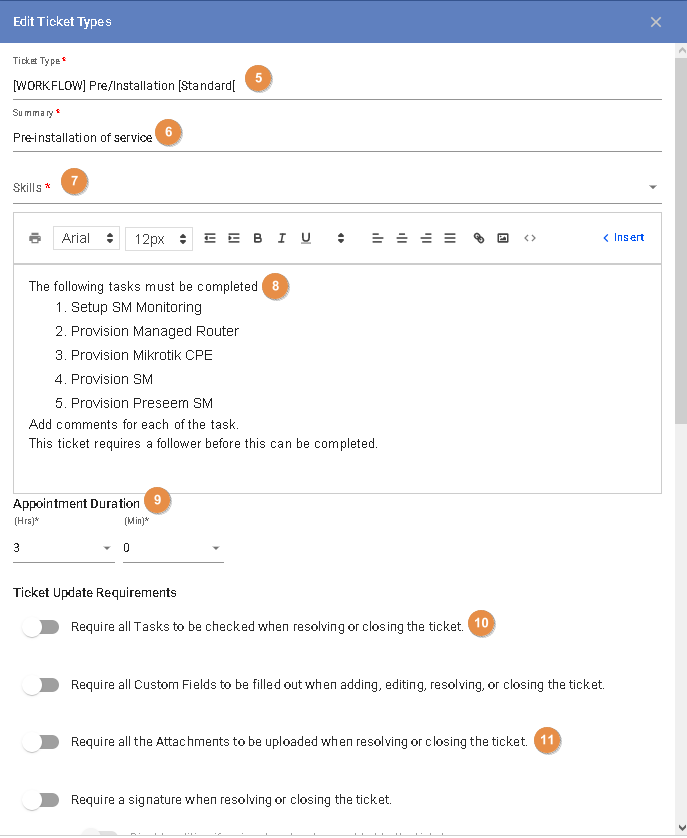
- Add a label in the Ticket Type field.

Setting up Your Ticket Type - Add a summary.
- Once the CRM feature is available, you can add team members with specific Skillsets for a ticket type. At the moment, you can skip this step.
- This field is for your ticket description. You can add bulleted or numbered lists of instructions for your technicians or team members on the field.
- The Appointment Duration shows how long the activity related to the ticket is to be completed, once scheduled. An installation can take 1-3 hours depending on the type and requirements (standard vs. non-standard installation).
- In the Ticket Update requirements, you can enable the toggle to see the links where you can enter Tasks or Custom fields. Disable the toggle again, so the Tasks or Custom fields added are not required, to close or resolve the ticket.
- You may require Attachments and Signatures to be added, as well as followers on a ticket, for the team to close it.

- You may require schedules to be added to a ticket and queue unscheduled tickets for your available technicians.
- You may select from the available list here items that can be included in your notifications to the customer.
- Ticket notes can also be included when printing the ticket or as part of the Subscriber Summary report.
- Click on Alerts to set or schedule triggered Alerts to be added to a subscriber account, when the specific ticket type is selected.
- The options for this ticket type when integrated with Facebook Manager will be explained in a separate video.
Saveyour work when done.
- Go to the
-
-
For more information about this and all other features in VISP, reach out to your VISP Client Success team today.