

1. Activating the New Ticket Drawer (Beta)
If you are still seeing the legacy tabbed view when you open a ticket, you must manually switch to the modern Accordion View.
- Step: Open any existing ticket from your dashboard.
- Step: Locate the Three Dots (⋮) icon in the upper right-hand corner of the ticket drawer (positioned just to the left of the “Right Arrow” icon).
- Step: Select the New/Beta toggle from the dropdown menu.
Note: The legacy view is scheduled for sunset on March 31st, 2026.
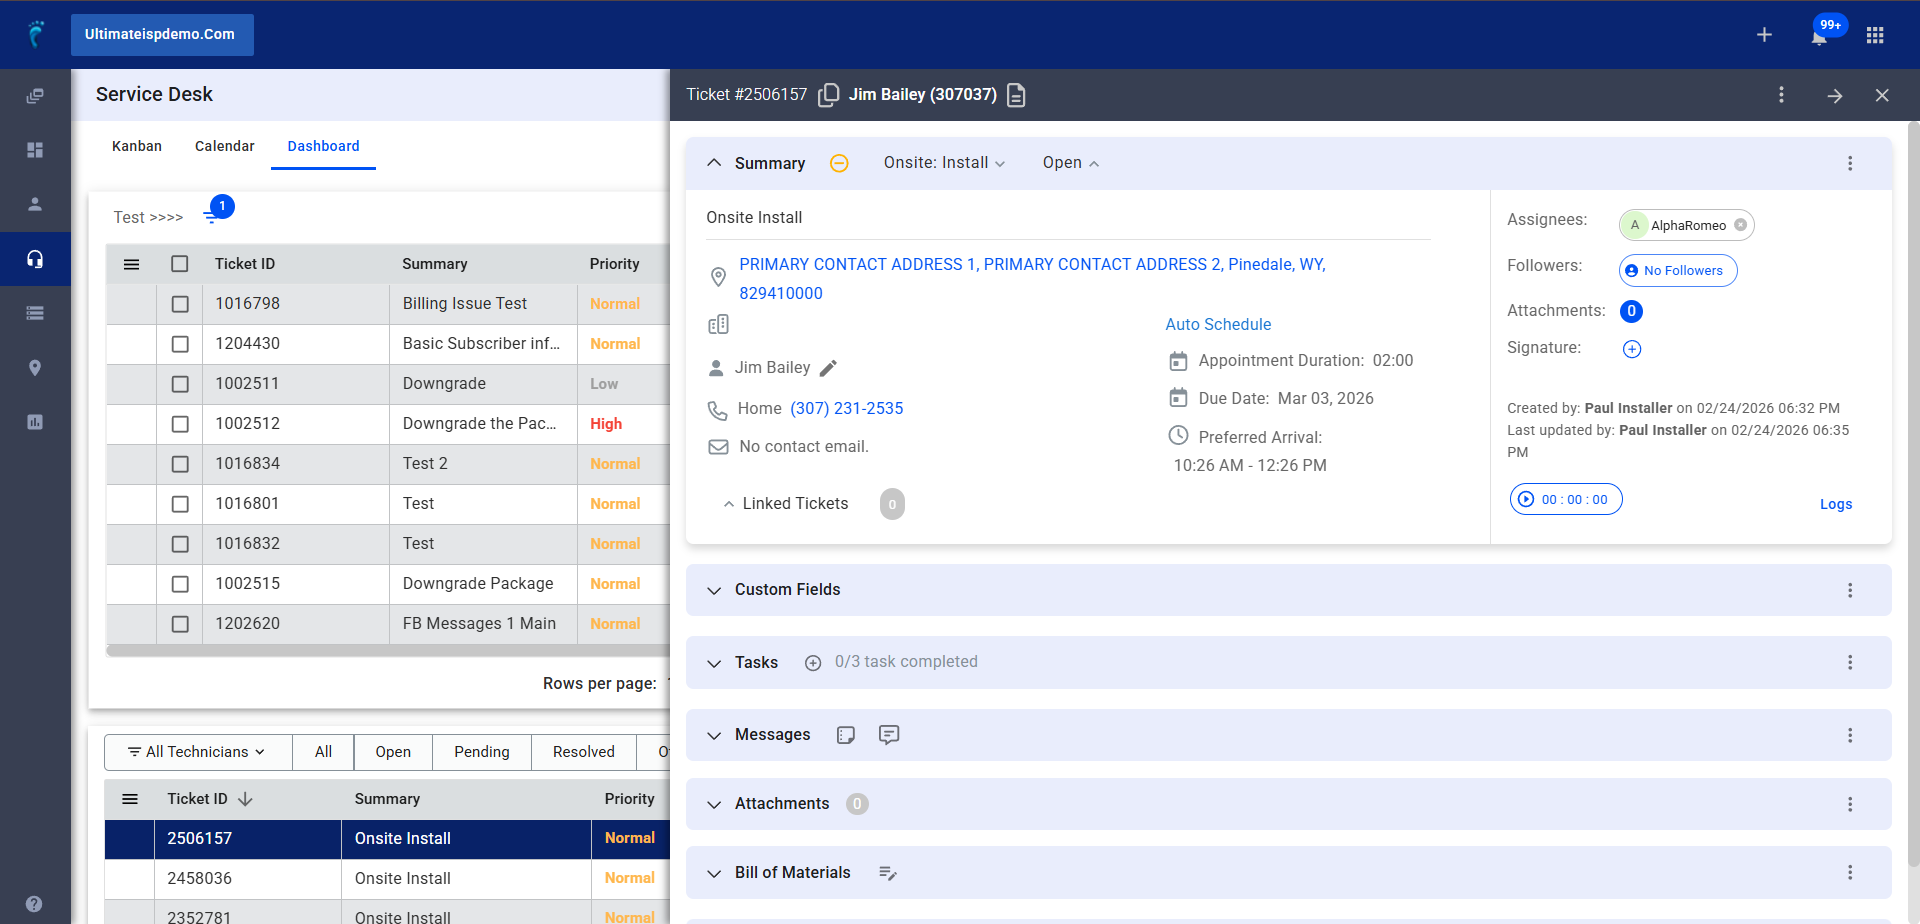
2. Navigating the Summary Accordion
The top section of the drawer contains high-level job details and communication shortcuts.
- Customer Info: View the physical address (marked by a Pin Icon) and the subscriber’s name.
- Quick Contact: * Click the Phone Number to initiate an immediate call.
- Click the Email Address field to send a message to the ISP.
- Modifying Assignments: Click the Pencil Icon to change who the ticket is assigned to.
- Linking & Merging: Click the Link Icon next to Linked Tickets. You can search for other tickets to create Parent/Child relationships or Merge them entirely.
3. Assignments, Followers, & Signatures
- Assignees: Click the Assignee Pill to select technicians. You can add up to two (2) assignees.
- Followers: Click the Followers Pill to add supervisors or backup staff who need to monitor the ticket for completion.
- Capturing Signatures: 1. Click the Circle with a Plus (+) sign in the Signature section.
2. Once the pop-up appears, have the customer sign.
3. Click Accept and Sign to save, or Clear to restart.
4. Customizing Tasks & Fields
The content of these sections is determined by the Ticket Type settings.
- Ad-hoc Tasks: Click the Gray Plus (+) button within the Tasks section to add a new requirement on the fly.
- Completing Tasks: Click the Checkbox next to a task.
Pro-Tip: The system takes 1–2 seconds to sync with the server. If the checkmark doesn’t appear instantly, wait a moment for the auto-save to complete. - Configuration: To change which Custom Fields appear, go to the App Launcher (9-dot menu) > CRM > Ticket Types and edit the Ticket Update Requirements.
5. Communication & Materials (BOM)
- Notes vs. Messages: * Use Add Note for internal account documentation.
- Use Add Message for external SMS (via Twilio) or Email updates to the customer.
- Bill of Materials (BOM): Click the Add Bill of Materials icon. This table allows you to search for and add equipment or assemblies.
- Note: Items added here create a quote that converts to an Invoice once the ticket is closed.
6. Activity Logs & Docking
- Activity Table: Scroll to the bottom to see a full audit trail of changes, attachments, and messages. Use the Search Bar or Pagination at the bottom to find specific history.
Docking: If you need to navigate away but want to keep the ticket accessible, click the Dock icon in the upper right. This keeps the ticket pinned to the side of your screen.