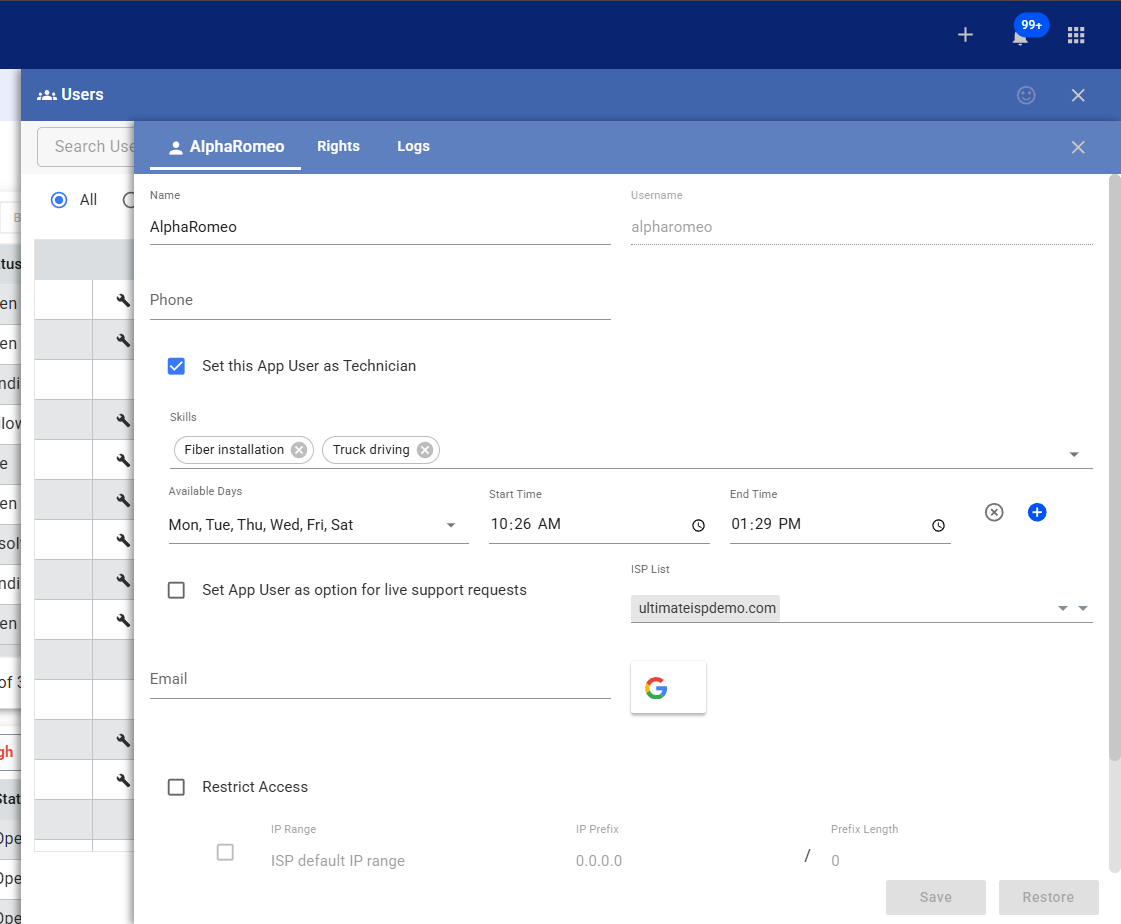
1. Configuring Technician Work Hours
Before scheduling jobs, you must establish when your technicians are available.
- Click the App Launcher (nine-dot menu) and select the General tab.
- Click on Users.
- Hover over a specific user, click the Vertical Ellipses (⋮), and select Edit.
- Locate the Available Days section.
- Select the working days from the dropdown menu and enter the Start Time and End Time for each.
- Use the Blue Plus (+) sign to add additional time blocks or the X to remove them.
Click Save to apply the user availability.
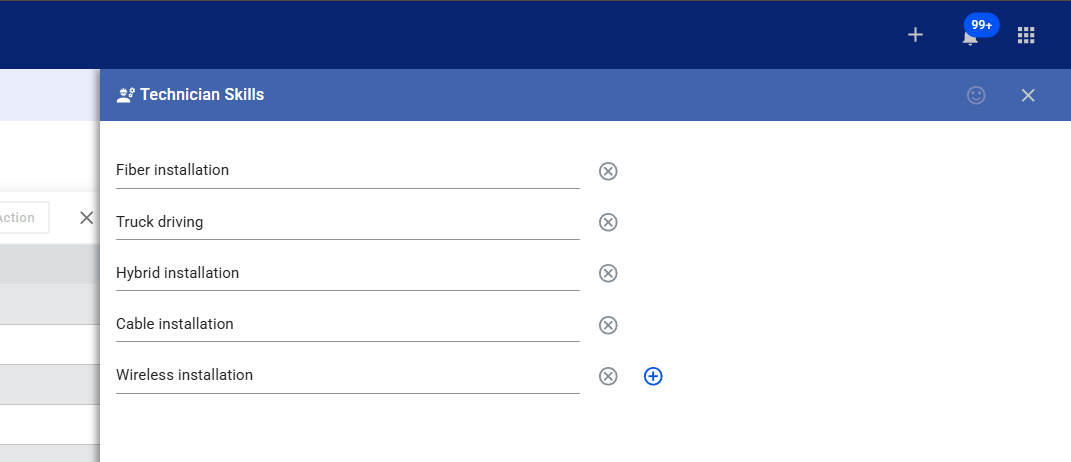
2. Managing Technician Skills
Skills allow you to categorize staff by expertise (e.g., Fiber, Wireless) for precise job matching.
- Navigate to the App Launcher (nine-dot menu) and select the CRM tab.
- Click Technician Skills.
- Click the first empty line to add a skill (e.g., “Fiber Installation”).
- Click the Plus (+) sign to add additional skill rows.
- Click Save once all relevant skills are listed.
- Important: Return to the Users section (Step 1) and assign these newly created skills to the appropriate technicians.
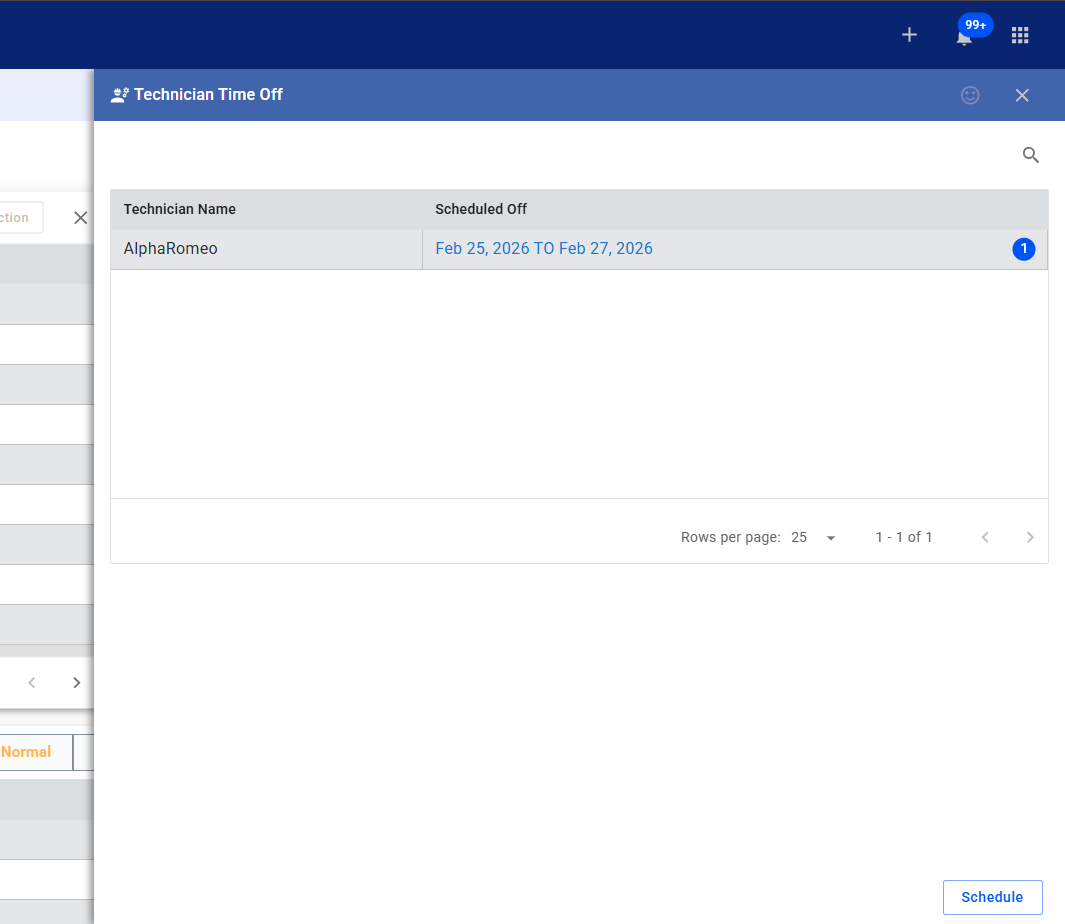
3. Scheduling Technician Time Off
Ensure dispatch accuracy by logging vacations or unavailable dates.
- In the App Launcher (nine-dot menu), go to the CRM tab and select Technician Time Off.
- Click the Schedule button.
- Use the Calendar Picker to select the specific date or range for the time off.
- Choose the technician(s) from the dropdown menu.
- Specify if it is a Whole Day or Partial time off (entering start/end times if partial).
- Enter the Reason for the time off in the final field.
Click Save.
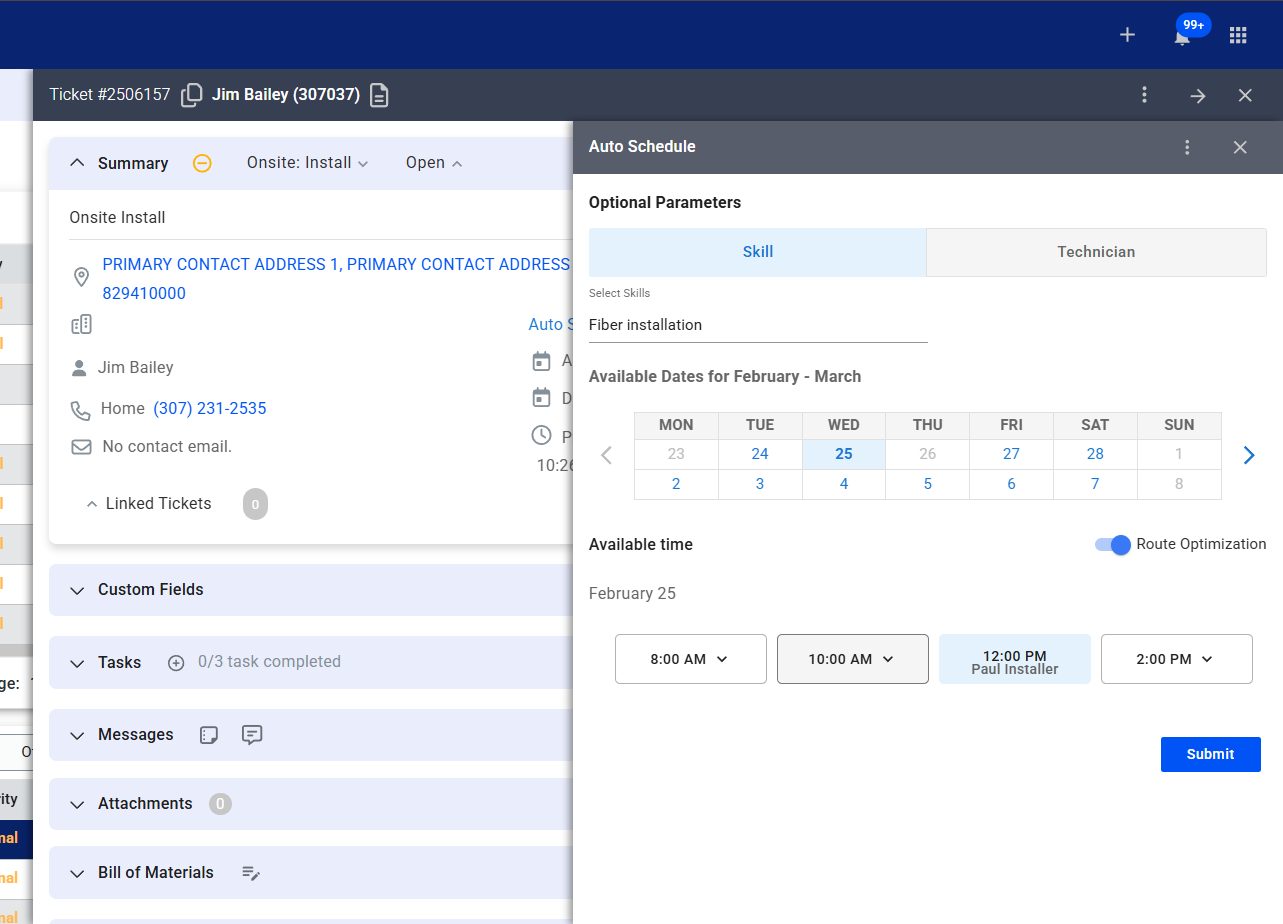
4. Auto-Scheduling and Route Optimization
Once the foundation is set, you can automatically assign tickets based on skill and proximity.
- Open an existing ticket or click the Plus (+) sign in the top right to Open Ticket.
- Fill in the subscriber name and ticket type (e.g., Onsite Install) and click Create.
- In the ticket Summary section, click Auto Schedule.
- Choose your scheduling method at the top of the window: Skill or Technician.
- Select the desired date on the calendar.
- Toggle Route Optimization to “On” to prioritize the technician closest to the job site.
- Review the Available Time blocks and select a technician from the dropdown within the preferred time slot.
Click Submit to finalize the dispatch.