To setup IPAM:
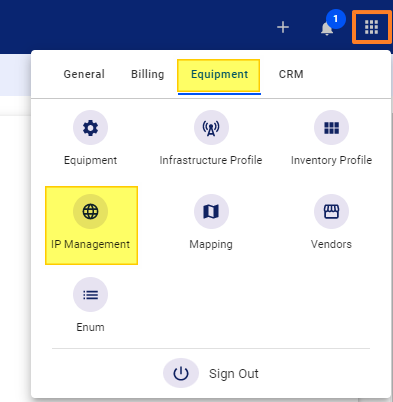
- First, click on the
menu - Go to your
Equipment tab - Click on the
IP Managementpanel.
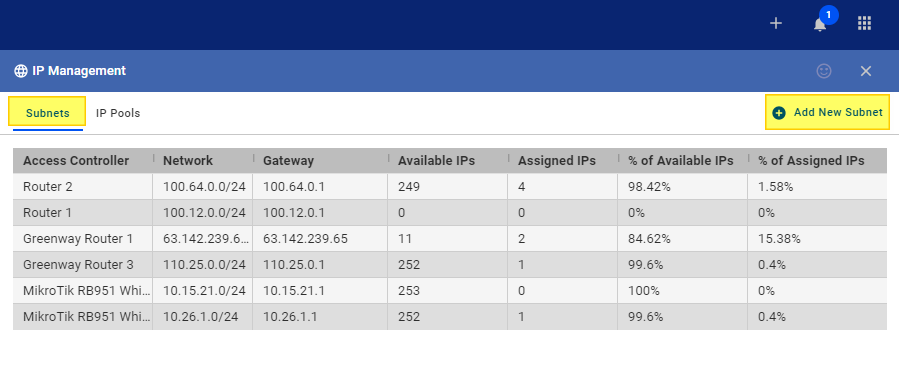
In the Subnets tab:
- Click on Add New Subnet
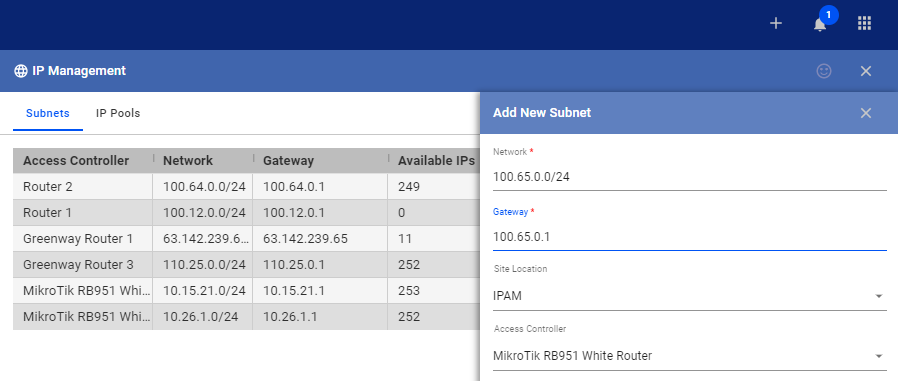
- Fill out the Network field, which contains your IP and slash notation.
- The Gateway field automatically populates after you enter the Network IP and subnet.
- Select a site or tower from the Site Location dropdown.
- Pick a router-type device or access controller available in the dropdown. Add a new router, if it is not yet available, and associate the device with a tower or site.
- Save your work when done.
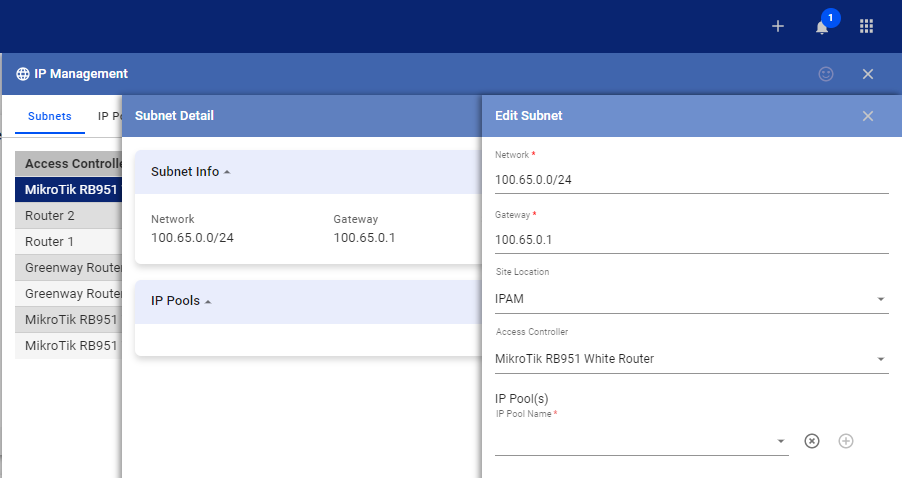
The Subnet Detail panel will open.
- Add a New IP pool by clicking on the pencil icon in the IP pools section.
- If you already have the Site Location and Access Controller populated, click on the dropdown in the IP Pool(s) field, and select Add New IP Pool.
- Add a name or label to your IP pool range. For example, if you’re adding Public IP addresses you can include that on your label.
- Click on Add when done. Add more IP pools as necessary.
- In the edit Subnet section, click on Save.
- Now you’ve populated your IP Pools and subnet.
For more information about this and all other features, reach out to your VISP client success team today.


