

Initial Setup
If you’re using a new Mikrotik router, we recommend resetting the device to remove the preinstalled configuration as it contains settings you will probably not need. You may also need to upgrade your RouterOS to the latest stable version, from mikrotik.com.
If you are using a Mikrotik that’s already running in a production network, we suggest that you make a backup of your current configuration. Go to Files > Backup, then click to backup your current configs to the file. Optionally drag-and-drop the new backup file to your desktop to save it locally.
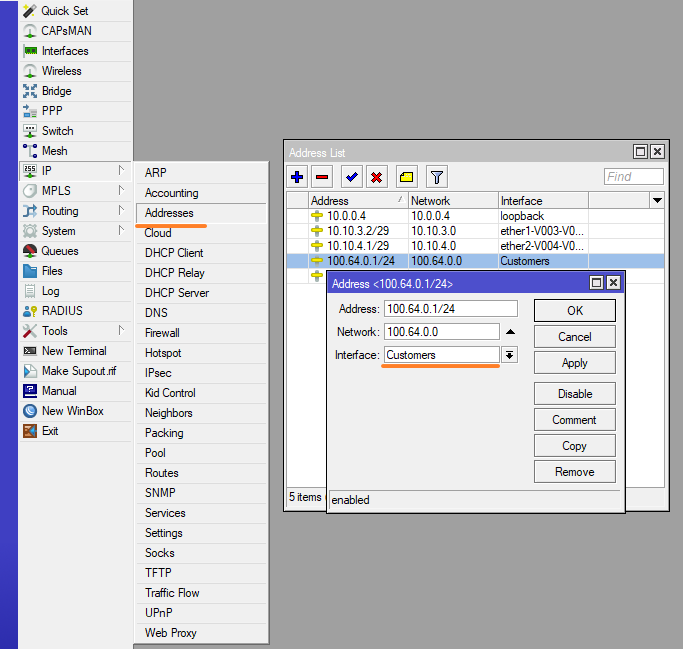
Adding IP Addresses to the Mikrotik
Add an IP for your Hotspot network by going to IP > Addresses. Ensure you assign the IP address to the proper interface on which the switch or AP for the hotspot network will be connected. It is also best practice to put comments on the newly added subnet.
Configuring the Hotspot Server
To configure a hotspot server, follow these steps:
- Click IP > Hotspot.
- Click the Hotspot Setup button to open the wizard.
- Select the correct interface for the hotspot network and then click Next.
- Verify the IP of the server, which should be the address you had created for the hotspot network, and click Next.
- Verify the IP range that’s automatically chosen for the hotspot users and click Next.
- Ignore the server certificate setting, at least for now, and click Next.
- Accept the default IP Address of SMTP Server (0.0.0.0) or ignore the setting and click Next.
- Verify that the DNS server address from your Internet connection is entered and click Next. If you don’t want to use the DNS server from your uplink provider and prefer to use public DNS instead, you can create one here and click Next.
- Finally, create a local hotspot user as required in the setup process; then click Next.
Hotspot Server
Double-click on the new hotspot server that is created (usually named ‘hotspot1’) and perform the following steps: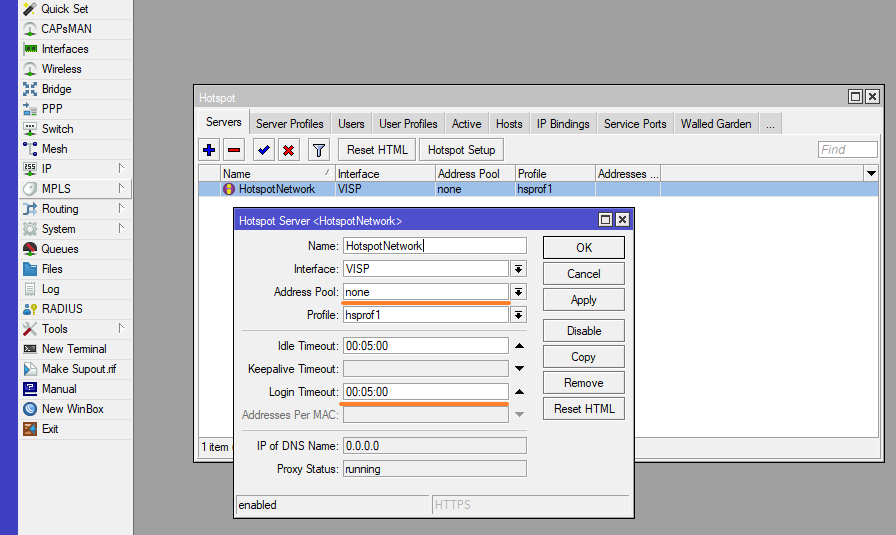
- On the Address Pool option, select ‘none’ from the drop-down (reason: addresses are assigned by DHCP, so this is redundant and can cause issues).
- Set the login-timeout to five minutes (00:05:00), If the device hasn’t self-authorized within this timeframe, the host entry gets deleted from the host table. This loop repeats until the device is authenticated.
- Click the Reset HTML button on the right, confirm by clicking Yes.
Server Profile
Edit the server profile created in the last step (by default named hsprof1) by double-clicking on it.
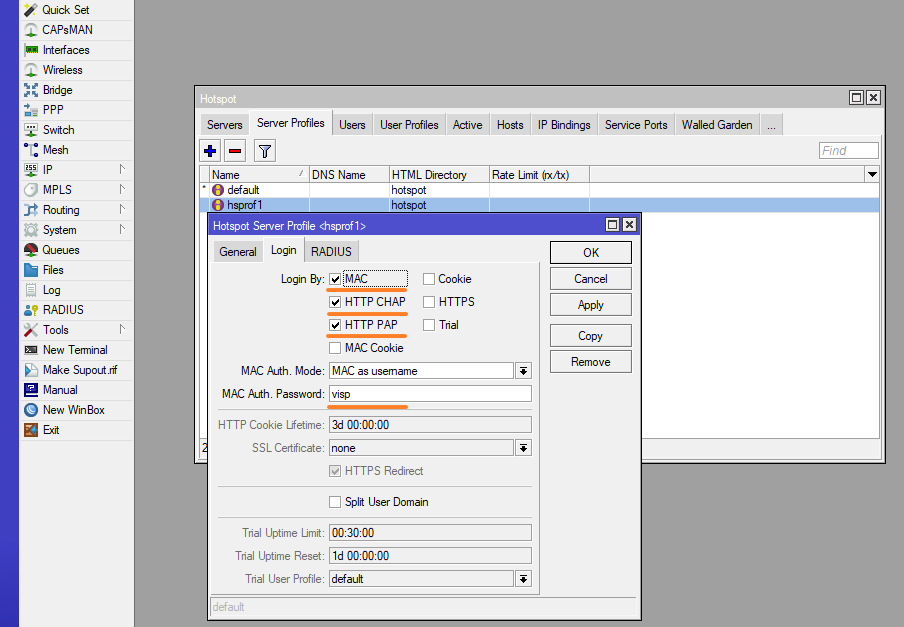
- Click RADIUS
- Select ‘Use Radius’
- Ensure ‘Accounting’ is checked
- NAS Port Type = 19 (Wireless-802.11)
- Click the Login tab
- Check MAC, HTTP CHAP, HTTP PAP, uncheck Cookie
- Enter ‘visp’ (no quotes) as MAC Auth Password
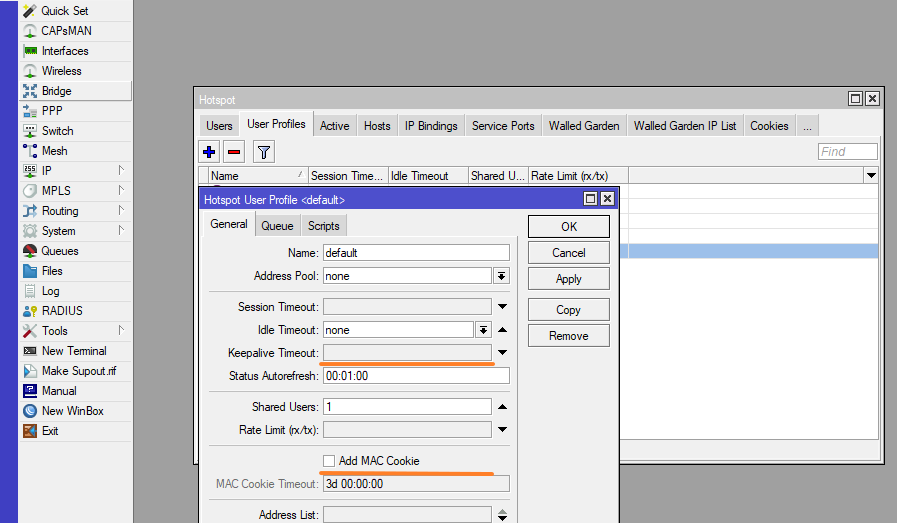
User Profile
Edit the User profile by double-clicking it and performing the following steps:
- If the ‘Keepalive Timeout’ option has a value in it, click the up-arrow to the right of it to disable the Keep alive timeout.
- Make sure that the ADD MAC COOKIE OPTION is unchecked.

IP Bindings
IP-Binding allows specifying the subnet that is only allowed to authenticate to the hotspot server. It also helps to eliminate unwanted traffic.
To allow authentication only within the Hotspot network.
- Add the Hotspot network address on the address box
- Set server = all or specific server
- Set type = regular
To block unwanted hosts/subnets from the HotSpot network (Eliminating Unwanted Traffic).
- Add a quad-zero route (0.0.0.0/0) on the address box
- Set server = all or specific server
- Set type = blocked
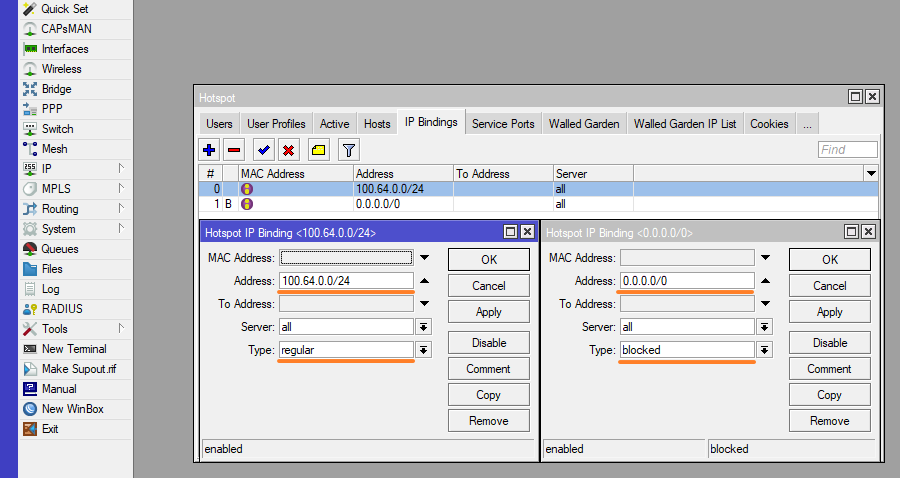
Note: Make sure that the drop rule is added last on the list. It will block all traffic if it’s added to the top.
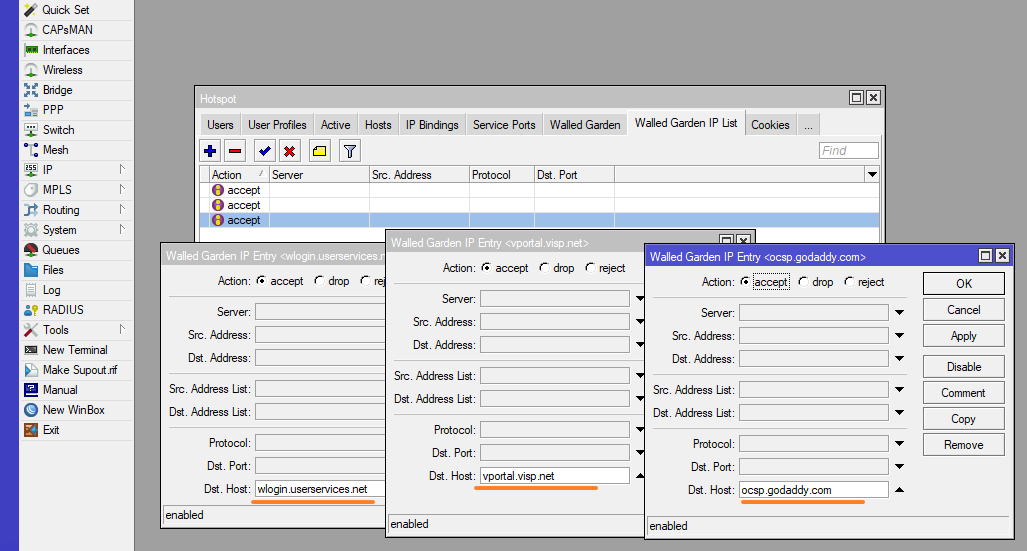
Walled Garden IP List
Walled-garden IP list allows you to add URLs or websites that are accessible for clients without authorization. This is where we will be adding the URL for the payment portal, signup page and login page.
- Go to IP → Hotspot → Walled Garden → IP List
- Click Add (+)
- Set the following:
- Action: accept
- Dst. Host: (enter domain)
- Click OK
- Repeat for each domain below.
Add each of the following Dst. Host entries:
| Purpose | Domain |
| SSL Certificate | ocsp.godaddy.com |
| Visp Portal | vportal.visp.net |
| Visp Login | wlogin.userservices.net |
| Payment Gateway | secure.nmi.com |
| Apple Captive Portal | captive.apple.com |
| Android Captive Portal | connectivitycheck.gstatic.com |
| Windows Captive Portal | www.msftconnecttest.com |
| Windows Network Check | www.msftncsi.com |
| Linux Captive Portal | nmcheck.gnome.org |
Script Method (Automatic)
Instead of adding manually, you can run this script:
/ip hotspot walled-garden ip
add action=accept dst-host=ocsp.godaddy.com
add action=accept dst-host=vportal.visp.net
add action=accept dst-host=wlogin.userservices.net
add action=accept dst-host=secure.nmi.com
add action=accept dst-host=captive.apple.com
add action=accept dst-host=connectivitycheck.gstatic.com
add action=accept dst-host=www.msftconnecttest.com
add action=accept dst-host=www.msftncsi.com
add action=accept dst-host=nmcheck.gnome.org
Queues
- Select the Queue Types tab, and then double-click the default-small queue to open it.
- Change the default-small queue Kind value to ‘SFQ’ and leave the default settings.
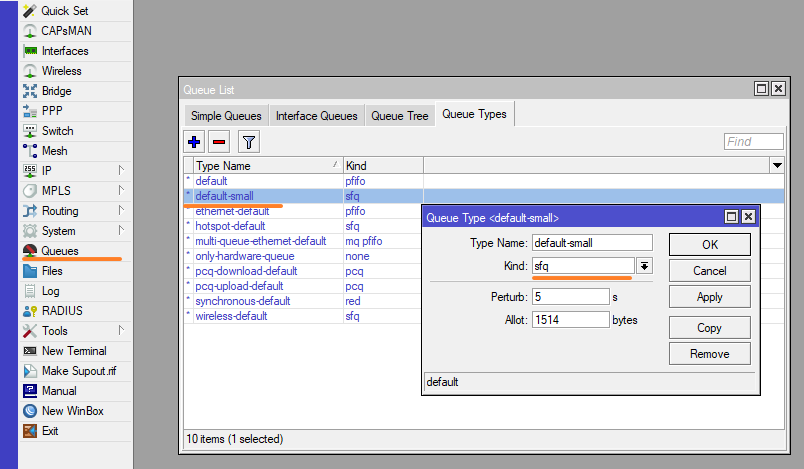
SFQ and RED are the two best at large connections. However, RED randomly drops packets when the connection begins to become congested. That’s ok for big pipes like 1gbps that shouldn’t be congested often. It’s not so great for home internet that you expect to be hitting these limits regularly. You don’t want to drop UDP traffic. Games and VoIP don’t do well with packet loss.
SFQ will insert delay which will slow down the TCP connections, generally without packet loss. The weakness of SFQ is the resources consumed in the router. However modern MikroTik’s have more than enough resources to manage SFQ’s. In general, SFQ is recommended for the setup.
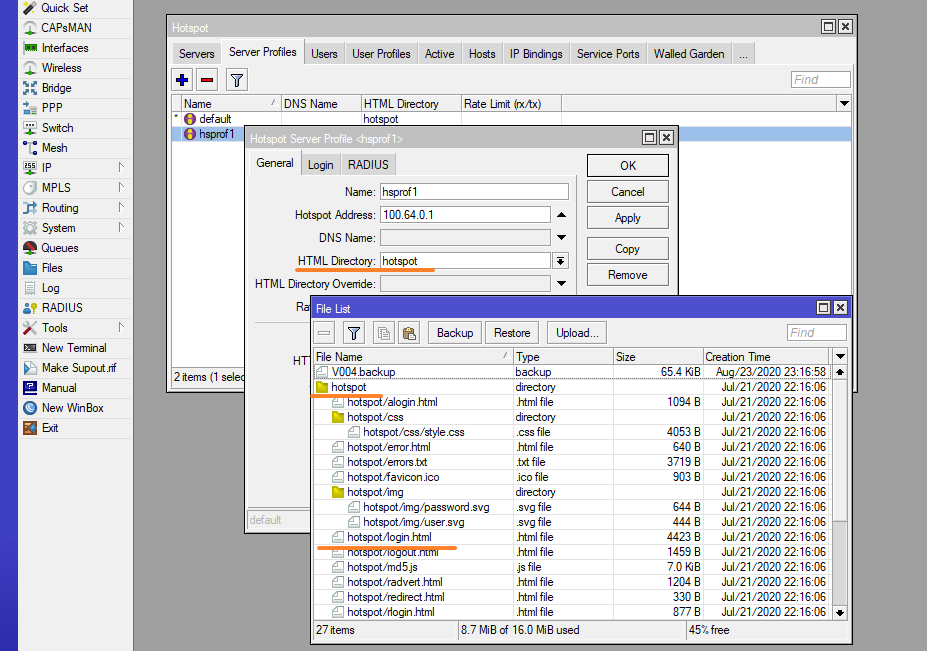
Files
- Populate the fields below for your ISP domain eg. Visp.net and optionally the Location ID (which can be left blank). Use the “Generate Login.html File” to download a customized login.html which will be placed in your router.
- Drag the login.html file from your desktop into the HTML directory specified on the Hotspot Server profile.
RADIUS Servers
Follow the instructions on this page to configure the RADIUS servers.