

There are two common ways to enter customer information in VISP
- By manually entering the customer information or
- Using the signup form.
Let’s first discuss manually adding customer information to the VISP software.
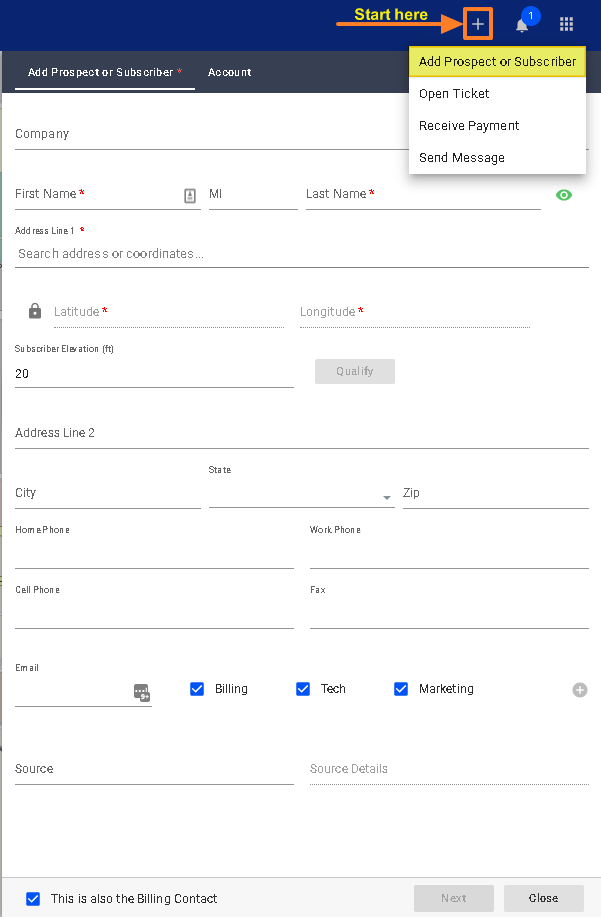
- Click on the plus sign
+in the upper-right corner of the screen. - Select
Add Prospect or Subscriber. - Enter your customer’s information.
- In the Address 1 field, you have the option to use the fully qualified street address of the customer. The system will auto-suggest validated addresses if you type a location in the Address 1 field.
- You can also use their coordinates to locate the customer on the map. Enter the latitude and longitude of the customers in the respective fields.
- Enter and save your customer’s email address and phone number on file, so you can use the mass email and messaging service in VISP, to easily notify customers about their bills or inform them about planned maintenance or unscheduled outage.
- You can use the fields for Source and Source Details to determine where your customers heard or have signed up for service. You may view the results via
Reports>Marketing>Marketing Source and Source Details Report. - If the customer has a different billing contact information, uncheck this field and then enter the information in the Billing Contact tab.
- Click on Next when you’re done, or click on the Account tab.
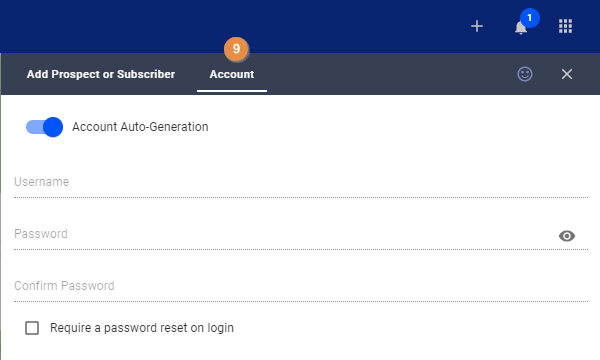
- When Account Auto Generation is enabled, the system will automatically create the username and send an email to the customer containing a link to reset or type a new password for the account.
a. If Account Auto Generation is turned off, you can set the customer’s username for their account. - Click on Add when you’re done.
Customer Intake / Signup Form
To use the signup form to enter customer information, first, you must configure the portal settings to display certain packages, and then you have to set up your packages to show on the signup page.
Enable Package Signup
- Go to the
menu, and click onCRMtab - Click on
Portals - Click on the
Online Signup menu - Put a check on the box to enable online signup for the following service packages.
- Toggle Internet Packages

Collecting Information
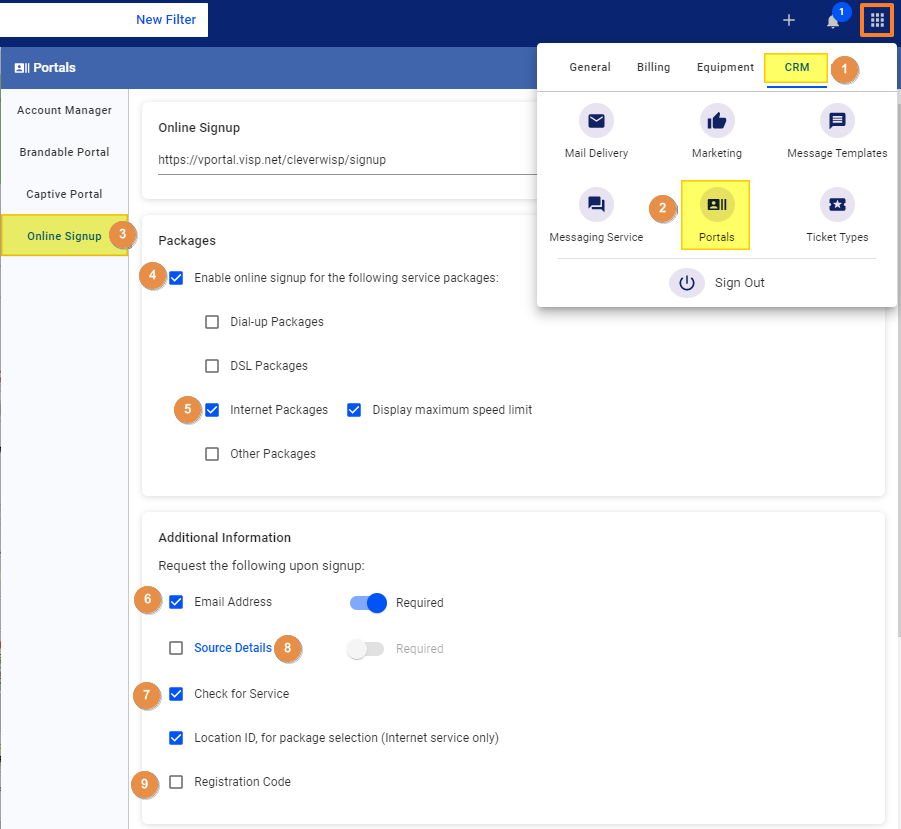
- In the Additional Information panel, you can enable certain fields and set them as required during signup.
In this example, check the Email address, service, and Location ID boxes. - The check-for-service feature allows customers to verify if a customer is within your coverage area. The location ID option, allows you to filter or group packages using a unique signup address or URL.
- ISPs use the source details feature to track the referral, the print ad, or any known sources that direct prospects to the signup page.
- Your prospects can enter a Registration code to get discounts or additional services during promotions. This is not automated and may require your team to apply for the discount or credit manually to the customer’s account.

Enable Packages for Display on the Signup Page
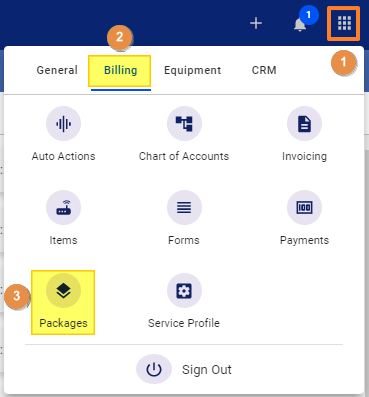
- Go back to
menu - Go to the
Billingtab - Select
Packages - Click on the vertical ellipsis
⋮or three dots to the right of one of your packages. - Click on
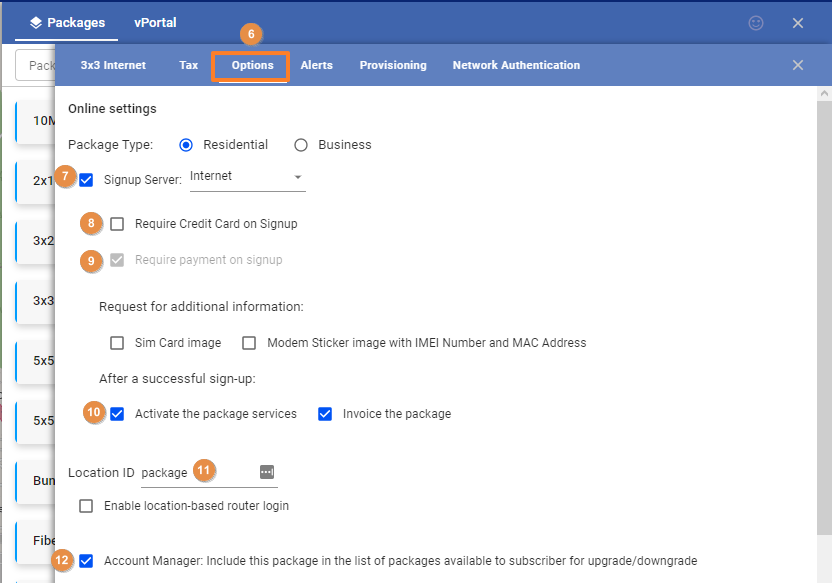
Edit - Go to the
Optionstab - Enable the Signup server option and select Internet from the dropdown.
- To require a credit card to be entered during signup for this package put a check on this box.
- If you want customers to prepay for their service, enable this option.
- When a customer successfully signs up for a service, you have the option to activate the package right away and invoice the customer. Or disable these options, and add the prospect for later installation and activation.
- The Location ID field allows you to add a label or a name for a specific location of a tower or site, where the package is displayed. The field can also create a custom signup link for the package.
- Lastly, you may display or hide this package from the available Package Upgrade options from the Account Portal.
- Save your work when done.
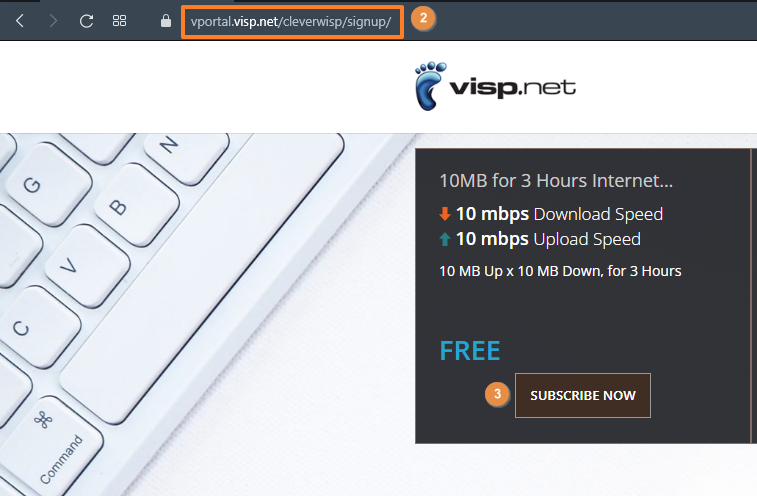
- When you’re done setting up your portal and packages, your customers can check out your signup page.
- Your portal link can also be customized to use your domain or sub-domain for the signup page. A separate video is available for this process.
- Have your customers open the link and go through the signup process.
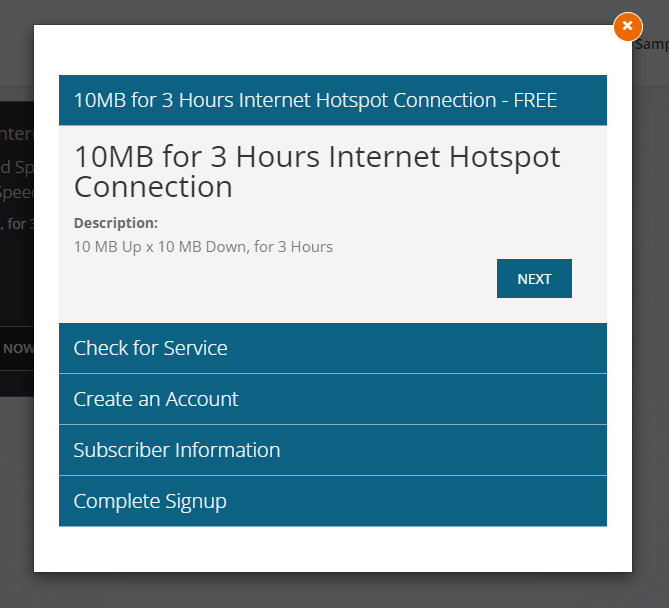
- Your customer must select a package and hit the Subscribe button.
- Let your customer fill out the necessary fields. Those with red asterisks are required.
- Click next to get the Check for Service form. Enter the customer’s address. If there’s coverage in a specific area, the customer will get a response from the system.
For more information about this and all other features in VISP, reach out to your VISP Client Success Team today.