

To View, Search, and Manage Current Users
-
-
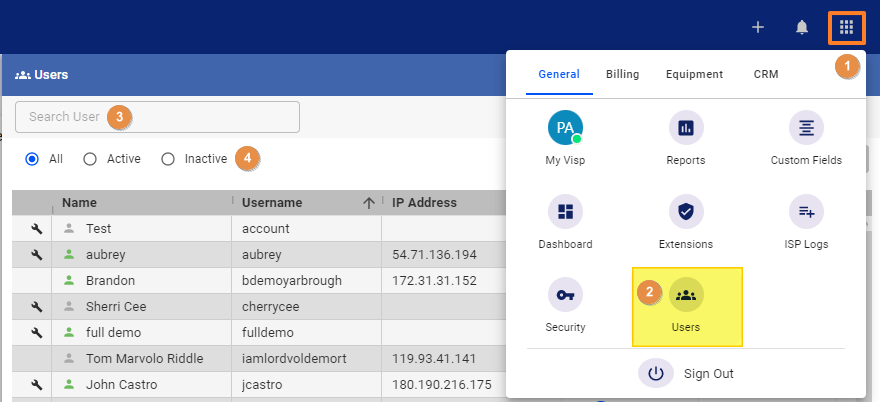
- Go to the
Menu - Click on
Users - To search for a specific user, type the name, username, or IP address in the search field.
- You can filter to see All Users or switch between Active and Inactive users.
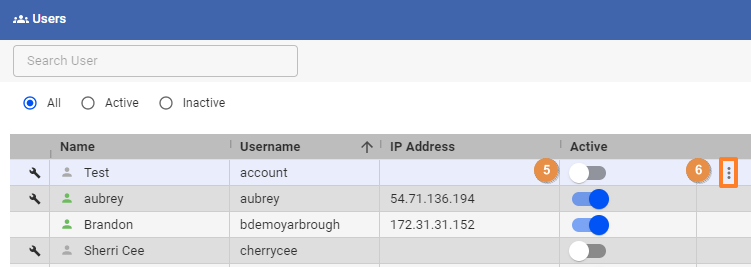
- You can set the user as active or inactive, by setting the toggle here. (shown on video)
- To edit a user’s profile, review their permissions and rights, or check the logs of changes made in the software, hover and click on the vertical ellipsis or the three dots
⋮(see image or video).
- Go to the
-
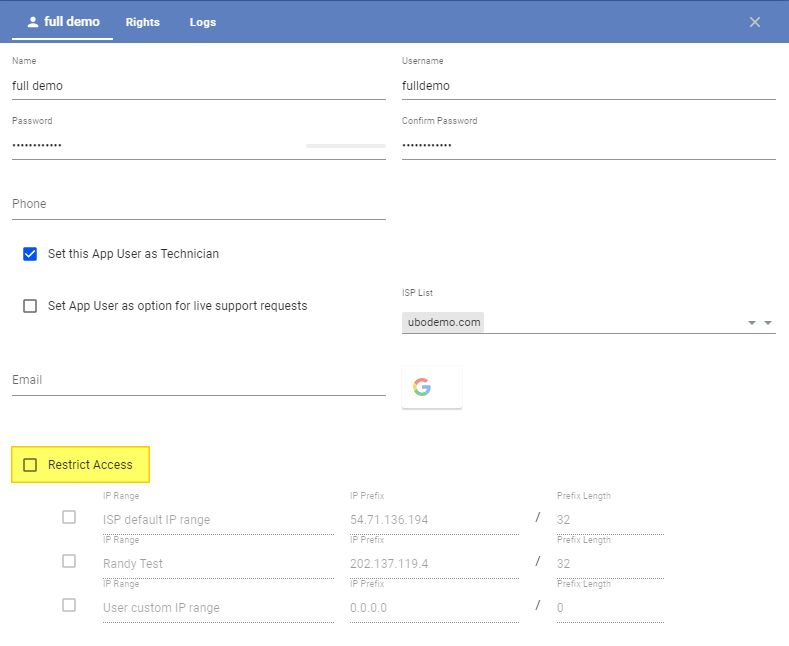
To Add a New User:
-
-
-
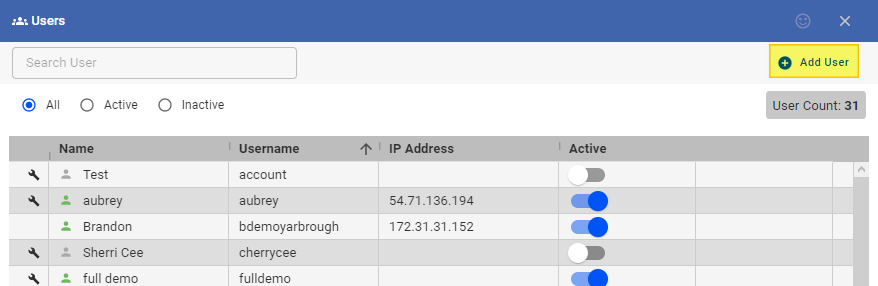
- Click on Add User.
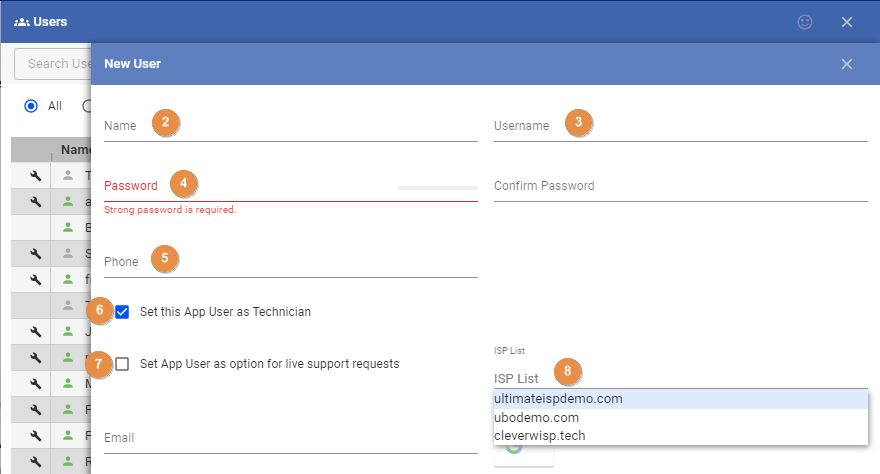
- Enter a name.
- Type a username for the account. The username field accepts only lowercase letters, numbers, and dots.
- Passwords should be a minimum of 8 characters long. The longer, the better. Use a mixture of uppercase letters, lowercase letters, and numbers. For increased security, you can also use commonly accepted symbols.
- Enter a phone number and email.
- You can toggle this option to set the user as a technician. You can assign tickets to a technician or make them followers of an existing ticket.
- If you want to assign the role of a live support technician to this user, toggle this option.
- These technicians provide technical support to customers using the built-in CRM features in VISP.
- If you are using a multi-brand account and you have other ISPs you want the user to have access to, select those ISPs from this dropdown.
- Save your work when done.
-
-
Here you can restrict users by IP address. You can set the IP range, via the global application security settings here in the Menu, the General tab, and then Security.
In the Rights tab:
-
-
- You can toggle or enable permissions to certain features or actions for a specific user.
- To grant users access to the Menu items, you can enable the Edit ISP information permission under Settings. You can set the user as an Application Administrator, to grant access and permission to add or edit existing user rights.
- Save your work, after making changes.
-

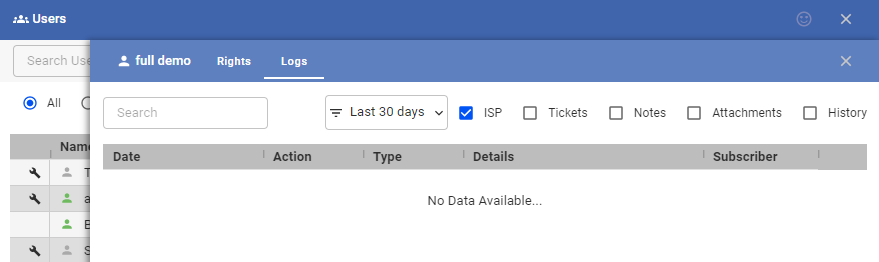
Logs Section
-
-
- Click on the Logs tab
- In the Logs section, you can filter and search historical data on high-level activities such as changes to the application settings or features, made by the specific user.
- When you’re done reviewing the logs, close the panel.
-
If you have questions about this and all other features in VISP, reach out to your VISP Client Success Team today.