

This guide outlines adding more terms to a customer’s subscription, considering different billing schedules and prorated charges.
1. Access the Subscriber’s Profile
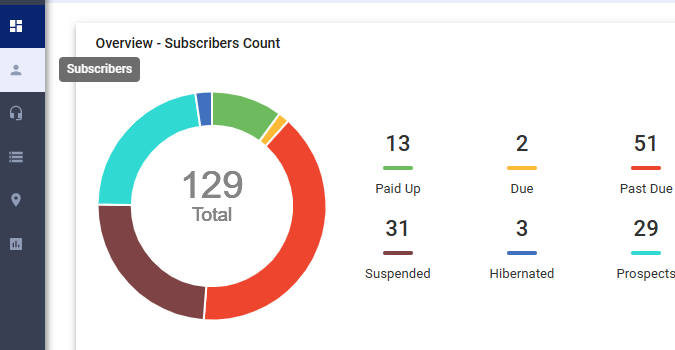
- Go to your Subscribers List .
- Search for the subscriber by name or ID.
- Select the subscriber to open their profile.
2. Add the Package to the Subscriber’s Account
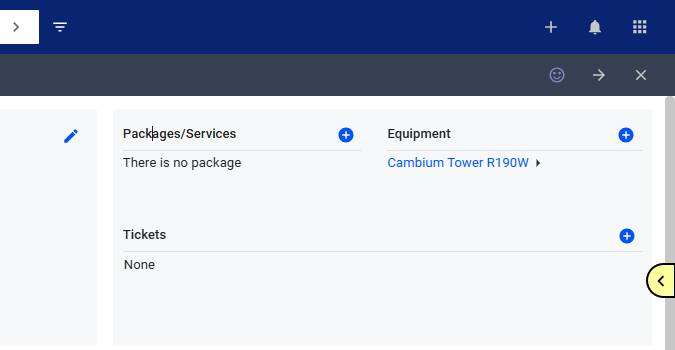
- Navigate to the “Packages and Services” section.
- Click the “+” sign to add a new package.
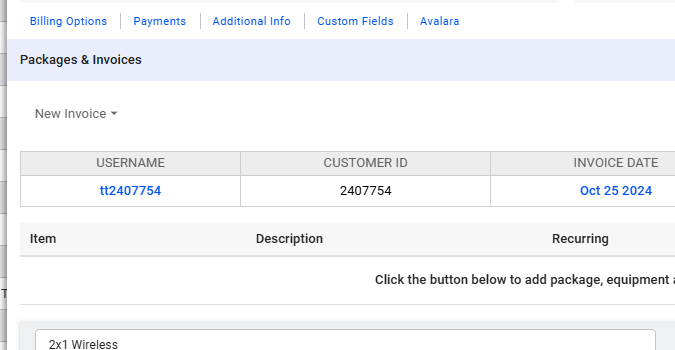
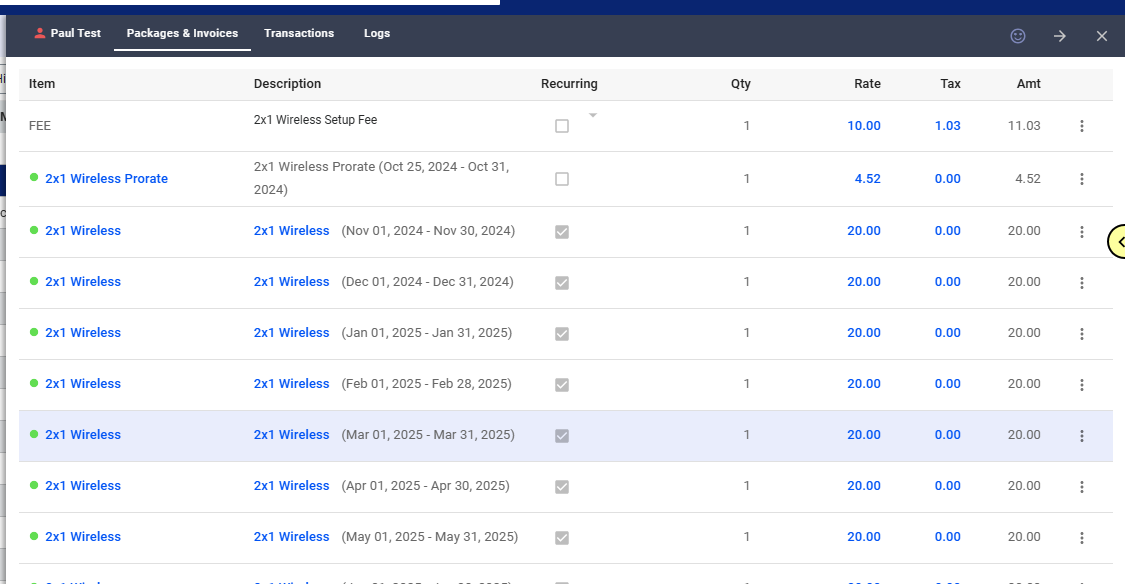
3. Alternatively, go to the “Packages and Invoices” section.
- Click the three dots on the right and select “New Invoice.”
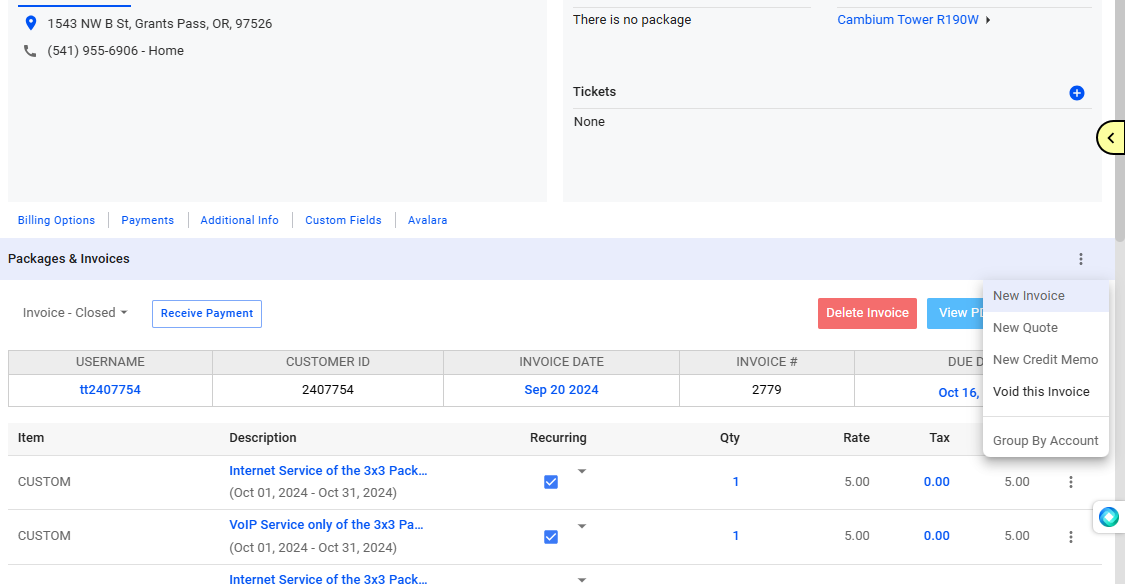
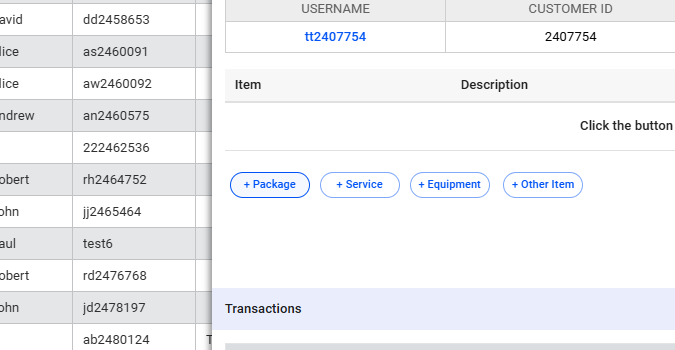
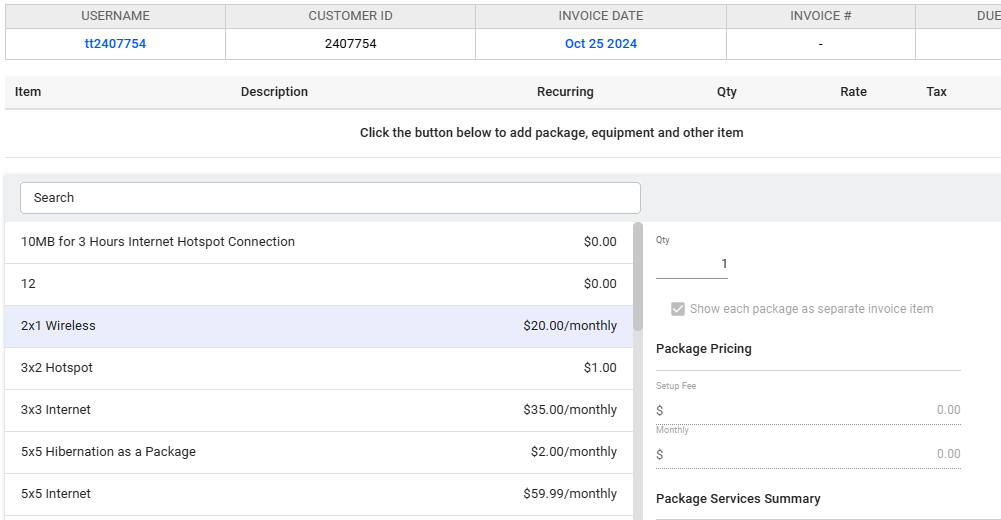
4. In the invoice, click the “+Package” button.
5. Configure the Package Term
- On the right side of the screen, you’ll see the quantity and package pricing .
- To add the package, click “Add to Invoice.”
- For more customization, click the dropdown menu and select “Add and Configure.” This will allow you to activate the package first before adding it to the invoice.
- Note: The system will automatically calculate prorated charges and future billing cycles based on the customer’s existing billing schedule and the system’s default settings.
6. Understand Billing Schedules and Proration
- New Customers: If the customer is new and has a flexible billing schedule, proration may not be an issue.
- Existing Customers with Fixed Billing Schedules: If the customer has an existing fixed billing schedule, you’ll need to carefully consider the prorated charge.
- Existing Customers with Flexible Billing Schedules: Adjustments might be needed to align the new term with their existing schedule.
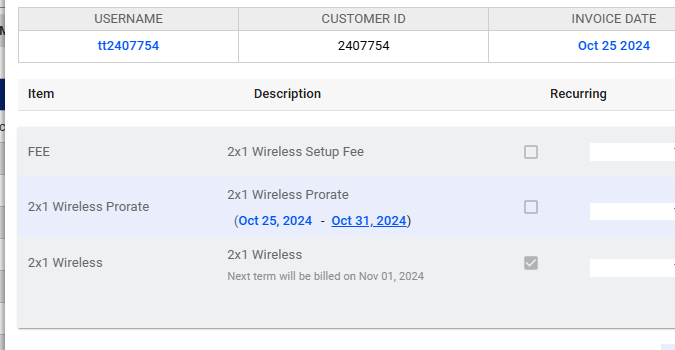
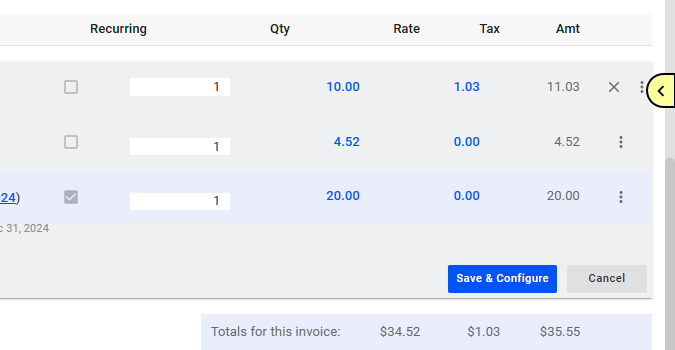
7. Preview and Adjust Invoice Charges
In the invoice preview, you’ll see two to three items :
- Setup Fee: (if applicable)
- Prorated Charge: Covers the period from the current date to the end of the existing billing cycle.
- Fixed Term/Full Term Charge: Covers the full length of the new term.
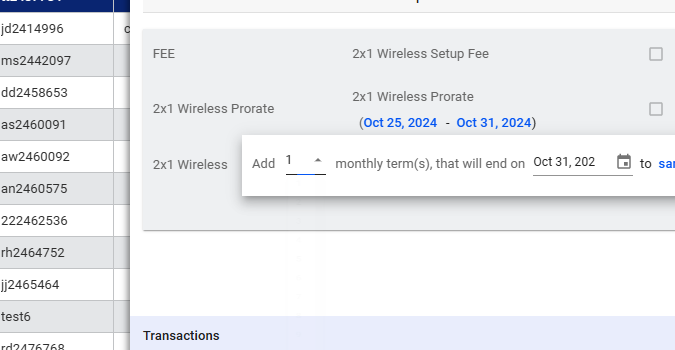
8. Modify Term Dates (Important!)
- To adjust the prorated charge or the full term charge, click on the blue text displaying the dates.
- A pop-up window will appear with a dropdown menu.
- Select the desired term length: You can manually set the term or choose predefined options like monthly or annual.
- Specify whether the changes should be applied:
- On the same invoice
- On separate invoices
9. Save and Configure
- Once you’ve made the necessary adjustments, click “Save.”
- If you initially chose “Add to Invoice,” you’ll need to click “Save and Configure” to finalize the package activation.
10. Activate the Service
- In the “Packages and Services” window, activate the package to complete the process.

11. Review the Invoice
The invoice will now display:
- The prorated charge for the current billing cycle.
- The full term charge for the next billing cycle.
Key Takeaways:
- Pay close attention to the blue highlighted text displaying the dates to modify the terms.
- The system automatically calculates proration and future billing cycles, but manual adjustments can be made.
- Understand the difference between “Add to Invoice” and “Add and Configure” to control the level of customization.
💡 For more information about this and all other features in Visp, reach out to your Visp Client Success Team today.
Phone: 541-955-6900Email: success@visp.net
Open a ticket via www.visp.net/ticket