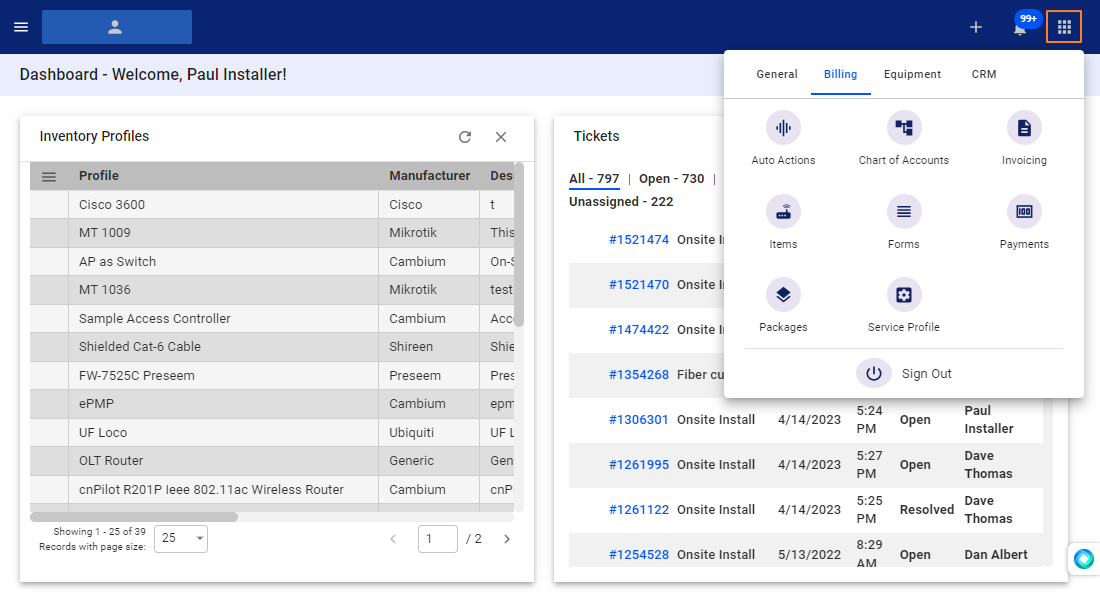
1. Click the nine-dot menu in the upper right corner to open the Visp Admin Page
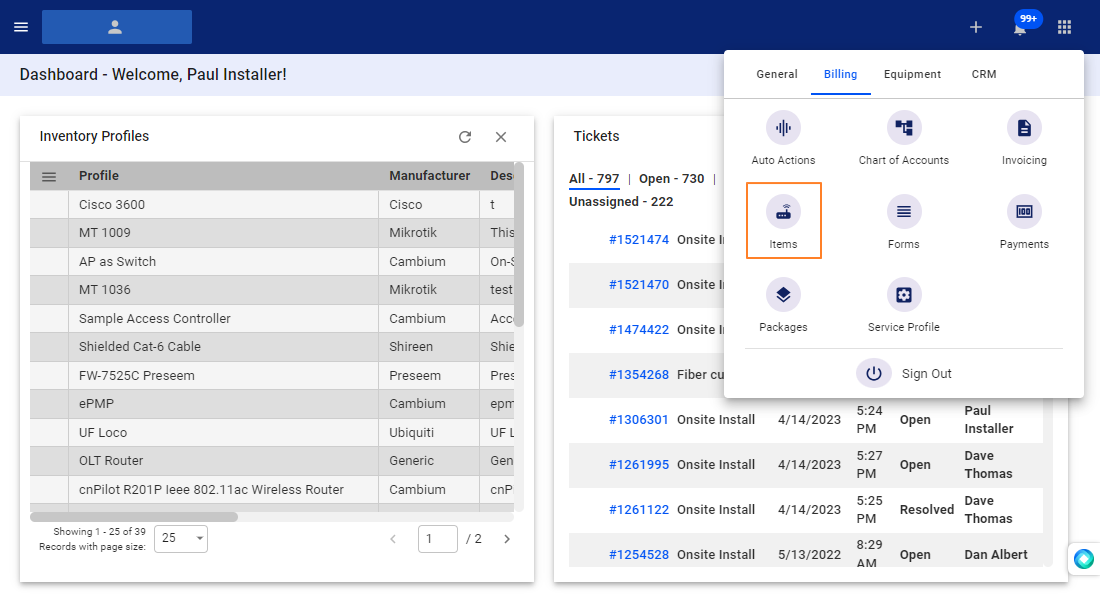
2. Click on Billing.
3. Select Items
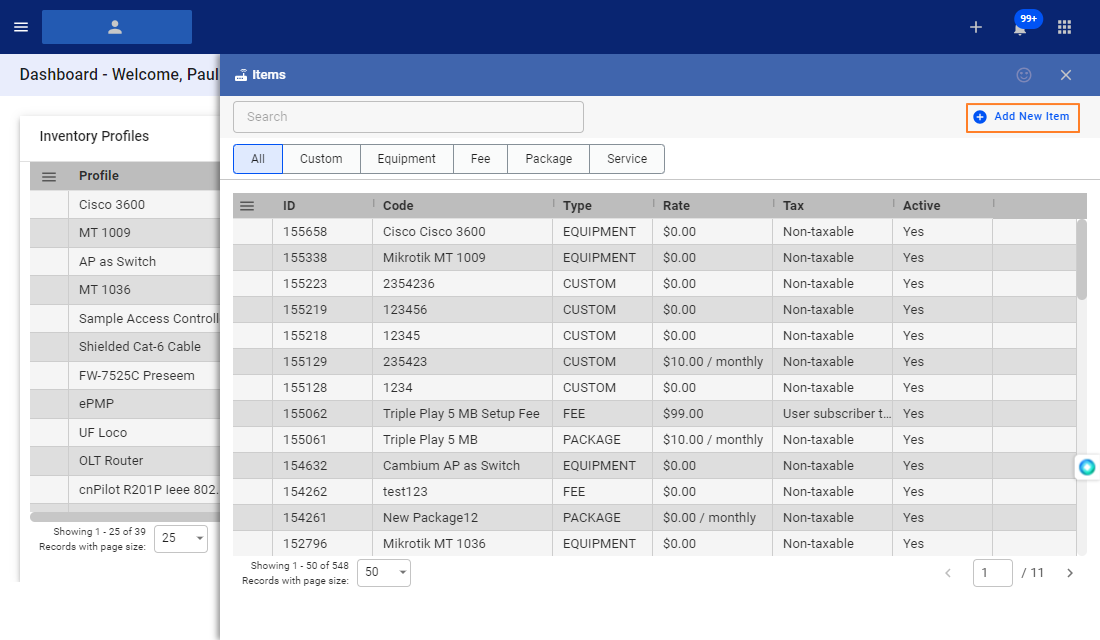
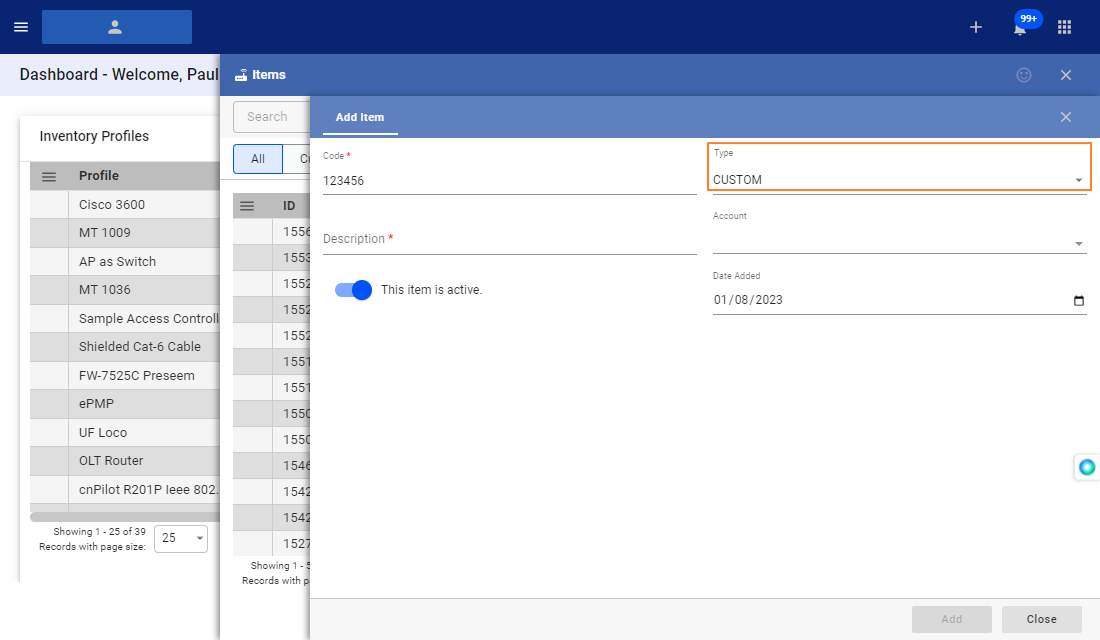
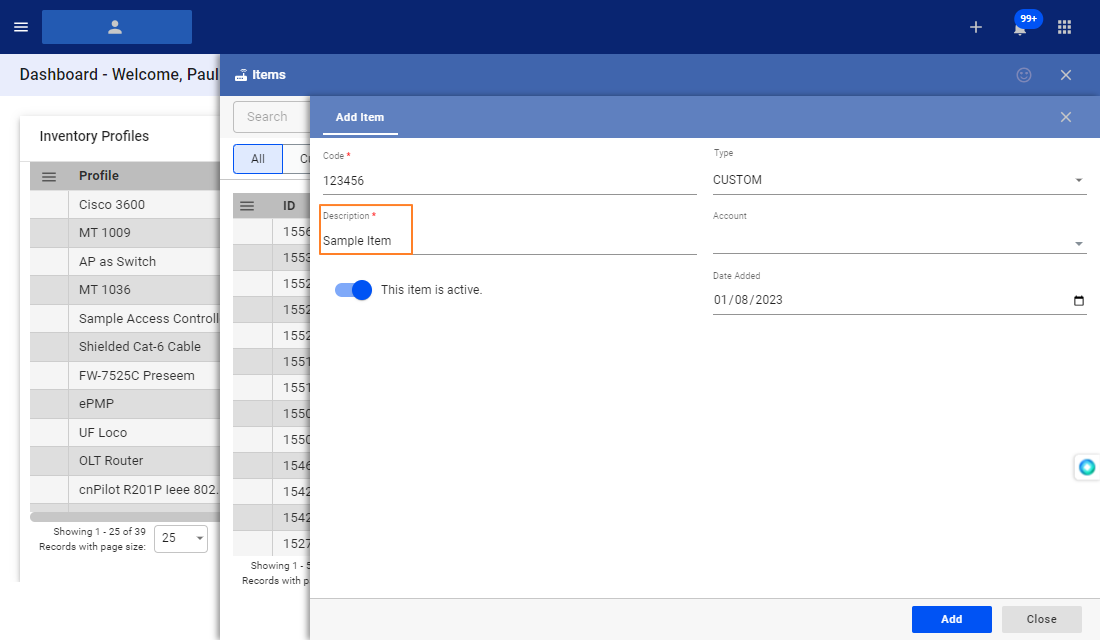
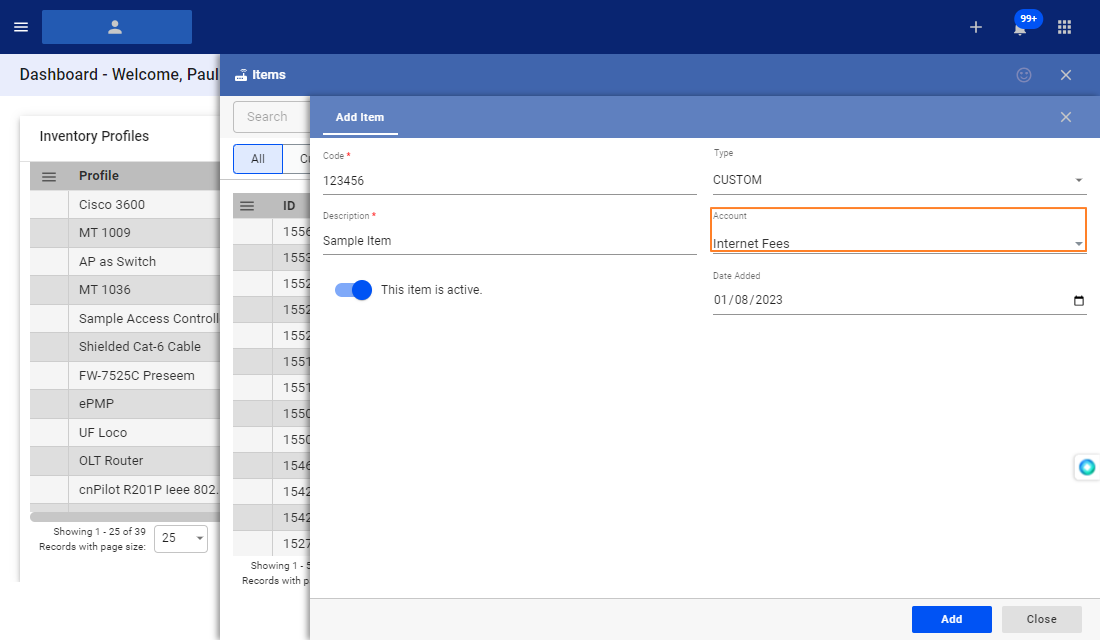
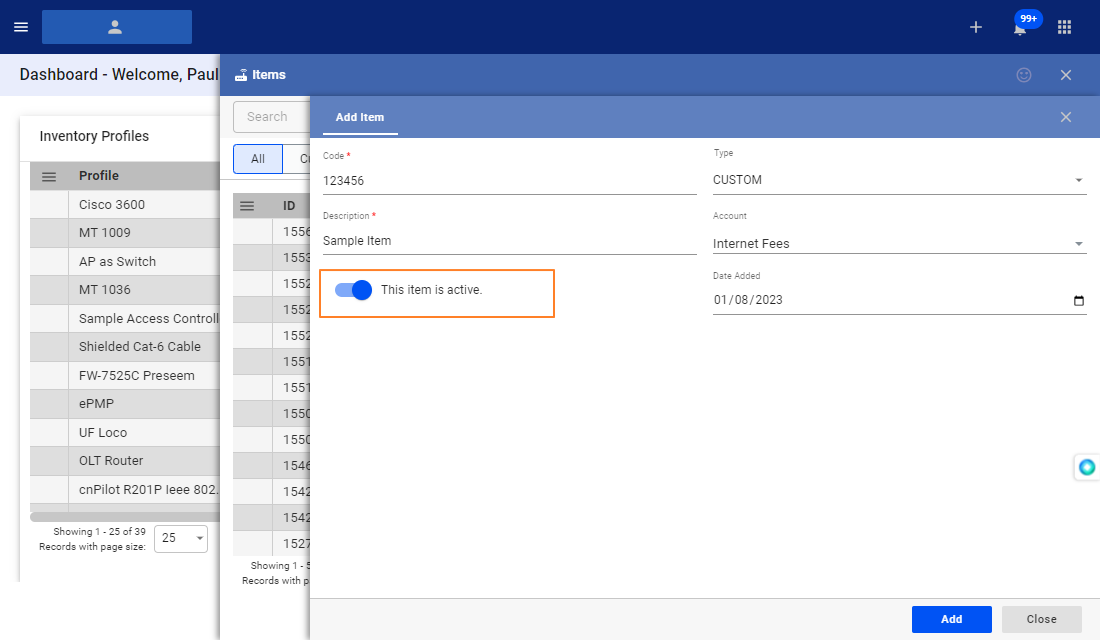
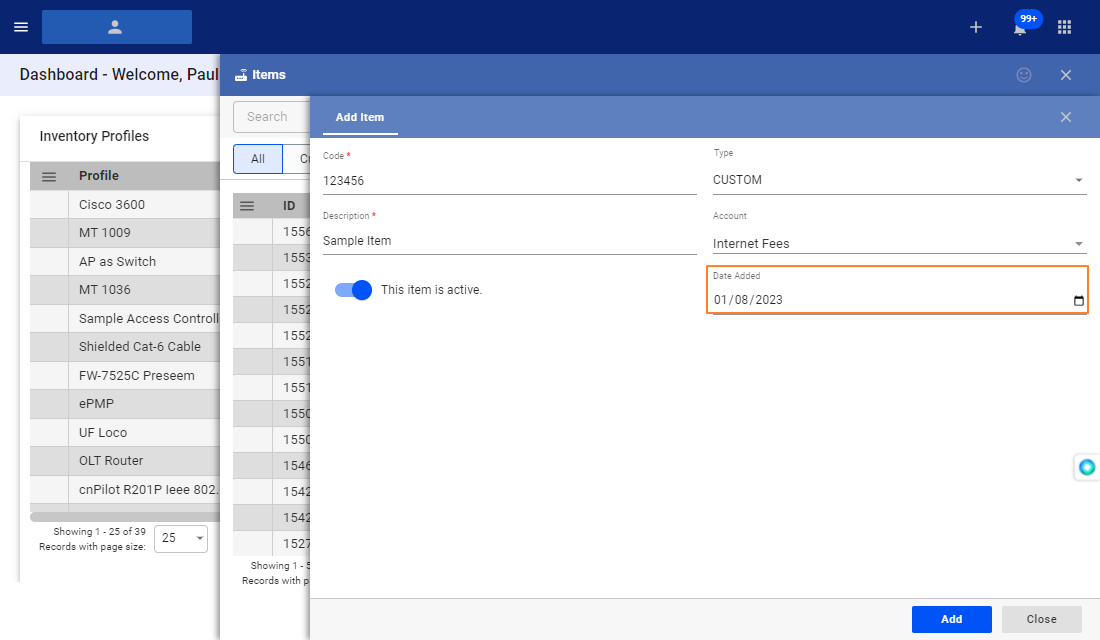
4. To create a new custom item that will be bundled or included in a package, follow these steps:
-
- Click on Add New Item
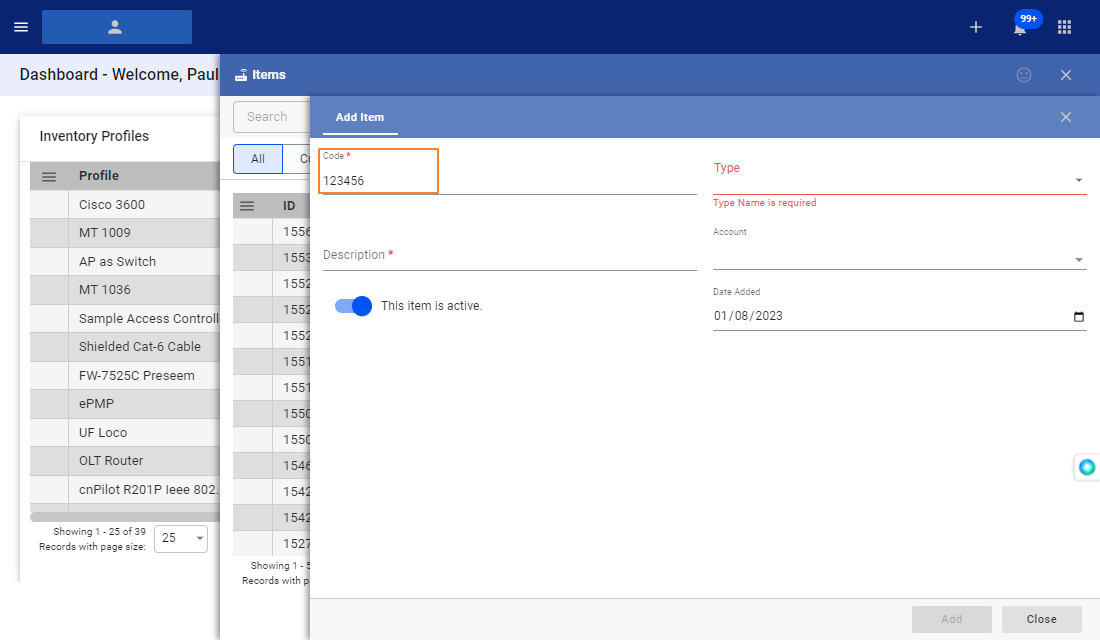
- Enter a unique item code
- From the dropdown under “type” Select “Custom.” You can bundle other types like Equipment and Fee with Packages.
- Enter a description.
- From the Chart of Accounts dropdown, select the appropriate account, or leave it blank.
- Confirm that “This item is active”.
- Select a date in “Date Added”.
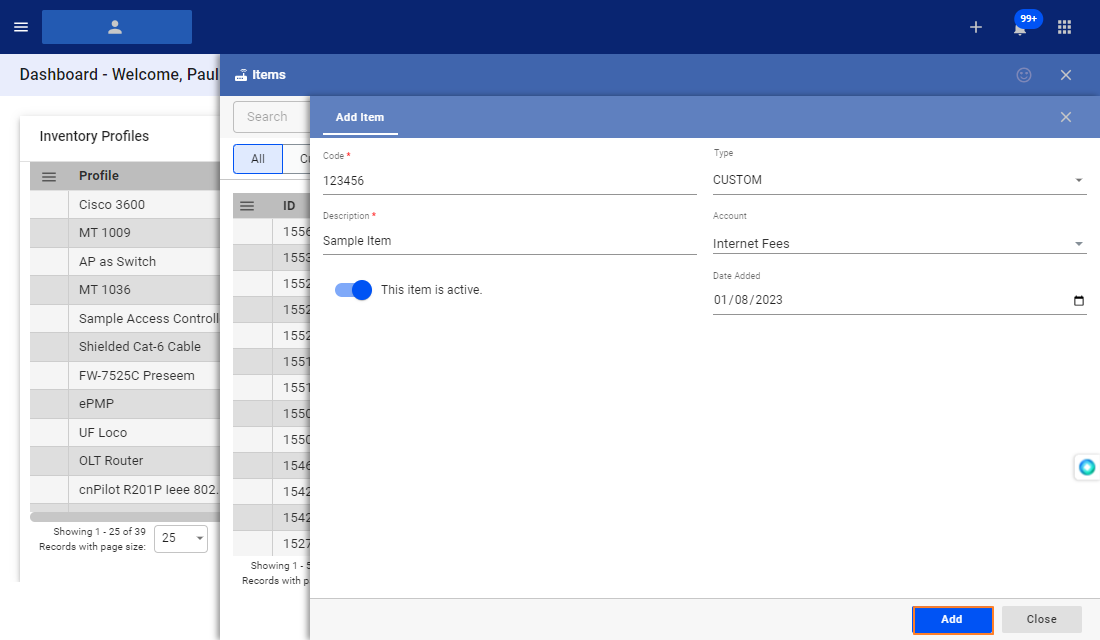
- Click “Add.”
- Click on Add New Item
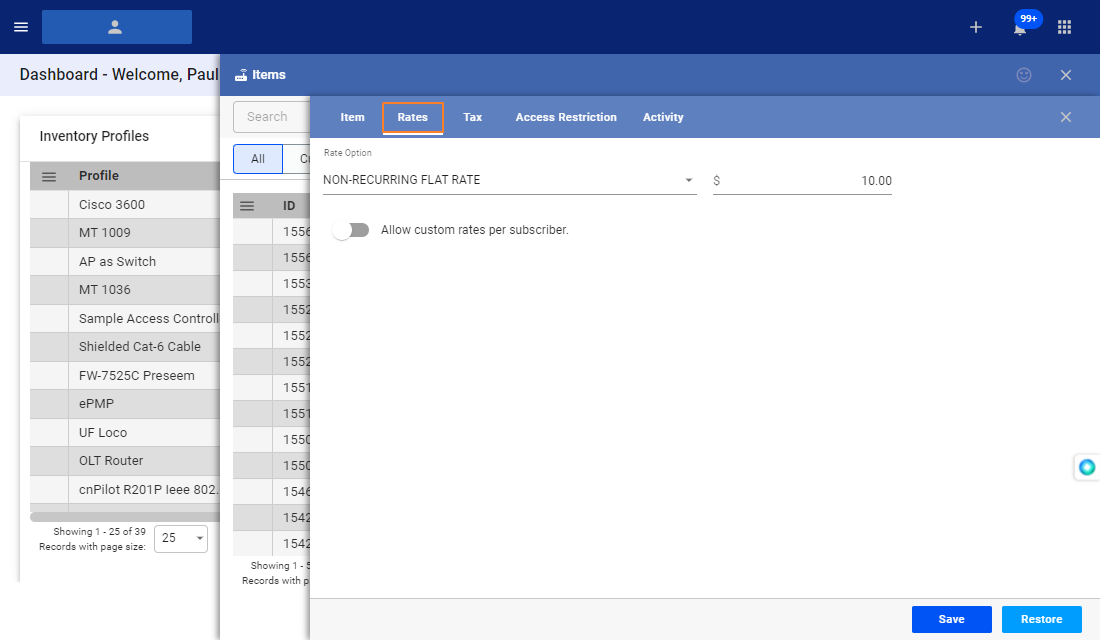
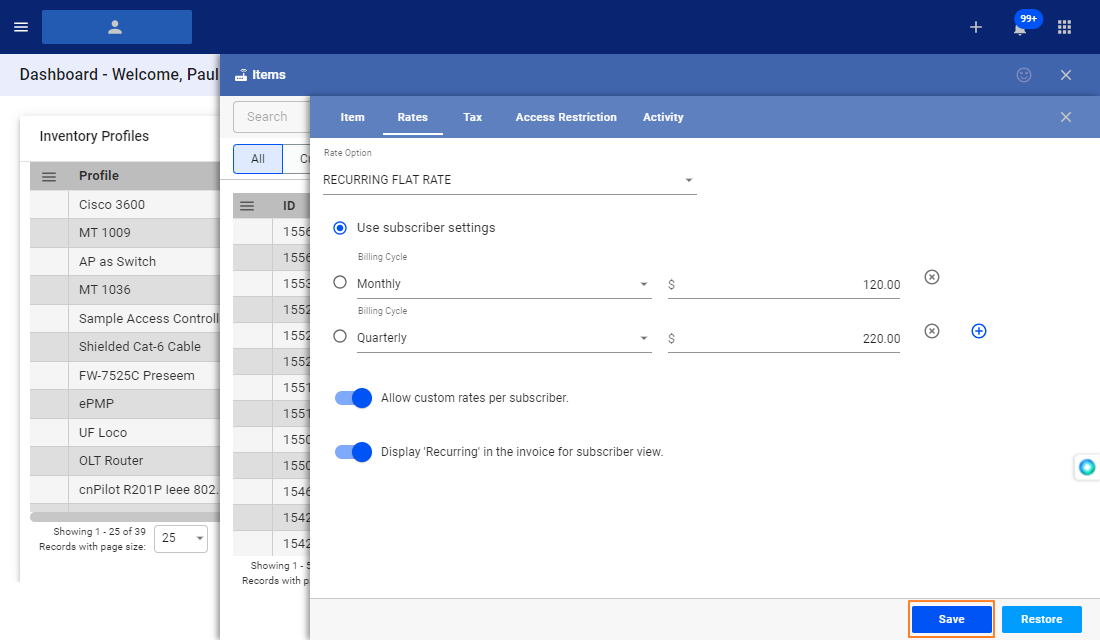
5. Click on Rates
-
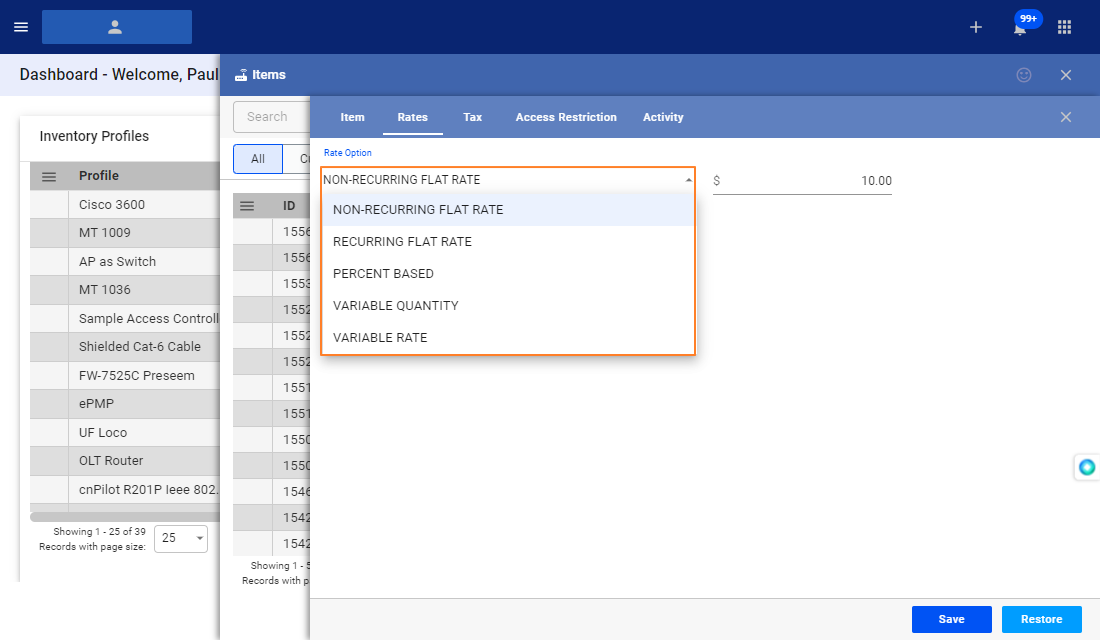
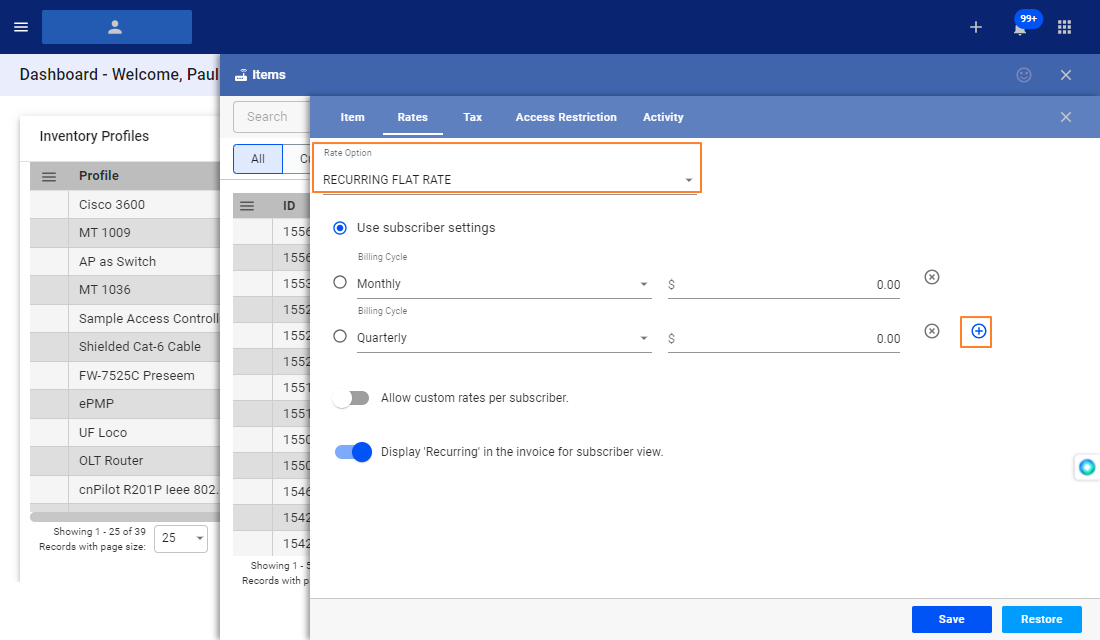
- Use the dropdown to choose a Rate Option.
- If set to a Recurring Flat Rate, click on the “blue” plus sign to add more billing cycles.
- If set to a Recurring Flat Rate, click on the “blue” plus sign to add more billing cycles.
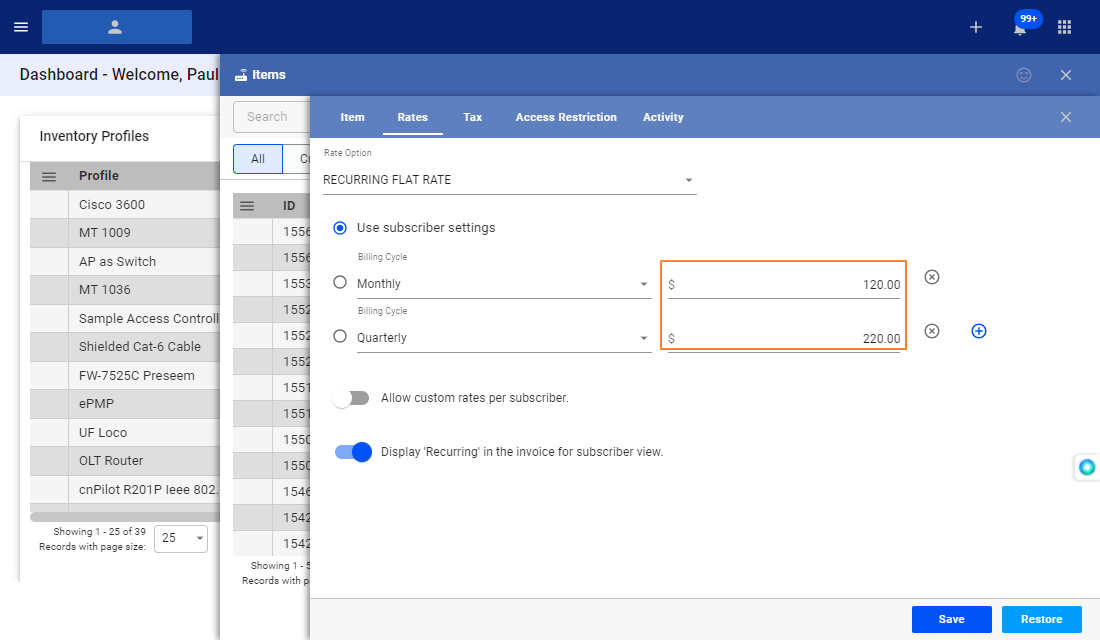
- Set the amount.
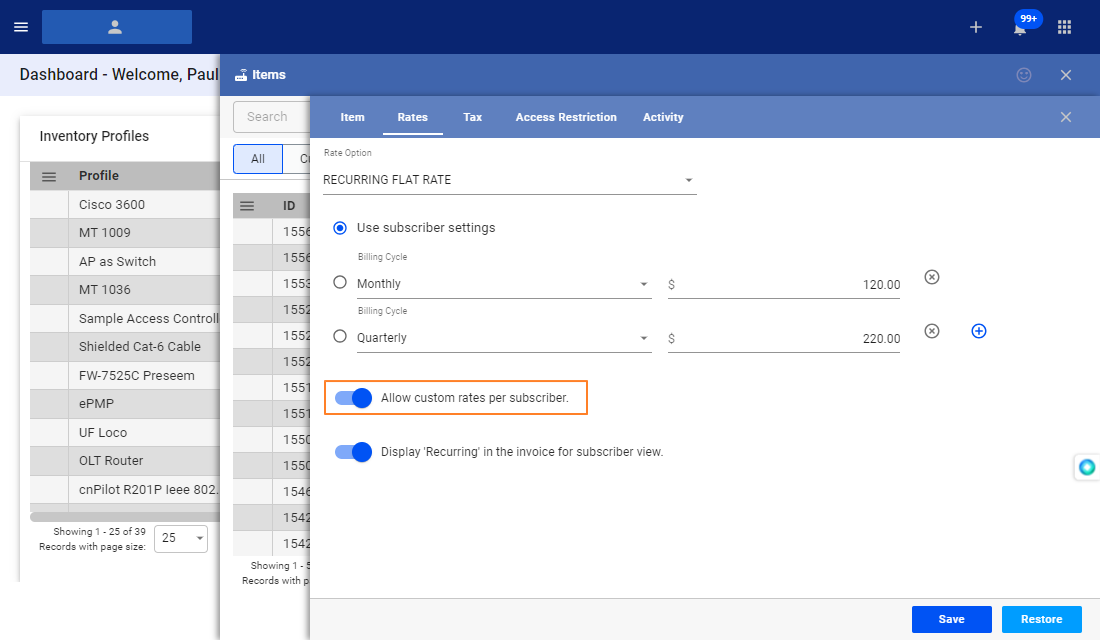
- Toggle, “Allow custom rates per subscriber.” if you want to set a custom rate for each subscriber.
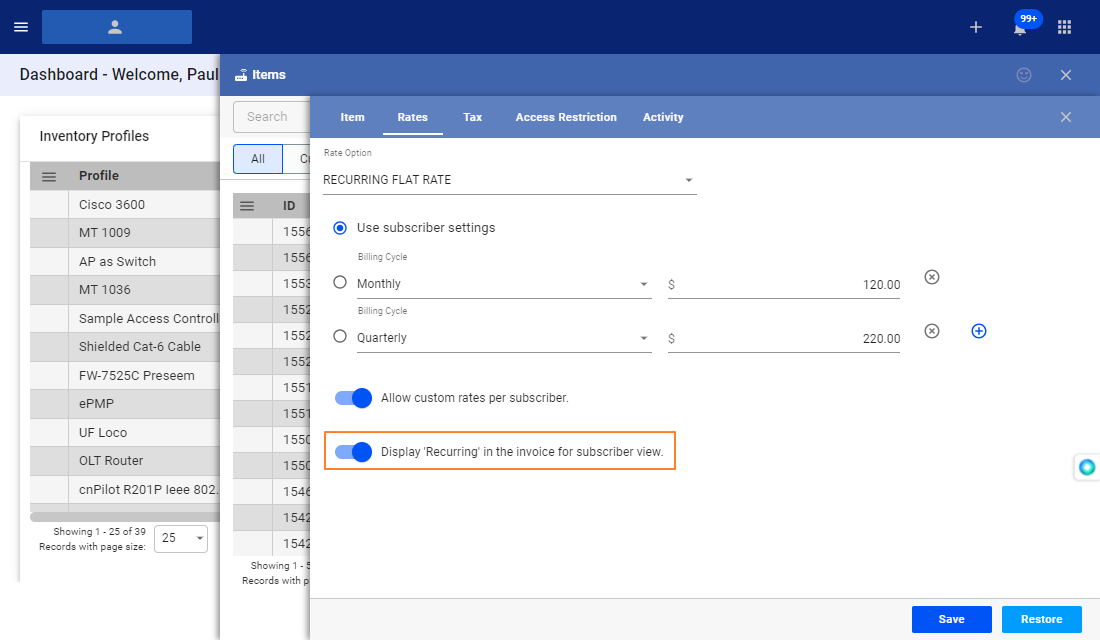
- If displayed, toggle “Display ‘Recurring’ in the invoice for subscriber view,” so recurring items show a ‘Recurring’ text or label on the invoice.
- Save your work.
- Click the X button, to close the item and go back to the main Items window.
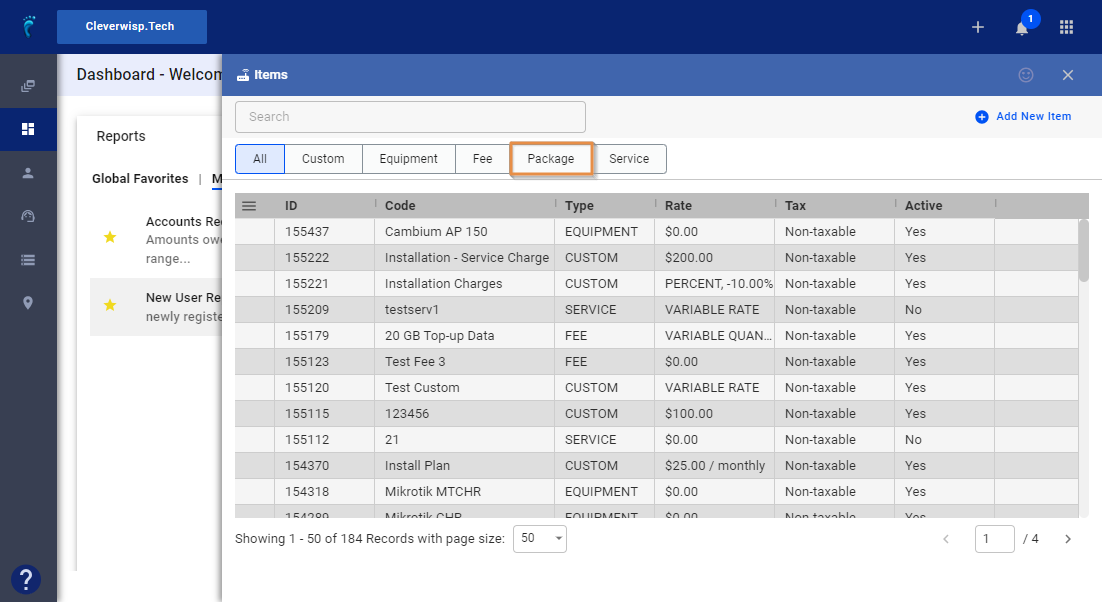
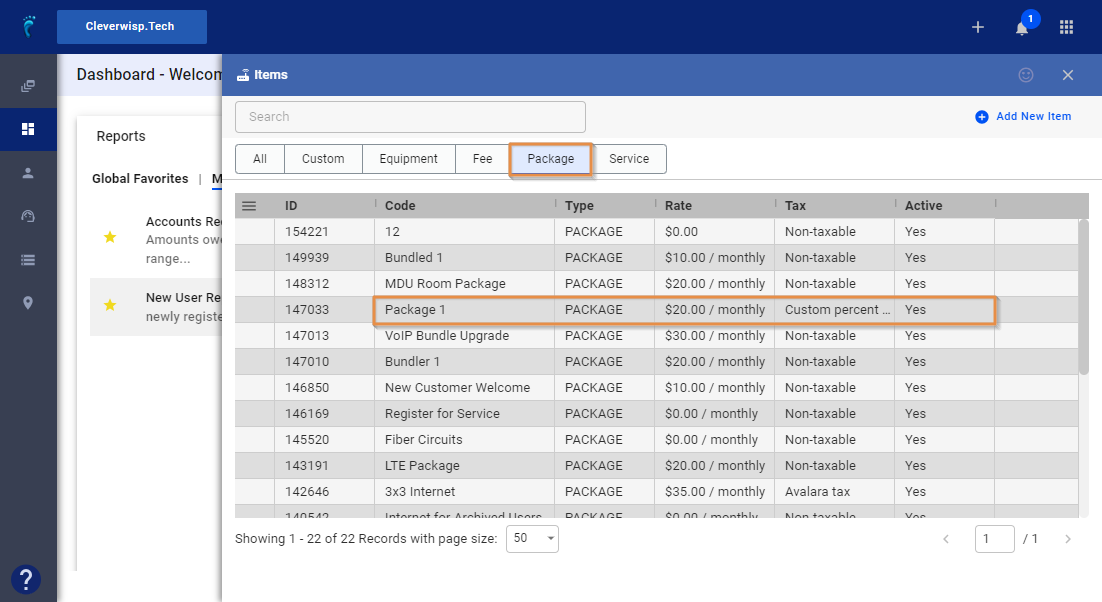
- From the Items window, click on Package
- Select a Package
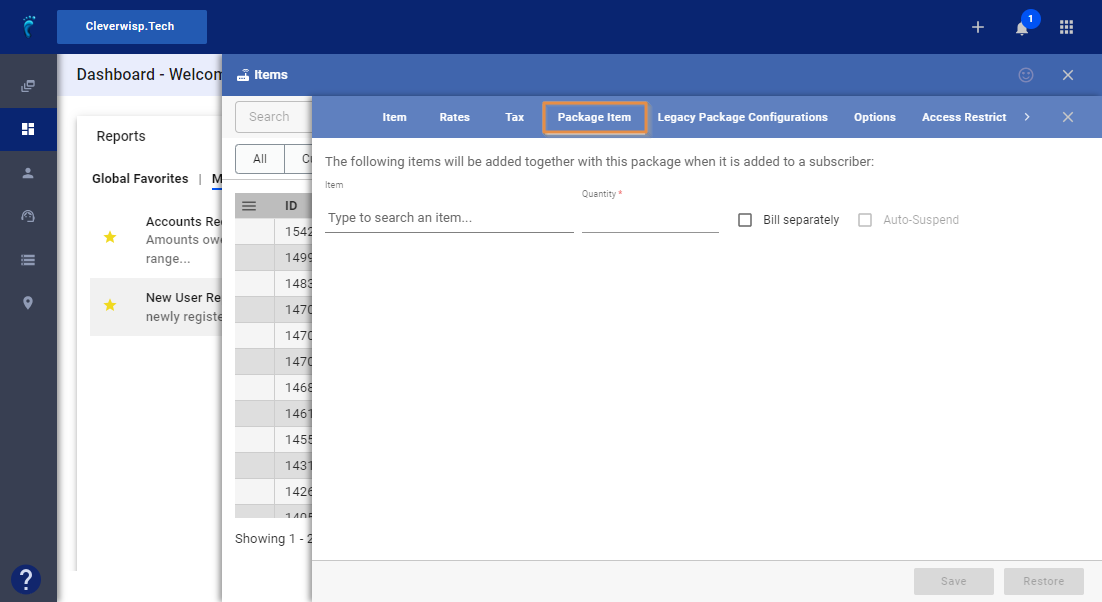
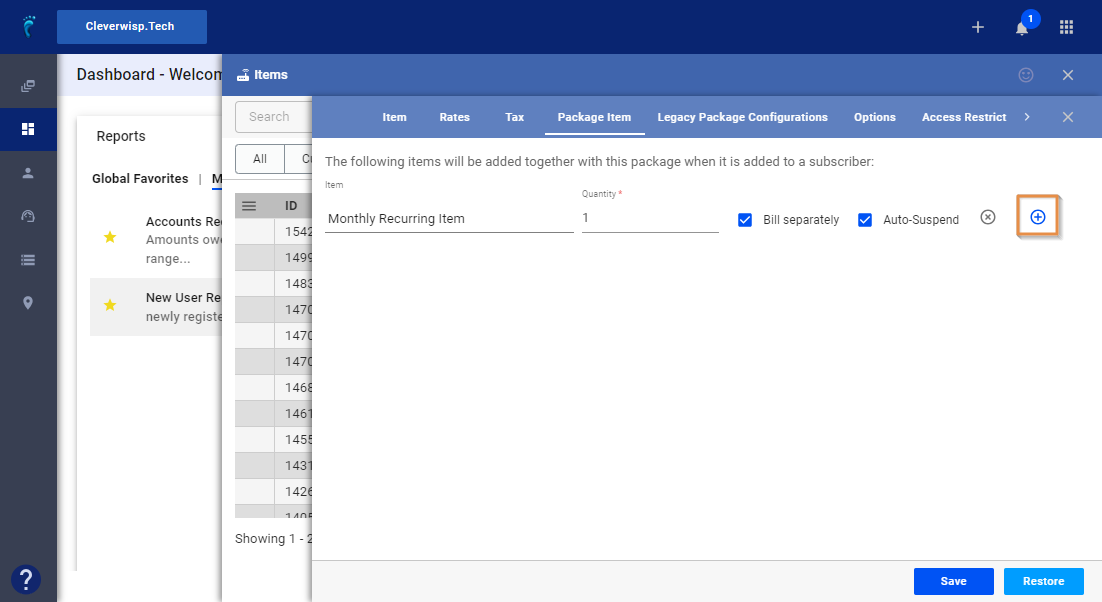
- Click on Package Item
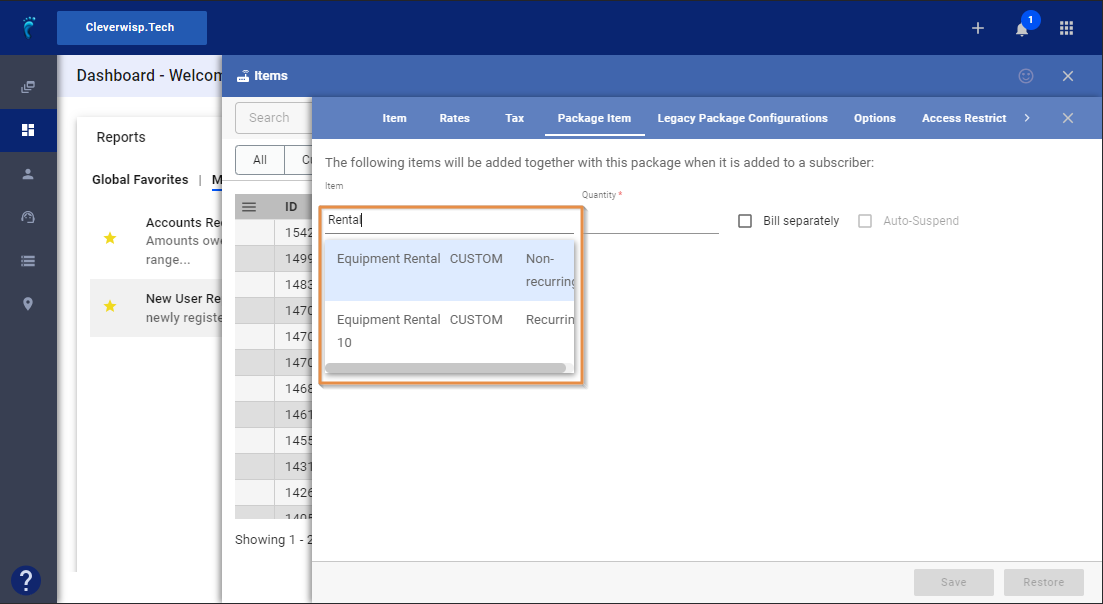
- Enter and search for an item from the list.
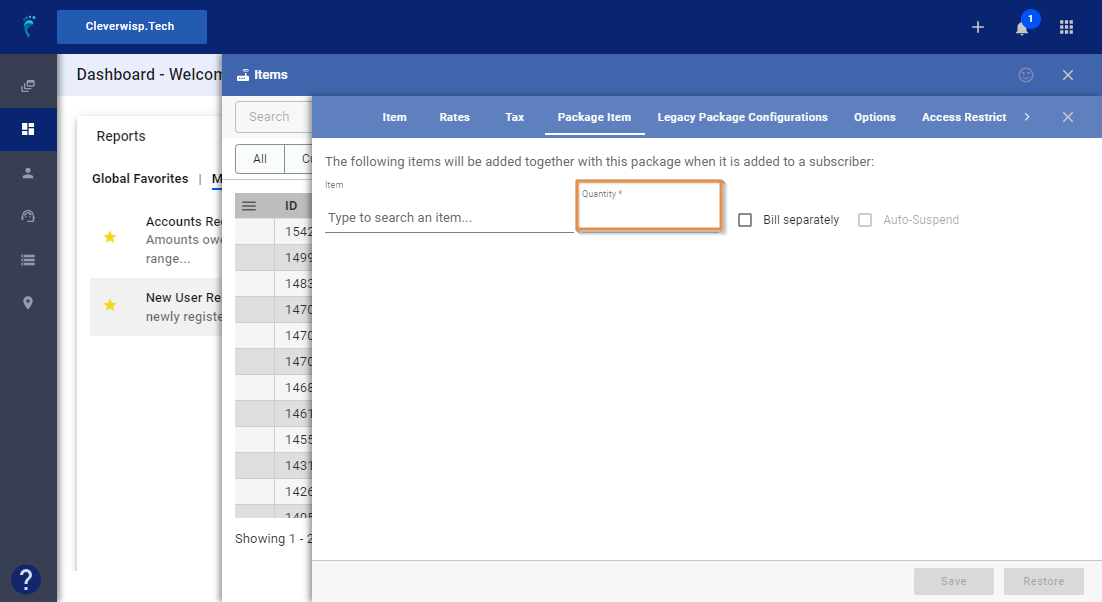
- Enter a quantity.
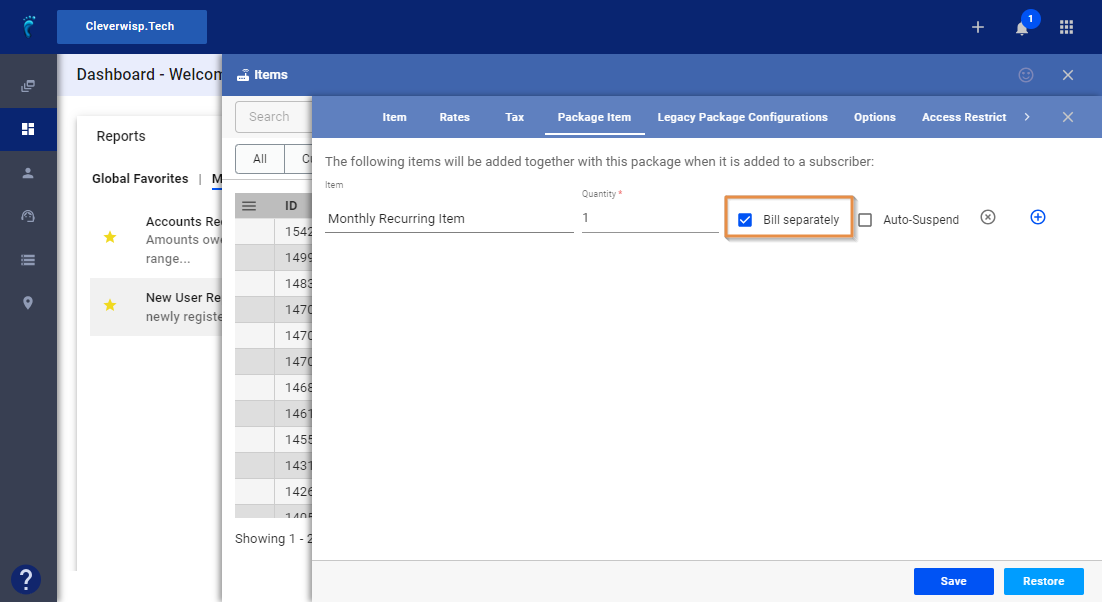
- Toggle, “Bill Separately,” to set a separate item description and cost from the package.
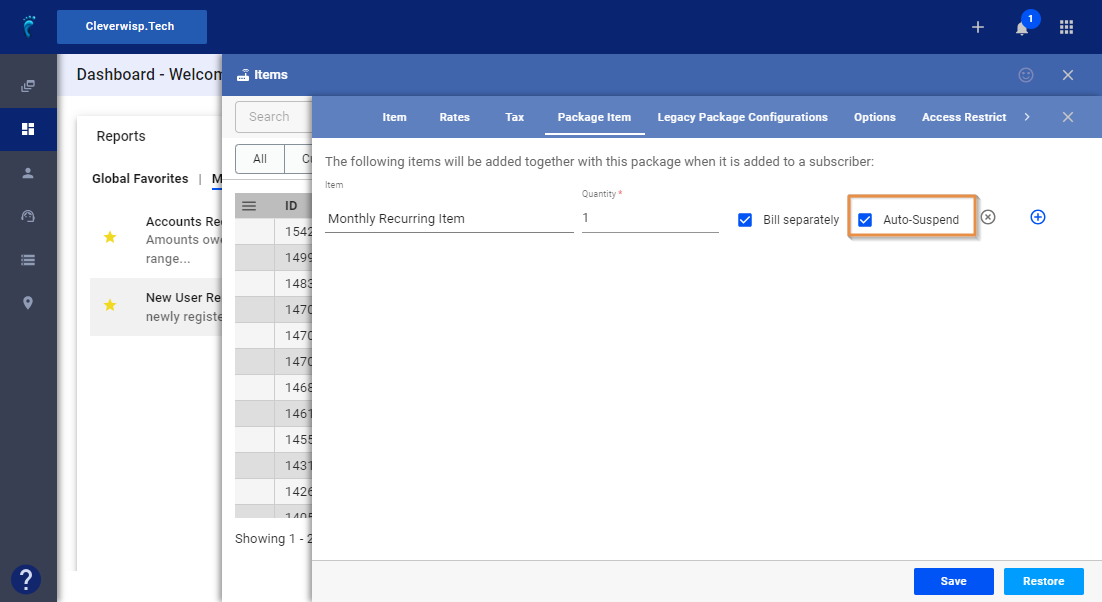
- Toggle, “Auto-Suspend” to suspend any recurring line item or billing if the package is suspended.
- Click the blue plus sign, to add more items.
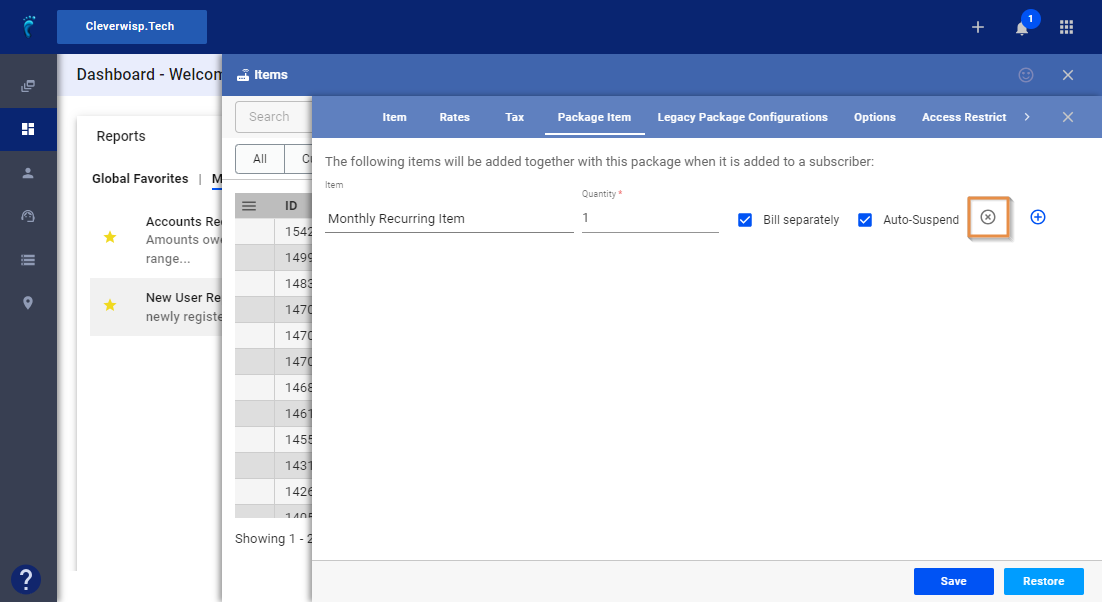
- Click on the x-button to remove items.
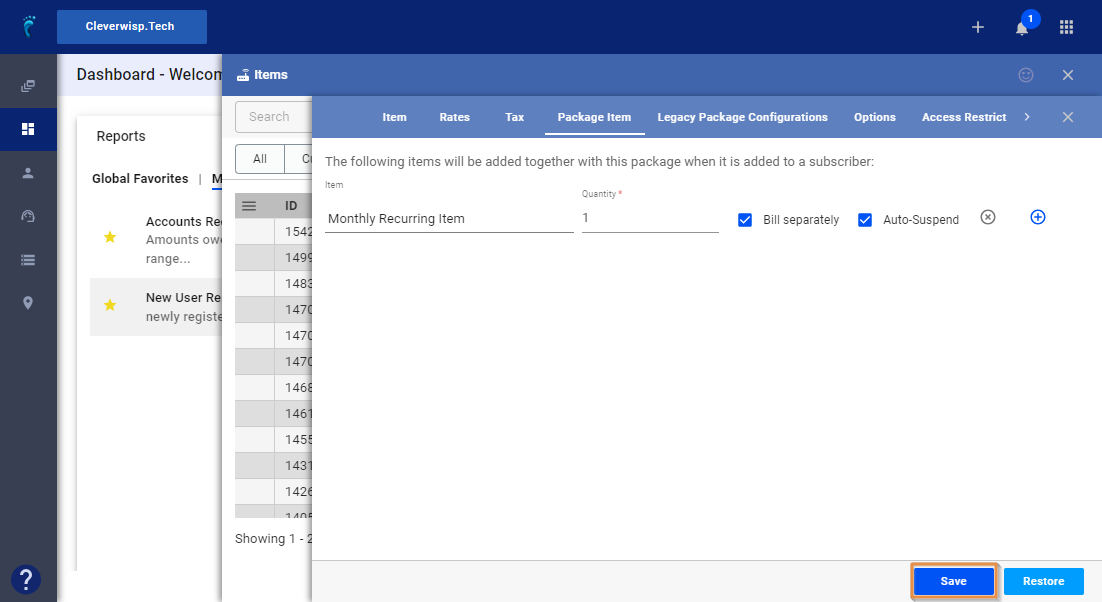
- Save your work.
- For more information, feel free to reach out to your Client Success Team.
- Use the dropdown to choose a Rate Option.


