

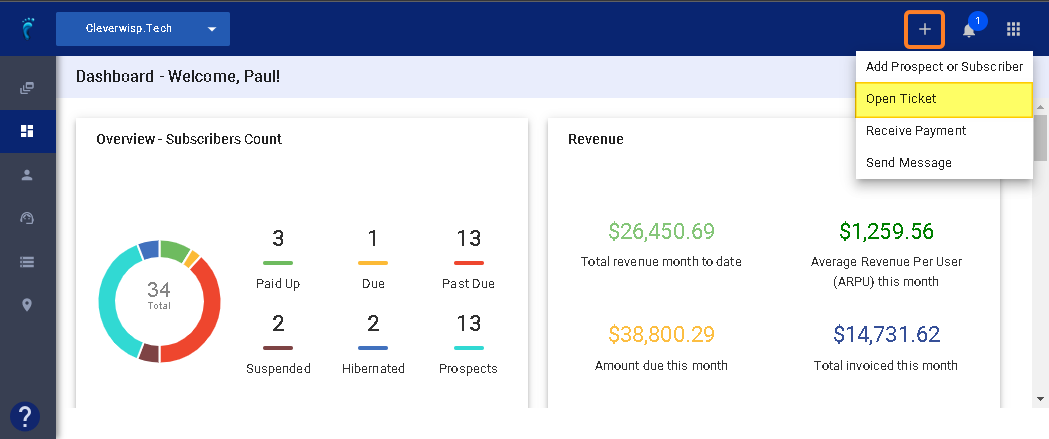
To add tickets to a customer, follow these steps:
- Click on the plus sign
+ - In the Subscriber field, type the ID or name, email, or phone number of the customer.
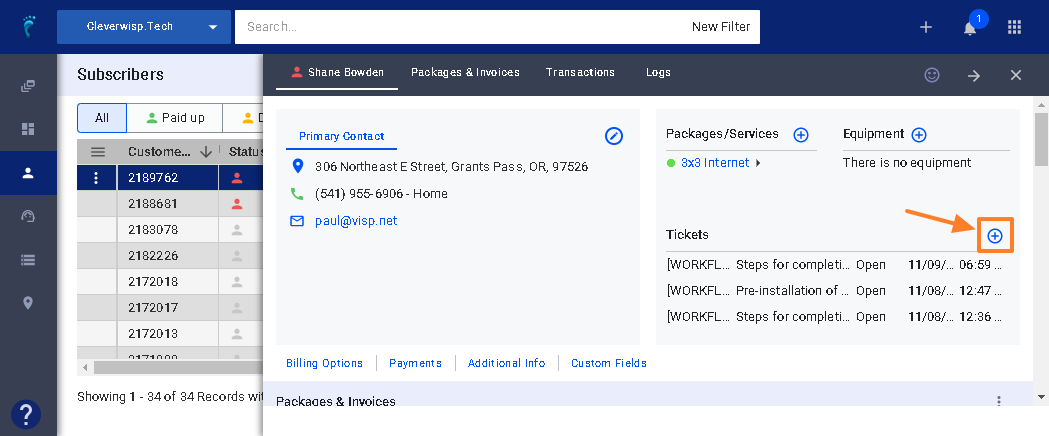
Alternatively, you can go to the subscriber’s list
- Select a subscriber.
- Click on the plus sign
+in the Tickets panel.
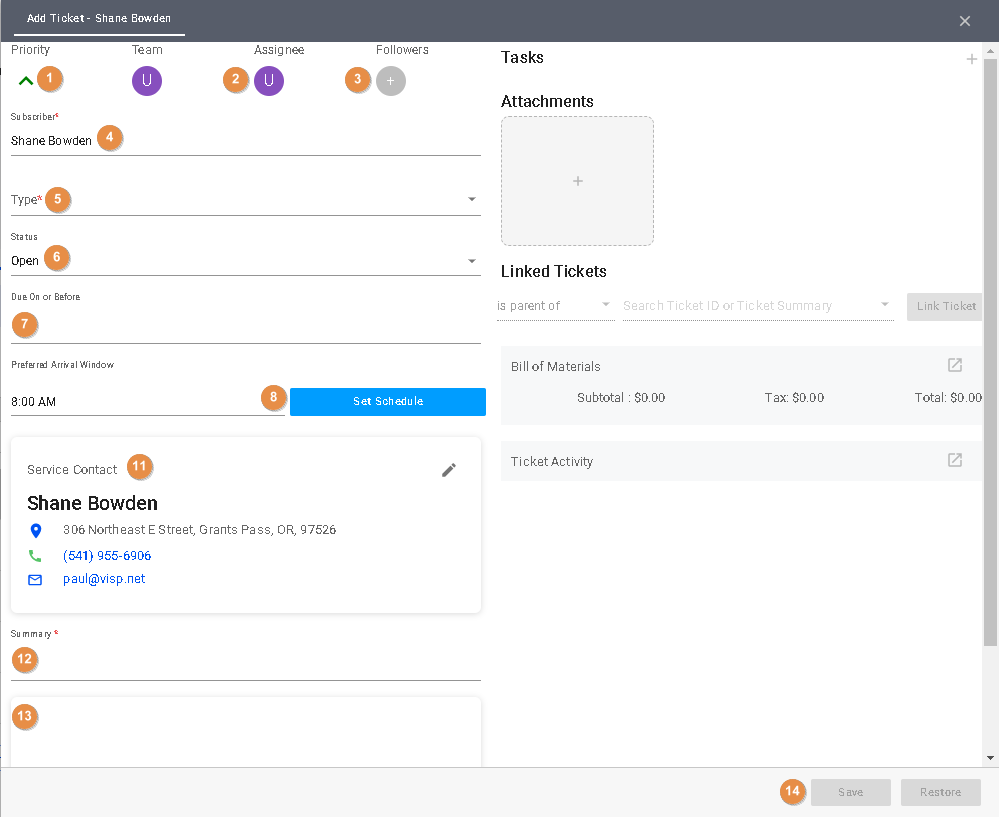
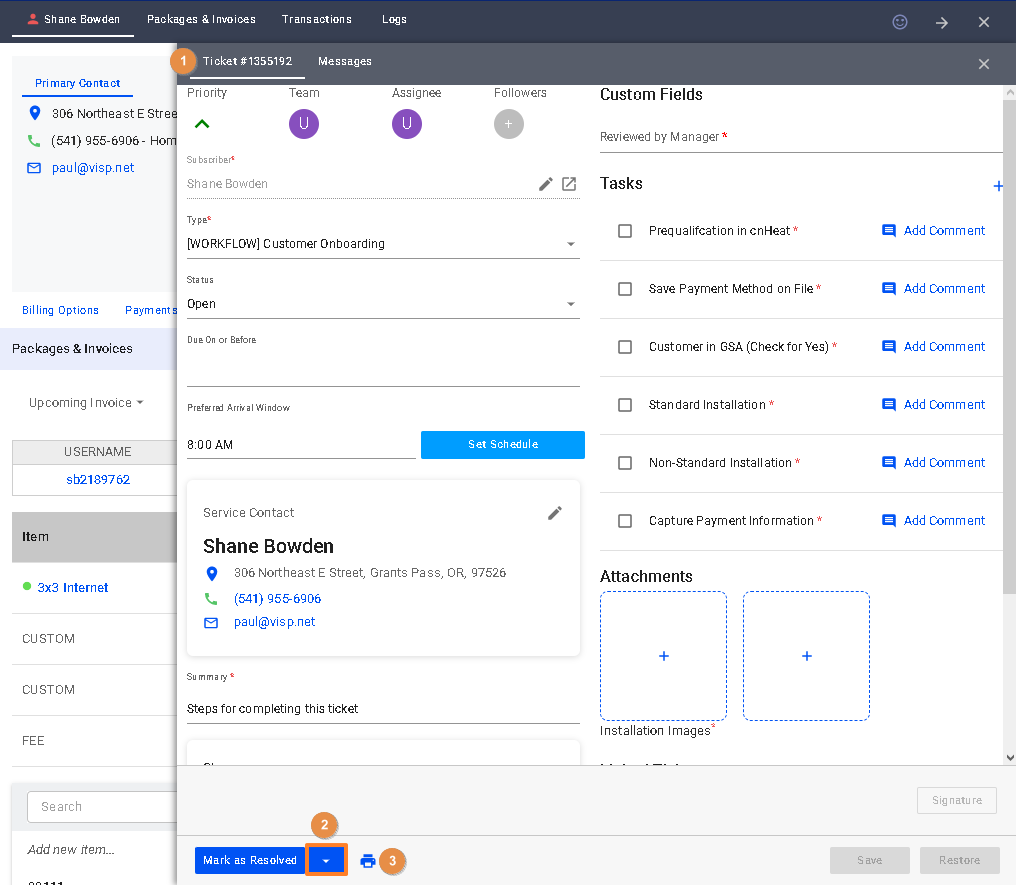
Once a Ticket is Generated
- Set the Priority for the ticket.
- Add the Assignee. This is your employee or technician who will be completing the requirements for the ticket.
- Add a Follower. The follower checks and makes sure that the task is completed, and in some cases, takes over if the Assignee is not available.
- If the Subscriber name is not populated here, you can type a name and the system will auto-suggest a customer for the field.
- Select the Ticket type or template to use. A ticket type contains pre-written instructions or details about a specific activity.
- Select the current status of the ticket.
- Set the Date and Time the activity is expected to be finished.
- If there’s an agreed or preferred schedule, click on the Set Schedule button.
- Select a current or future date on the calendar. Backdating is allowed but is not recommended.
- Set a duration for the activity by moving the toggle. Click on OK when you’re done.
- In the Preferred Arrival Window field, set a specific time or an interval in time during which the technician must arrive.
- Next in the Service Contact box, ensure that the Address, phone number, and email of the customer are populated. Clicking on the location pin opens the map and loads the exact
address of the customer in view. - The Summary field contains a brief label or title about the activity.
- The description box can be edited to show instructions about the activity or ticket.
- Save your ticket, to enable other options within the feature.
After Saving the Ticket, a Ticket ID or number is added to the upper-left corner of the window. Additional features like Tasks or Messages are now available.
- To add tasks to this ticket, click on the plus sign here.
- You may upload or attach images to a ticket by clicking on the plus sign.
- To link tickets together, select whether the current ticket is a parent, a child, or to be merged with other tickets in the system.
- Search the ticket by ID or summary on this field.
- Click on “Link ticket” when you’re done.
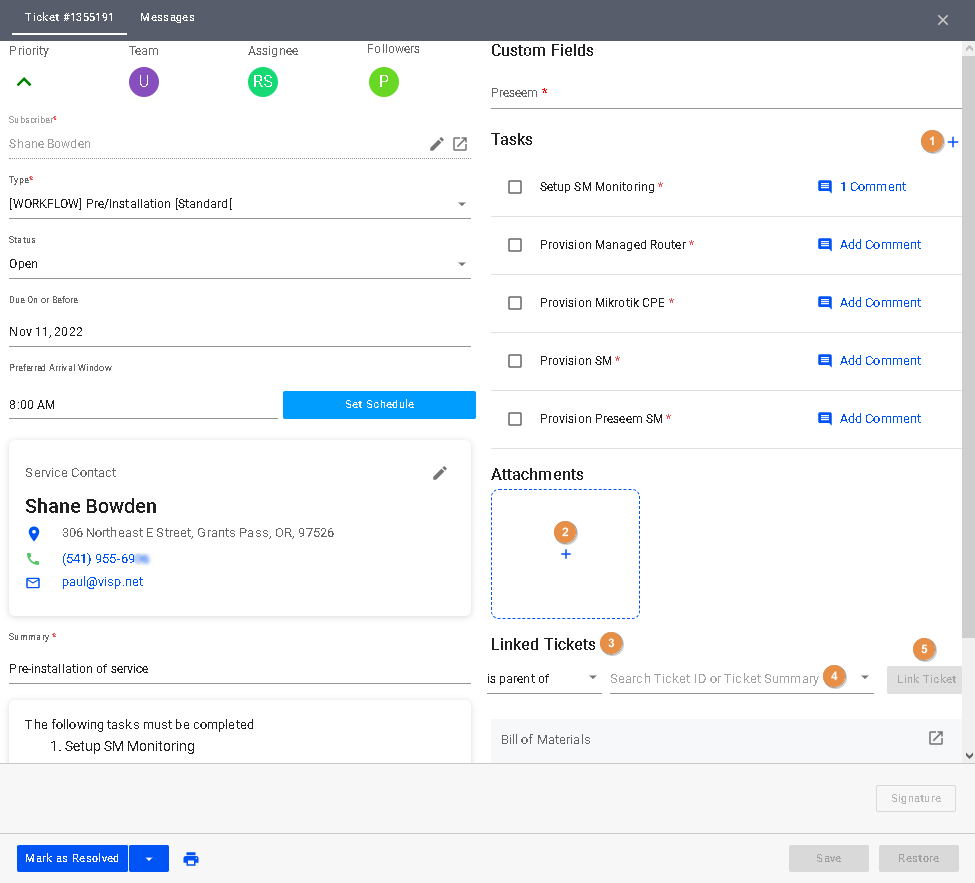
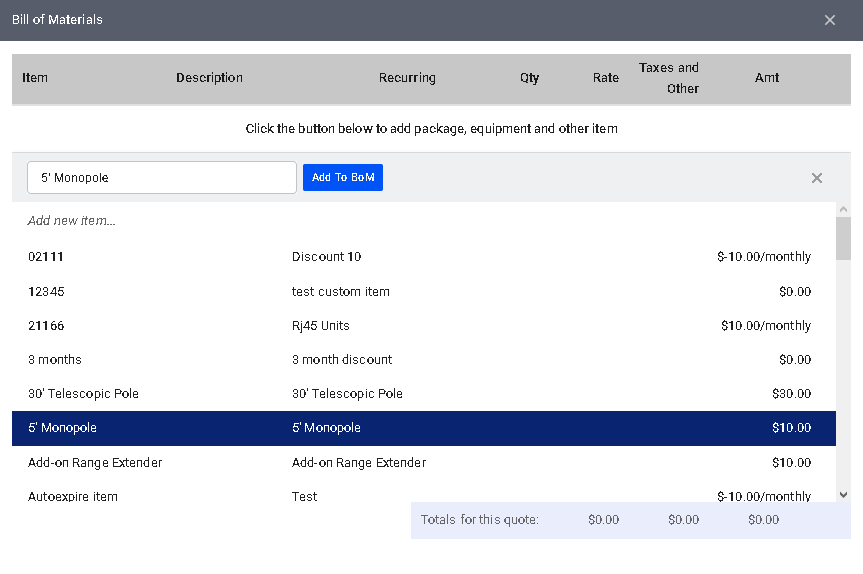
Bill of Materials
The external link opens the interface for the Bill of Materials, and you can enter Packages, Services, or Other items as additional charges to the customer. Once the ticket is resolved, the Bill of Materials is converted from a quote to an invoice in the system.
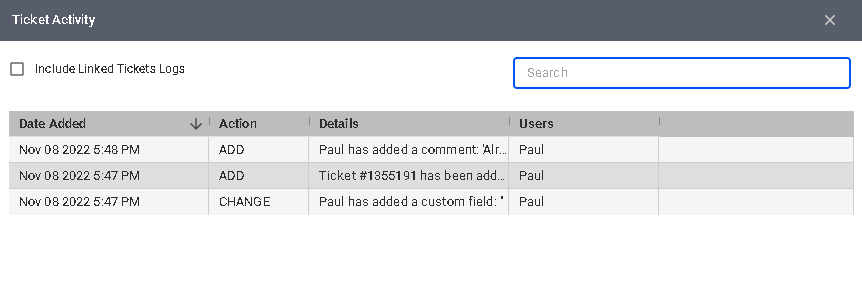
Logs
The Ticket activity records all the changes made to the ticket. To open the log, click here.
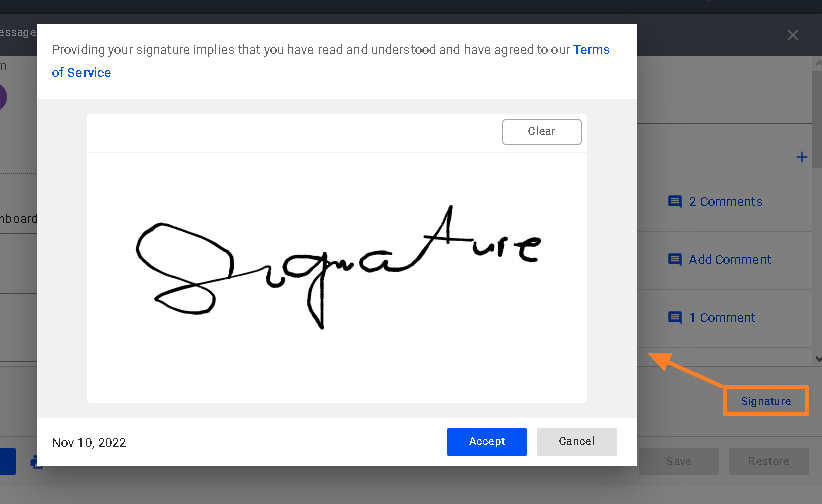
Signatures
A signature can be added to a ticket. The template or ticket type can also be configured so signatures are required before closing a ticket.
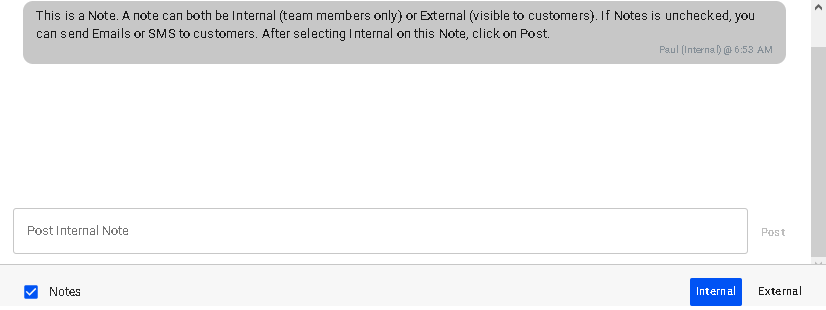
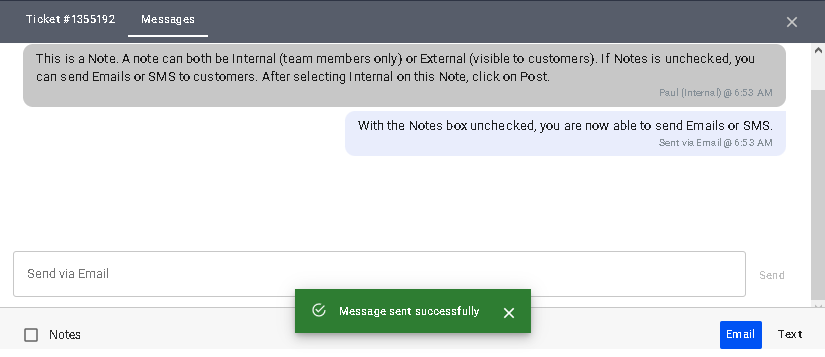
Sending Internal or External Messages
The Messages tab allows the technician and other employees to internally communicate about the status of the ticket. Toggle Notes to leave internal messages on the ticket. Uncheck the Notes box, for your external messages like email or an SMS to reach your customers.
Close, Resolve, Delete, and Reopen
- To return to the main ticket panel, click on the ticket number tab.
- To resolve, close, delete, and even reopen the ticket, click on the dropdown here, in the lower-left section of the ticket window.
- To print the ticket, click on the printer icon.
Remember to Save your changes when done.
For more information about this and all other features in VISP, reach out to your VISP client success team today.