Setting up a location ID for your internet package allows you to:
-
- Restrict the location where the package is displayed on the signup page.
- Apply location-based authentications.
- Use the location ID of the customer’s subscribed package to filter the upgrade package list on the Account Manager.
- Create segments that you can use for reporting, or for more targeted promotions in a given area (e.g. higher speed packages for a specific location).
Add a Location ID in your Packages
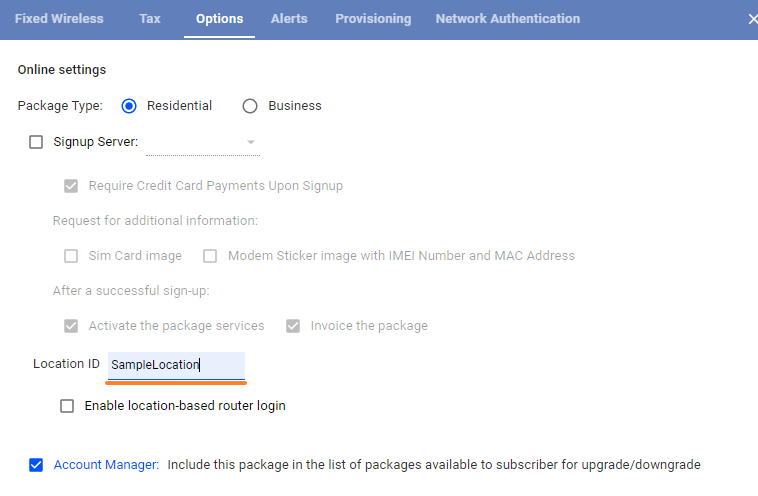
- Go to the
Main menu>Billingtab >Packagesand select the package you want to add a location ID to. - Click on the Options tab and scroll down to the Location ID field. Type the location ID you want to use.
- Click Save.
Location-based Signup (Hotspot Method)
The hotspot supports location-based signup and here’s how to configure it.
- Enable the location ID option on your portal page. Go to the
Main menu>CRMtab >Portals>Online Signupand check the location ID option.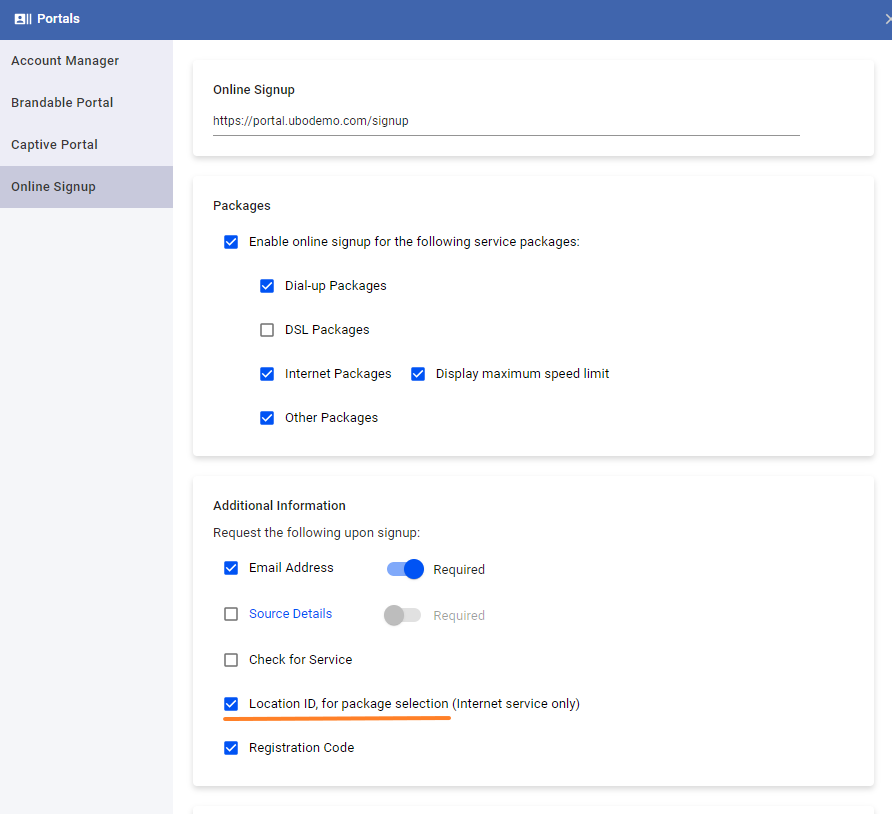
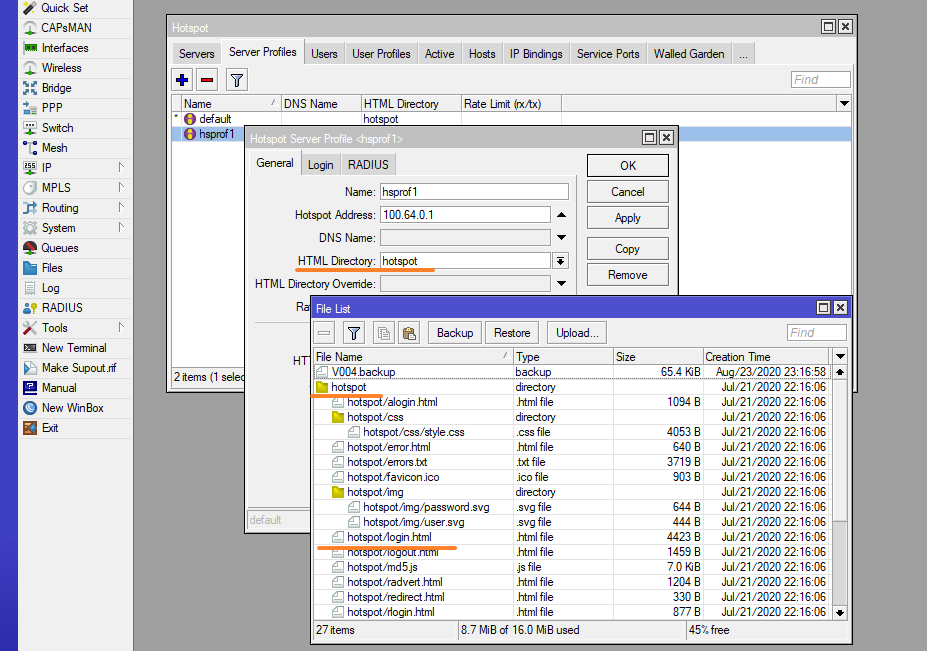
- Generate the login.html file. This will be stored in the hotspot folder of your Mikrotik router, for the new site location. Populate the fields below for your ISP domain (e.g. ubodemo.com) and the label Location ID (use a short label). Use the “Generate Login.html File” to download a customized login.html which will be placed in your router.
- Drag the login.html file from your download folder to the hotspot folder on the file listing. Refer to the video below for instructions:
Location-based Signup (Static Method)
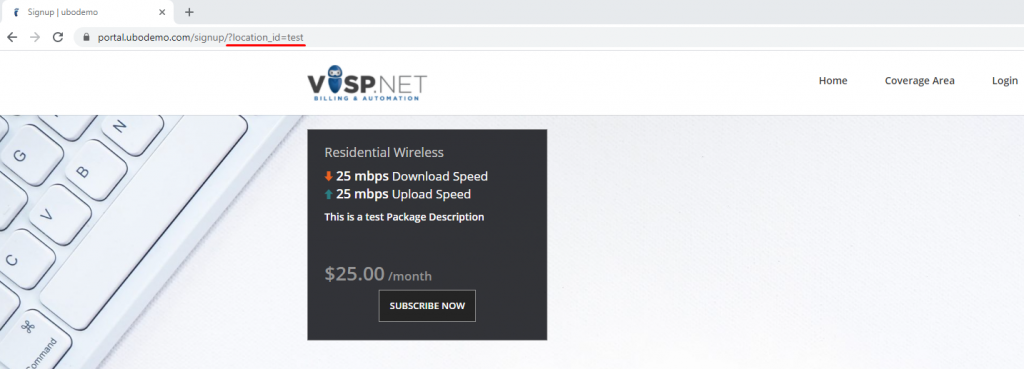
With this method, location ID is added manually to the link or URL of your signup page. This can be used to provide a specific link to your signup page from your website.
- Enable the location ID option on your portal page. Go to the
Main menu>CRMtab >Portals>Online Signupand check the location ID option. - Add a URL parameter to your signup link.
- Add a location_id key to the URL and location id of the package as the value for it.
Location-based Authentications (Hotspot Only)
Add a Location ID in your Packages and Enable the location-based router login
- Go to the
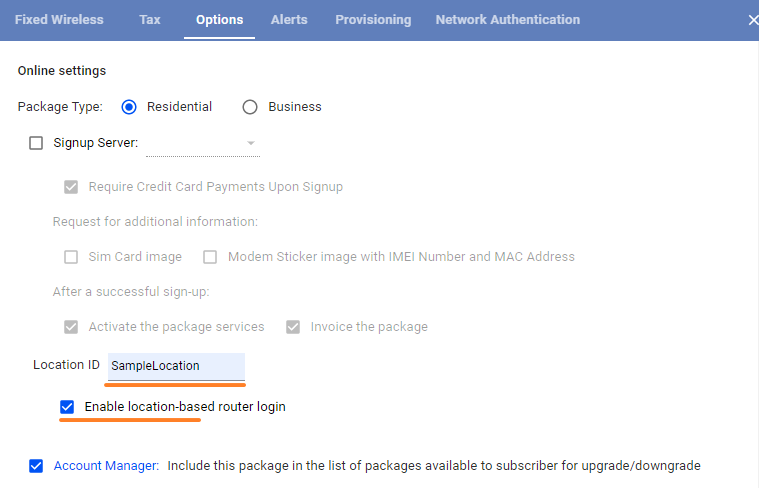
Main menu>Billingtab >Packagesand select the package you want to add a location ID to. - Click on the Options tab and scroll down to the Location ID field. Type the location ID you want to use.
- Click the option to enable the location-based router login
- Click Save.
Add a Location ID as Location Name to the Hotspot Server Profile
- Login to your MikroTik router.
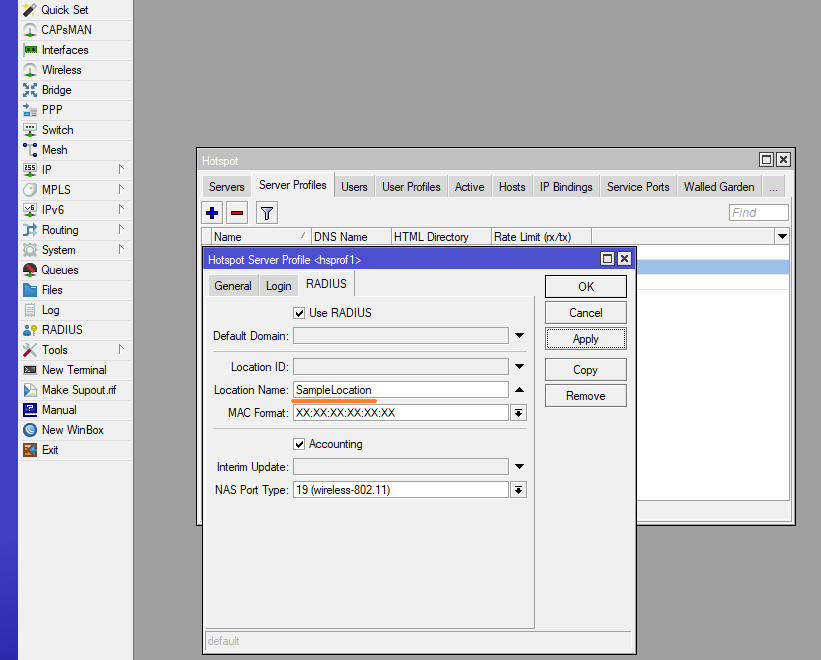
- Go to IP>Hotspot>Server Profiles. Double click the server profile to select the profile you use for your hotspot servers.
- In the Hotspot Server profile window, go to RADIUS tab. Fill in the Location Name field as shown below. This should exactly match the location ID of the package/s you want to apply location-based authentications.
Subscribers with location ids specified in the package are able to login or authenticate only at this access controller. Other subscribers whose location-based authentication setting is disabled can still login in to this AP.
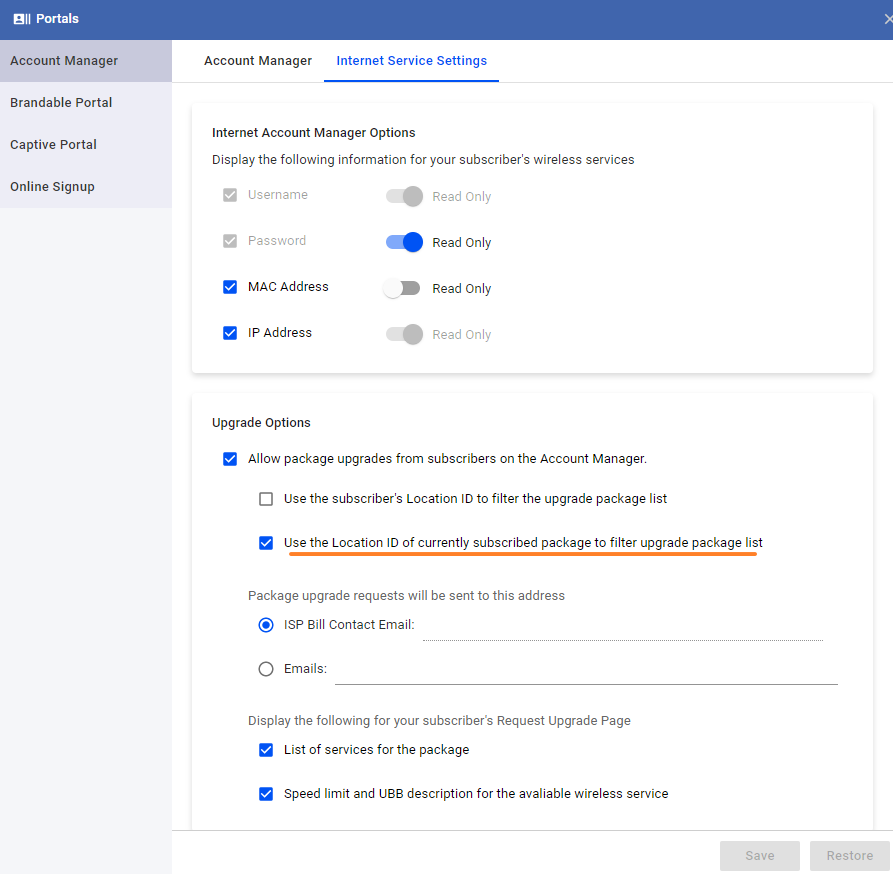
Use the Location ID to Filter the Upgrade Package List on the Account Manager
The Location ID can also be used to filter the upgrade package list on the Account Manager. Here’s how to do it:
- Go to the
Main Menu>CRMtab >Portals - On the portal window, click on the Account Manager
- Enable the “Allow package upgrades from subscribers on the Account Manager”
- Enable the “Use the Location ID of the currently subscribed package to filter upgrade package list”


