Accounting Controls
Accounting controls allow you to select different options when closing invoices and affect how statements will be displayed.
To access it, go to the Main Menu > Billing > Invoicing > Accounting Controls.
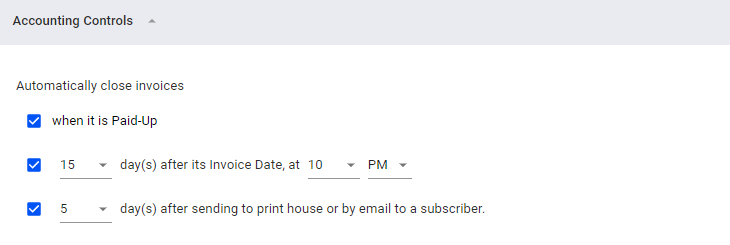
Closing an Invoice
Toggle or select how you want invoices to close.
- When the invoice is already ‘Paid-up,’ by the subscriber.
- When a specific day or time occurs.
- Select the day and time you want your open invoices to close.
- When you select ‘30‘ from the dropdown this sets invoices to be closed every last day of the month.
- After invoices are sent via email or go to the print house for printing.
- Select the number of days after an invoice is sent to the print house or attached in an email to the subscriber for it to close.
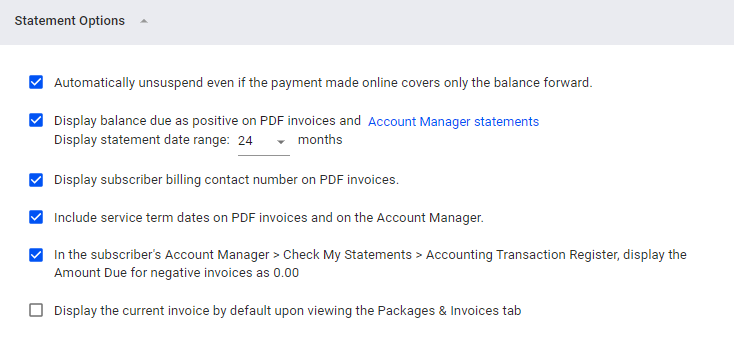
Statement Options
- Tick the ‘Automatically unsuspend subscriber’ checkbox to unsuspend a subscriber when the payment made settles the balance forward.
- To display a positive balance due in the subscriber’s statement or record in the Account Manager put a check in the ‘Display balance due as positive‘ field.
- To preview your work before saving the changes, click on the ‘Account Manager statements.’
- Set the default month range of transactions that would show in a subscriber’s statement by selecting from the Default statement date range drop-down.
- If you want to show subscribers’ billing contact numbers on their invoices, check the option to Display subscriber billing on the PDF invoices.
Payment Distribution
- Toggle to ‘Order invoices to apply payments by date in ascending order to organize payments in a FIFO (First In, First Out). Payments are applied to the earliest invoices generated by the system up to the most current.
- Available payment amounts can be taken from automatic payments and payments made via the Account Manager, and can be applied to unpaid invoices, debit memos and newly generated invoices.
Merchant Accounts
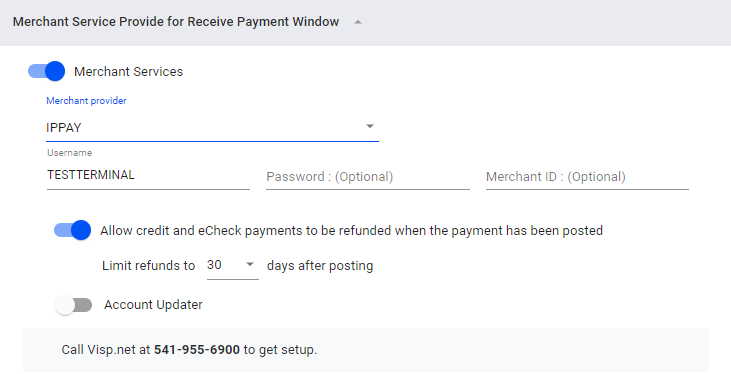
Enabling this feature allows you to receive either credit card or echeck payments or both depending on your merchant provider. Setting up your merchant account in VISP is pretty straightforward. Use your Merchant Account, which can be:
- IPpay
- Authorize.net
- PayPal
- ProPay
- Oriental Bank (Puerto Rico)
- Stripe
- Payment Express
- PlugNPay
Optional:
- You can enable VISP to process refunds, and you can set the number of days, from the original transaction date, within which to allow a refund to happen.
- Note: At the moment, refund processing works with IPpay and Authorize.net.
- Account updater
- Account updater only works with IPpay.
- The IPpay Account Updater connects and retrieves cardholder information from their bank, and ensures that everything is fully up-to-date in the VISP software. New card numbers, date of expiry or the security number can be automatically retrieved using the Account Updater tool.
- It also helps an ISP easily verify ACH payments, and automatically void payments in VISP should a transaction be rejected by the processing bank.
Auto-pay
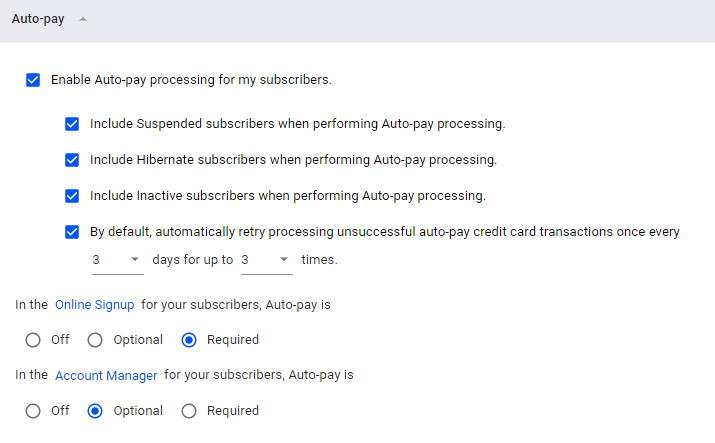
You can enable autopay to automatically collect the recurring charges or payments from your subscribers.
- You may include Suspended, Hibernated, and Inactive subscribers in auto-pay processing.
- Set the settings for automatic retry processing for unsuccessful auto-pay credit card transactions.
- You can enable the credit card payments automatically upon signup.
- You can allow subscribers to enable or disable auto-pay from the Account Manager.


