Configure IP Pools
- Setup a pool containing IP addresses you wish to assign to subscribers. Name the pool “pppoe-pool” and set the addresses to 10.5.50.2-10.5.50.254 (this will support up to 253 subscribers – expand the pool if you are servicing more subscribers from this PPPoE server).
- Setup a second pool. Name the pool “suspended”, with an address range of 10.254.254.2-10.254.254.254.
Configure PPPoE Server
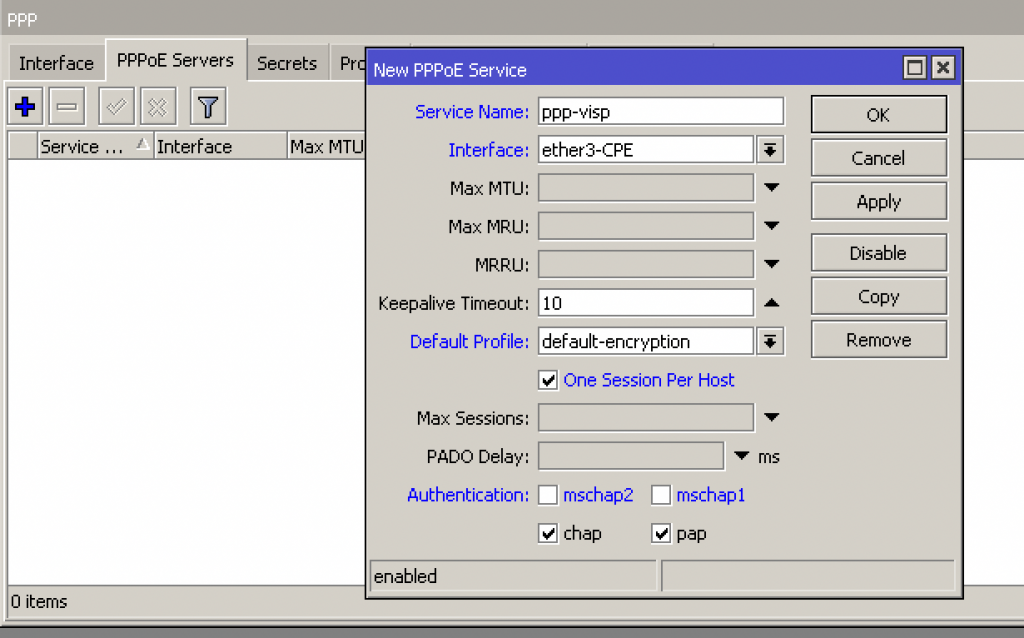
- Click the PPPoE Servers tab and add a new server with the following settings
- Name: ppp-visp
- Interface: select your subscriber facing-interface
- Default Profile: default-encryption
- Authentication: check PAP & CHAP, un-check mschap1 & mschap2
- Click the Secrets tab
- Click the “PPP Authentication & Accounting” button, check Use Radius & Accounting, choose OK.
- Click the Profiles tab and edit the default-encryption profile
- Local address: 10.5.50.1 in this example
- Remote Address: pppoe-pool
- DNS Server: 8.8.8.8 & 8.8.4.4 (or use your own)
Configure Firewall and Redirection Page for Suspended Subscribers.
- Please provide the ISP domain and the suspended subnet address to generate the firewall rules.
- After downloading the file, upload it to the Mikrotik router by dragging it to the file directory.
- Open the terminal window and run the following command:
/import verbose=yes file-name=firewall.cfg.rsc
Configure Queues
- Select the Queue Types tab, and then double-click the default-small queue to open it.
- Change the default-small queue Kind value to ‘sfq’ and leave the default settings.
Configure RADIUS Servers
Follow the instructions on this page to configure the RADIUS servers.


