

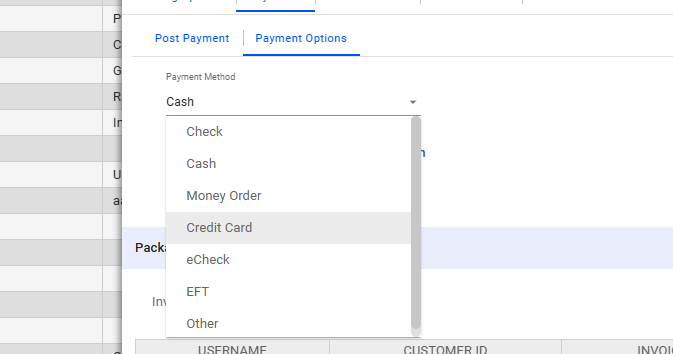
1. Click on Subscribers

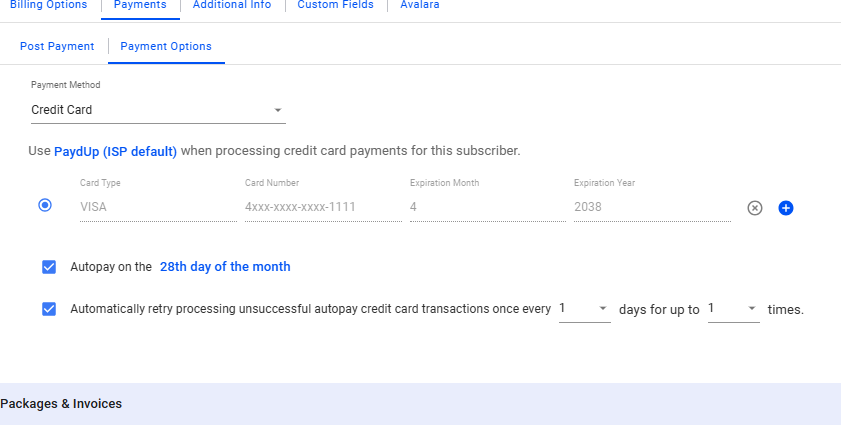
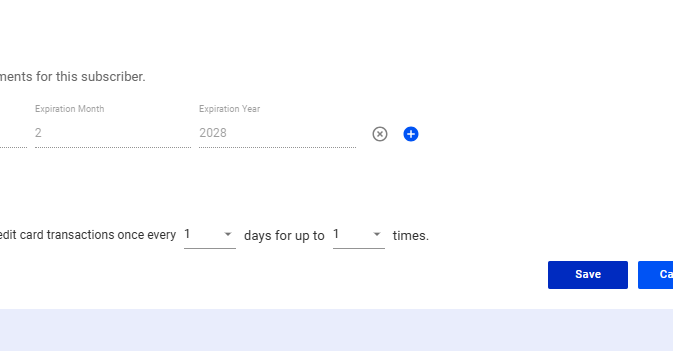
5. Click on the gray X icon, to the right of the card information, to remove it.
Here are the next steps:
- The Payment method will revert to “Cash”
- Save your work.
Additional Settings
Additional Settings
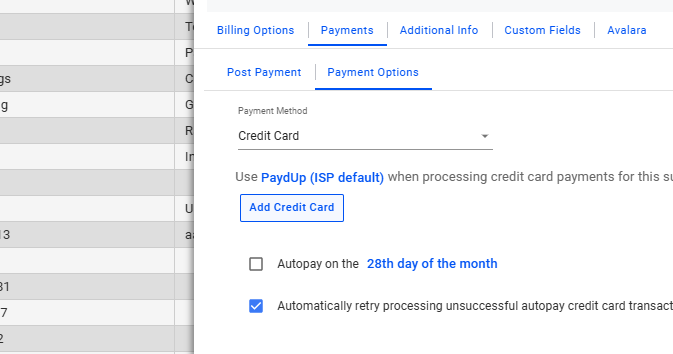
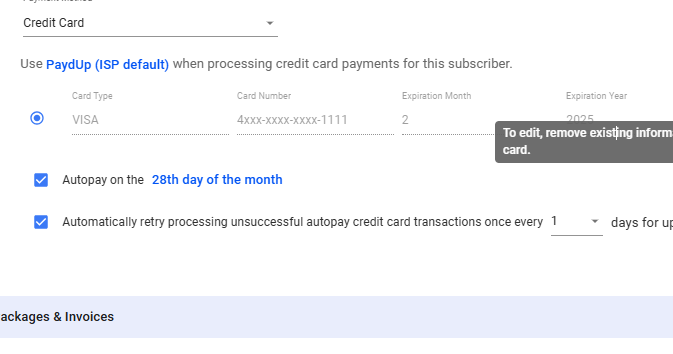
11. Enable Autopay and Automatic Retry
The Autopay feature lets you automatically collect funds from the customer’s card on a scheduled date for billing or payment. The automatic retry feature allows you to retry the card if the first autopay fails or if there’s an issue with the customer’s card.
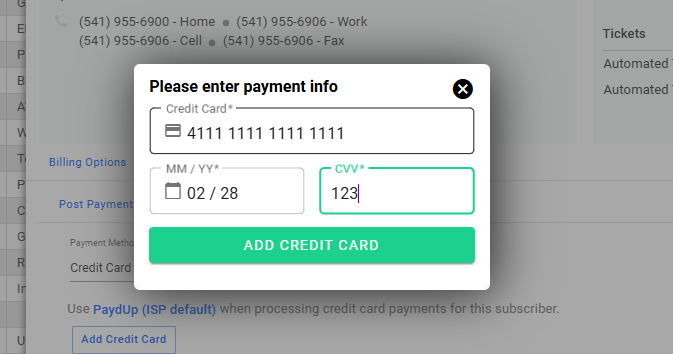
If you deleted the customer’s card previously and those options were available on it, you will need to re-enable them after adding the new card to the customer’s profile.
💡 For more information about this and all other features in Visp, reach out to your Visp Client Success Team today.
Phone: 541-955-6900Email: success@visp.net
Open a ticket via www.visp.net/ticket