

Set up and configure a filter with one or more conditions.
Schedule the sending of the message on a specific day or time.
How to Create a New Filter?
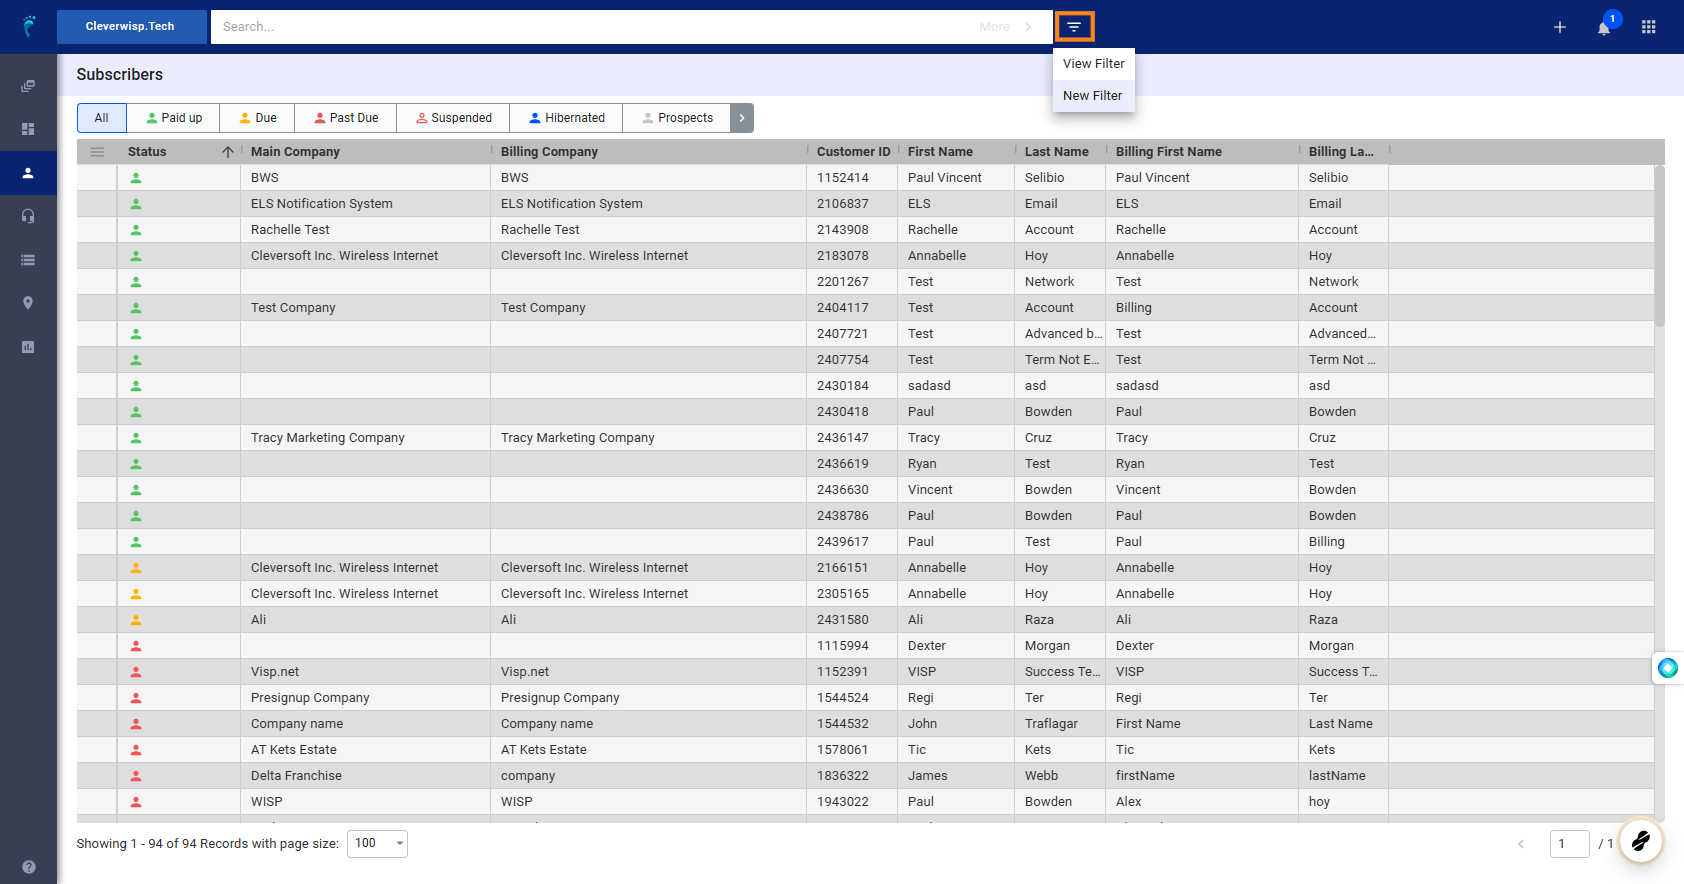
1. Click on Subscribers
- View Filter: Allows you to view and edit all created filters in the system.
- New Filter: You can create a filter and set its specific conditions.
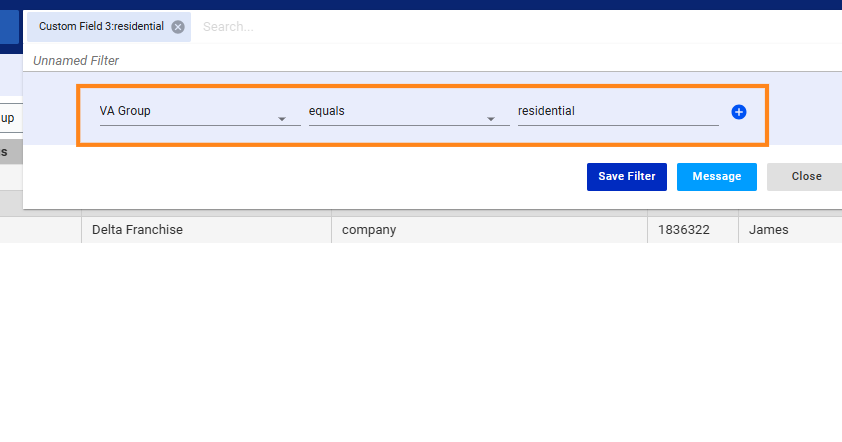
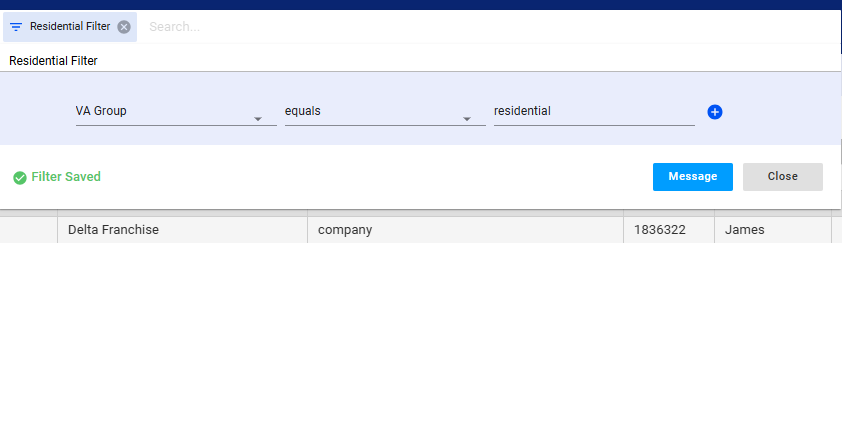
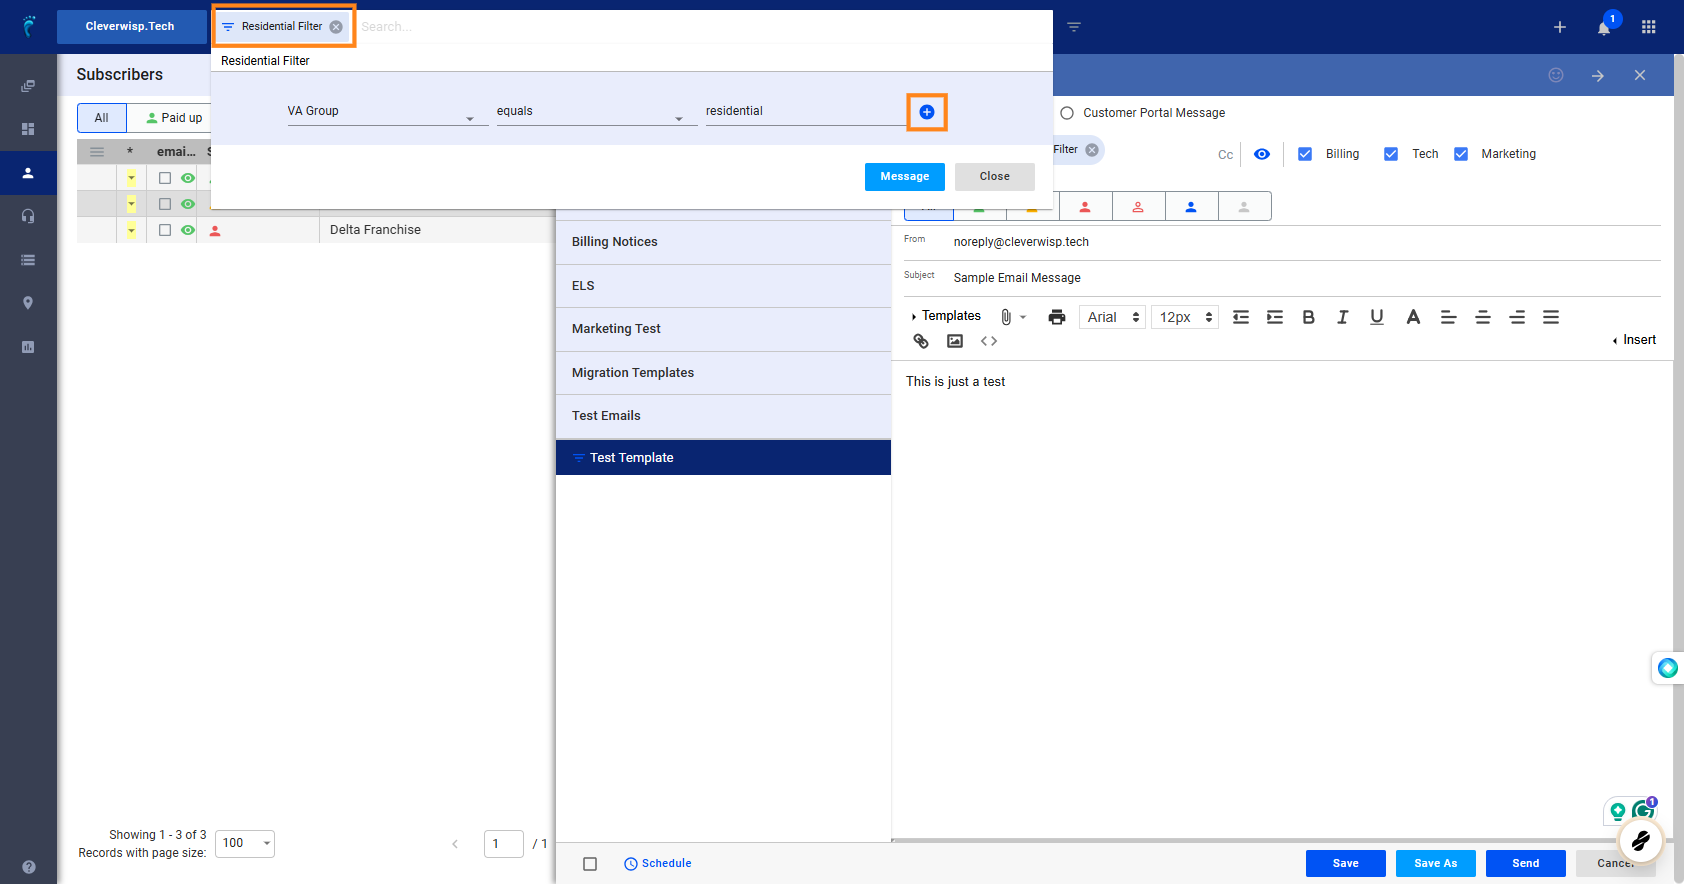
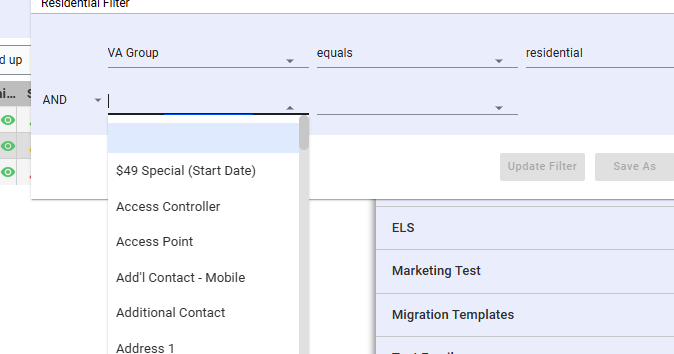
1. Filter Fields: These are composed of criteria you can filter.
-
- Example: Customer Name, Status, or Custom Field entries like VA Group, as shown in the example.
2. Filter Operators : These define the relationship between the filter field and the value.
-
- Common Operators are: equals, does not equal, greater than, less than, etc.
3. Filter Values : These are the specific values you want to filter for. They can be text, numbers, dates, or selections from a list.
-
- Example: Residential, Residential Accounts, Due, Past Due Status
- In the example, the custom field for VA Group was edited to contain the word “Residential” or “residential” (non case sensitive)
4. Filter Logic : This determines how multiple filters are combined. This usually appears once you click on the blue plus sign to add another filter / condition.
-
- AND (all filter conditions must be met)
- OR (at least one filter condition must be met)
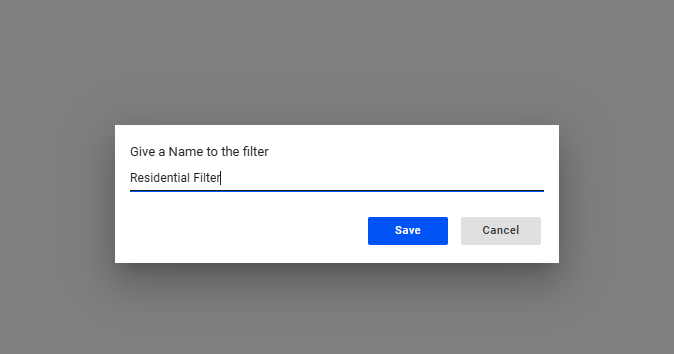
Save the filter after adding your conditions and values.
Click on “Save” when you’re done.
5. You may close the panel when you’re finished adding your filter.
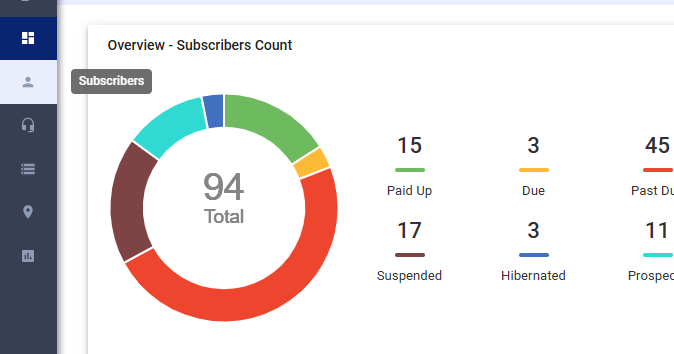
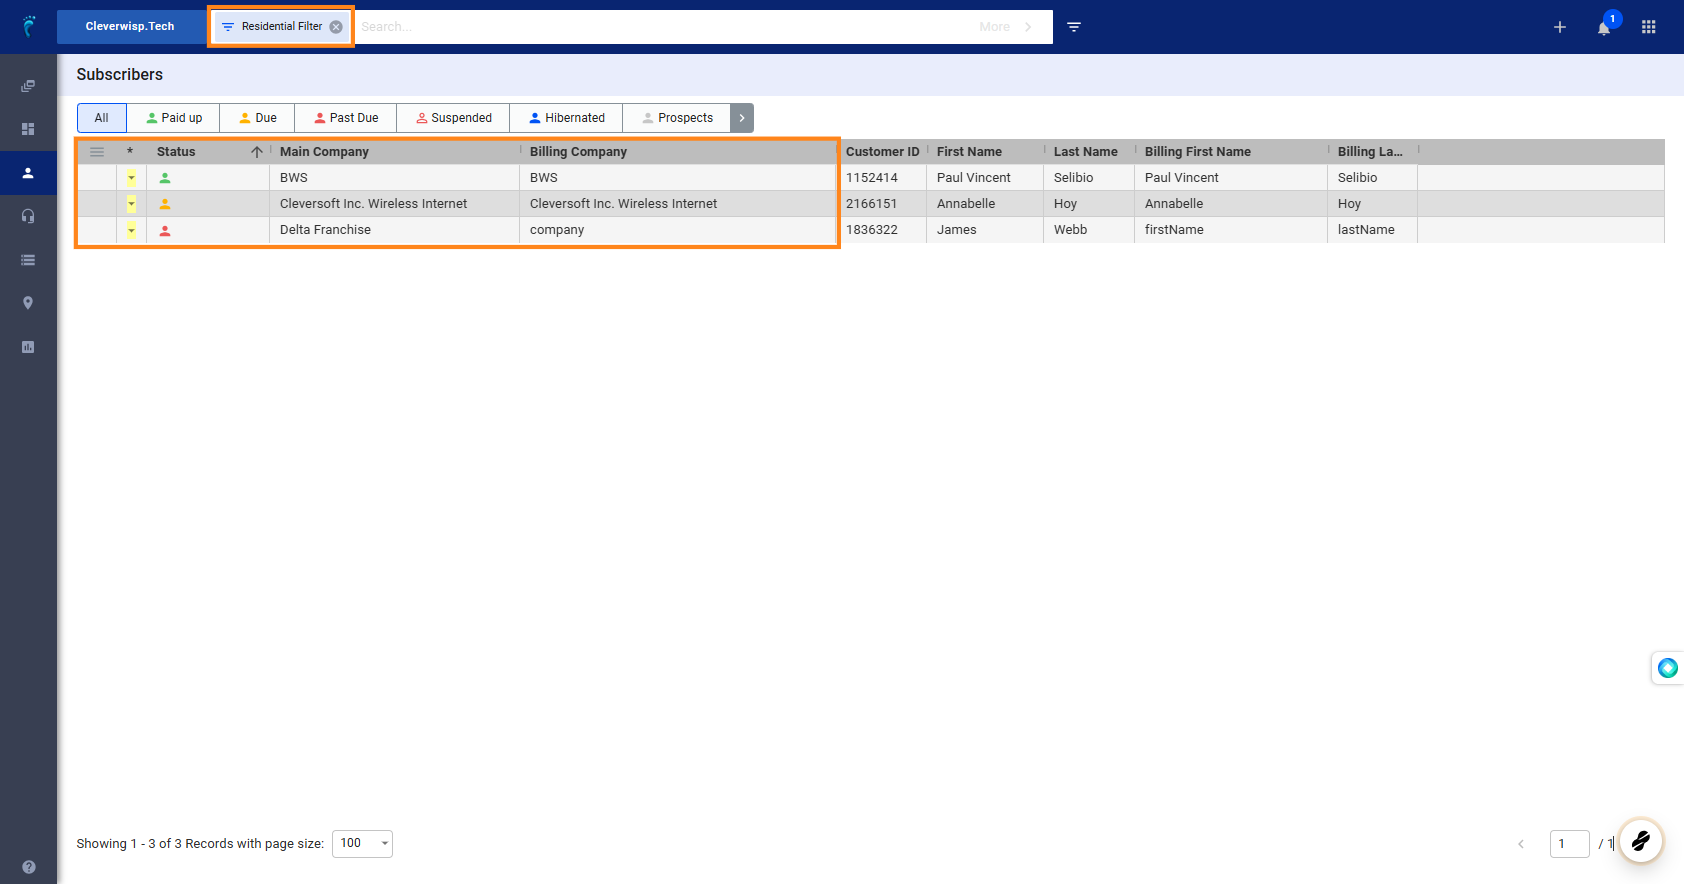
IMPORTANT: In this example, the filter was made to group users tagged with the ” Residential ” label in a custom field.
Since we did not specify a billing status, the filter includes all customers regardless of their billing status.
Use a Filter to Send a Message to a Specific Group
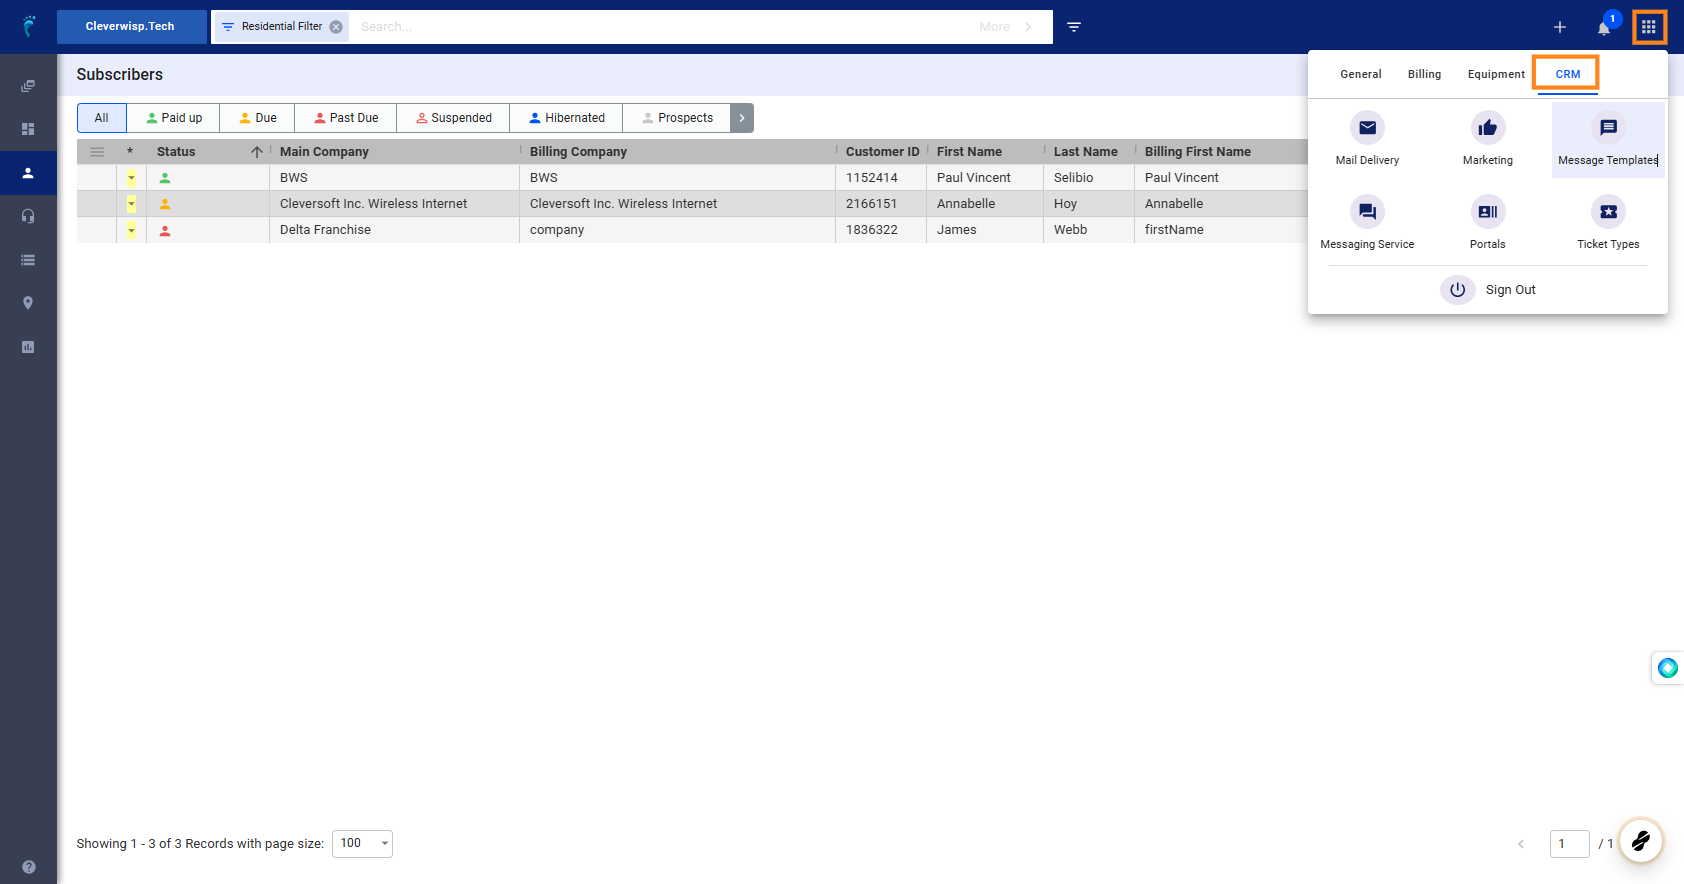
7. Open the Message Templates feature.
Steps to get here:
-
- Click the nine-dot menu in the upper right corner to open the Visp Admin Page.
- Click on CRM
- Select Message Templates
The Message Templates feature in VISP contains:
-
- Templates for emails, SMS, and portal notifications.
- Options for scheduled and triggered email notifications.
Here you will select whether to:
-
- Add a new Folder
- Create a new Template
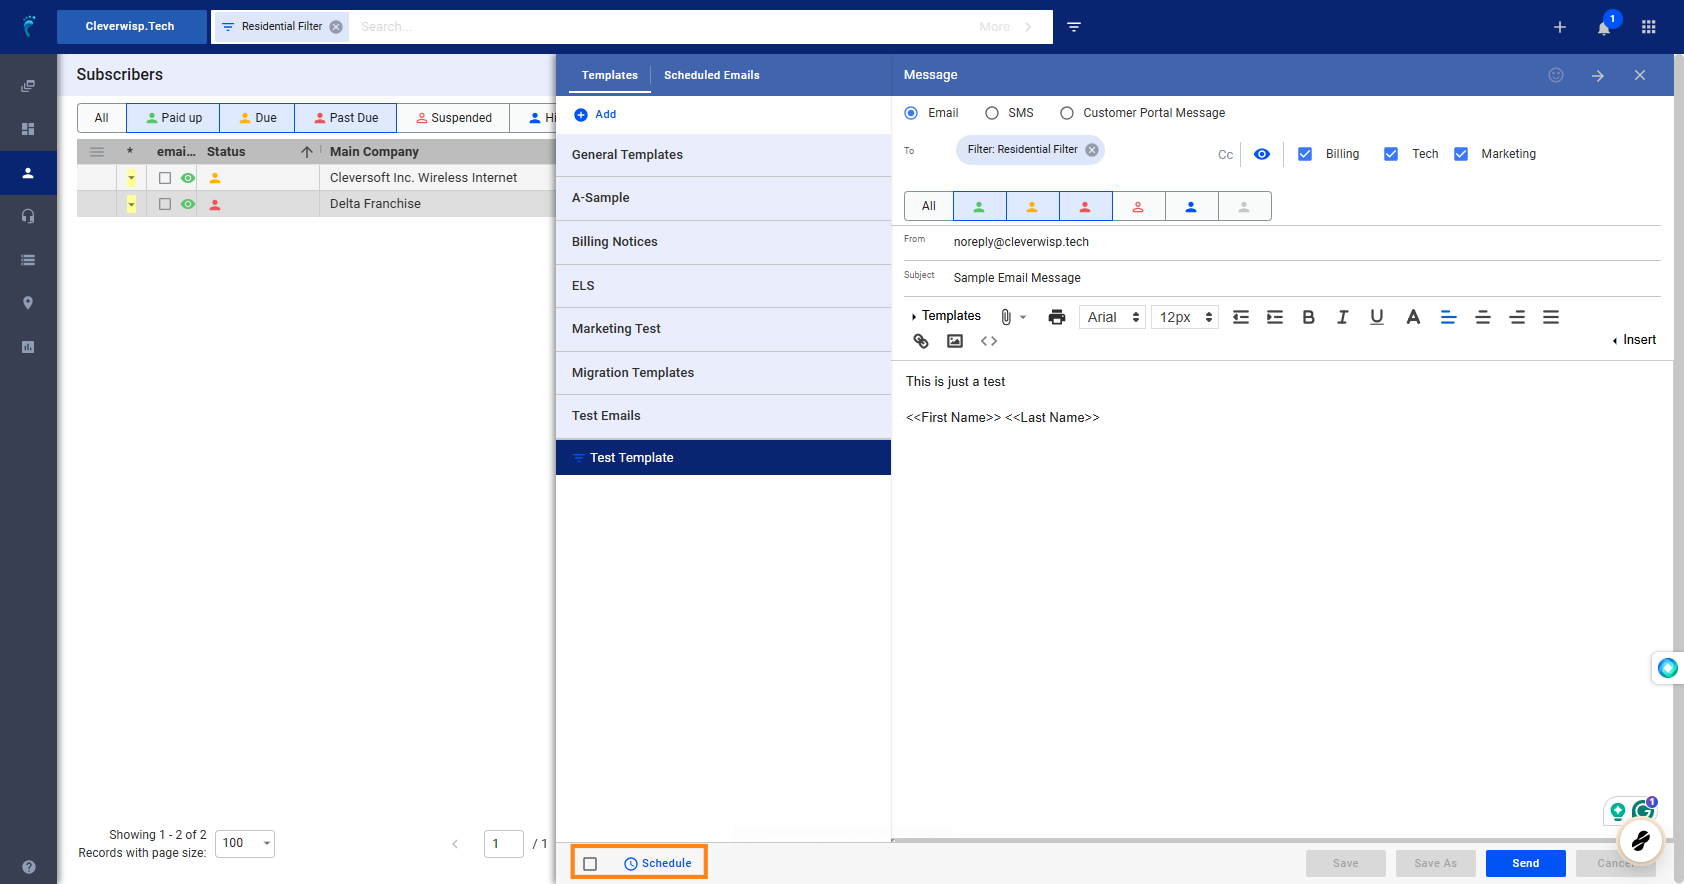
9. Populate the necessary fields.
-
- Toggle or select the Email option.
- Use the dropdown to select a folder where to store the template.
- Add a label or name for your new template.
Key Steps to Follow When Setting Up Your New Template
10. Ensure the necesary fields are populated.
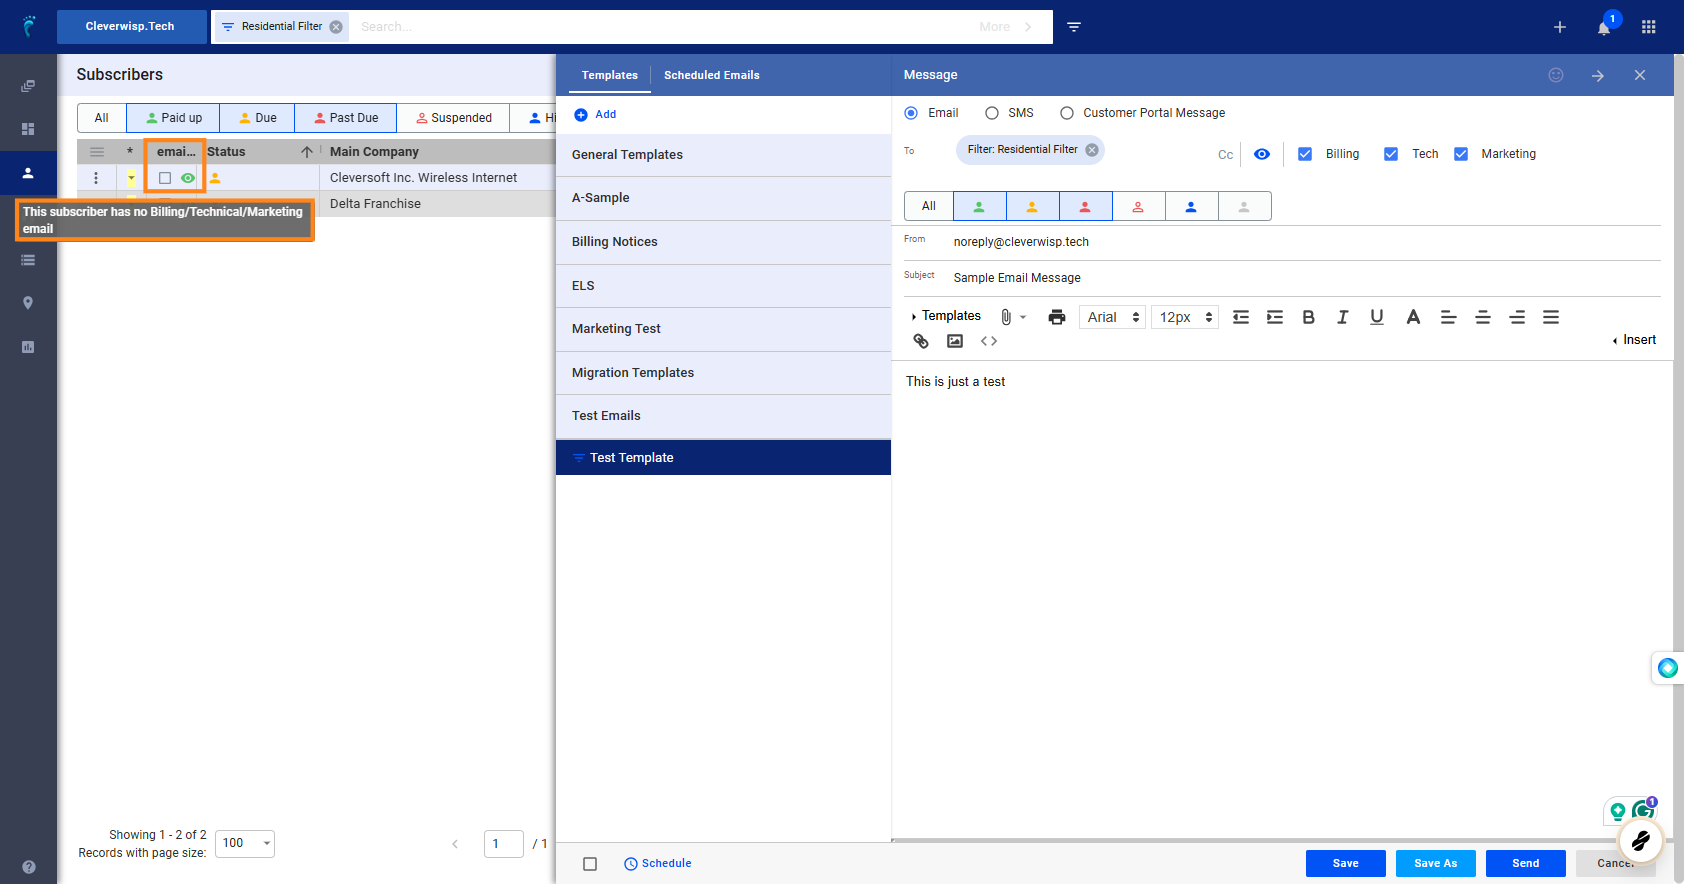
1. Click on your new template from the left side (list of folders and templates). Make sure that your template is selected.
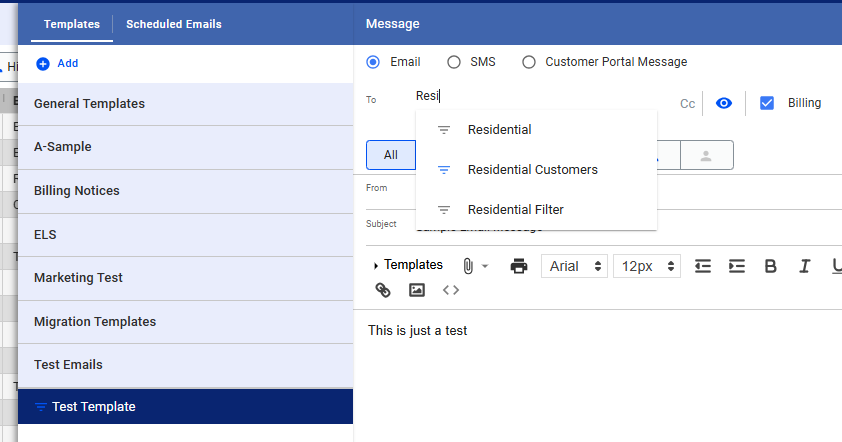
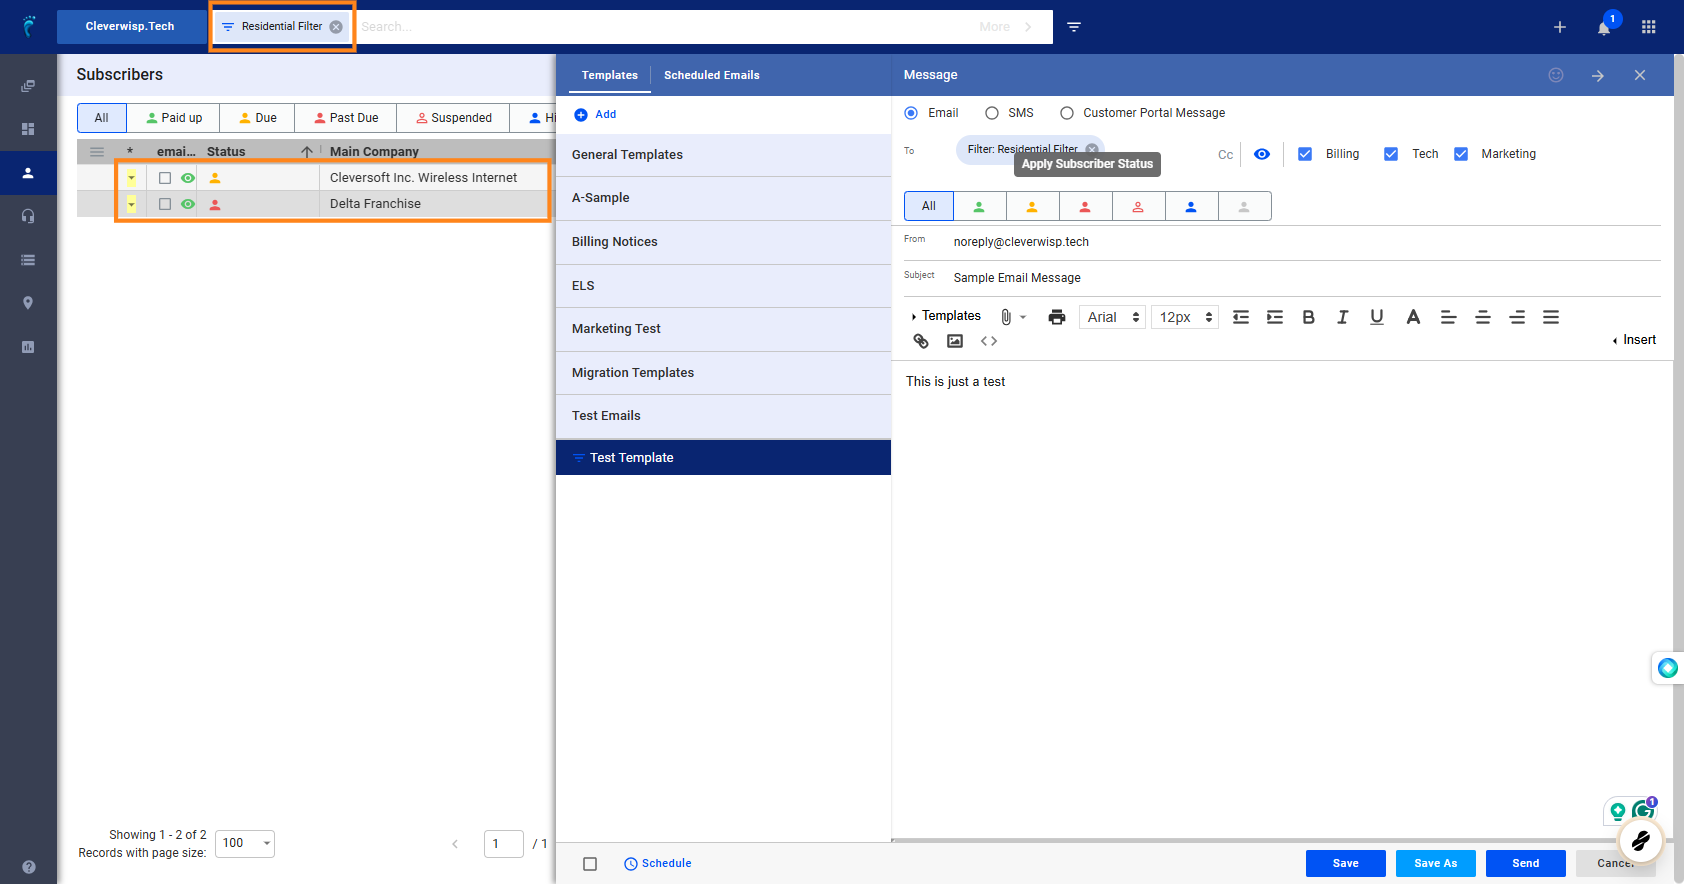
2. Click on the “To” field, and replace any default filters that were automatically added.
-
- You can enter the label for the filter you previously created, and you can use the dropdown to select your filter from the list.
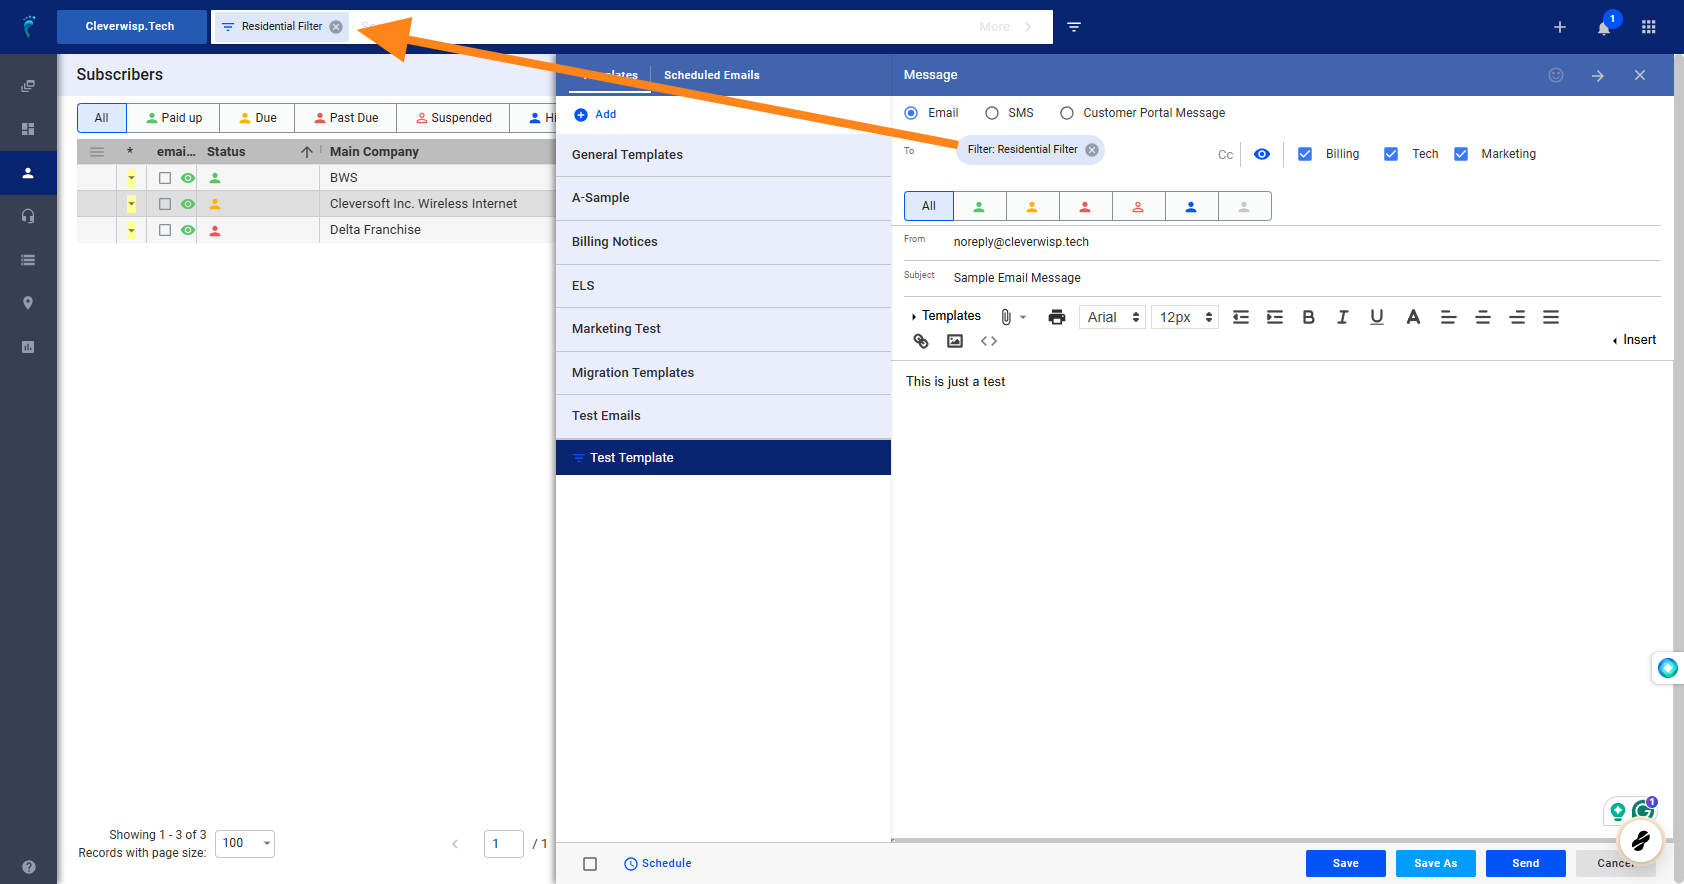
3. VERY IMPORTANT: The billing status display below the “To” field only shows the billing status of all targeted customers; it is not meant to add conditions to the filter itself to regroup the targeted recipients of the message.
-
- This is helpful if you did not use billing status of a subscriber as a condition within your filter.
- It shows a list of customers on the subscriber table to see how your filter targets customers with different billing statuses. For example, if the status is paid up, you will see all paid-up customers on the left side of the subscriber list.
- However, this toggle does not filter the billing status of customers for sending.
- To have specific customers receive the template based on their billing status, you need to edit the filters to include billing status as part of the conditions. The billing status toggle under the To field is ONLY for changing the statuses of the customers you can see on the subscriber table behind the Mass Email editor.
4. Click on the From field , and use the suggested list of email addresses from the list. This list can be edited when you go to My Visp and edit the Primary Contact information for your ISP.
5. Add a Subject and Body to your email.
Add a Billing Status Condition to the Filter
12. Click on the Filter label from the Search bar.
Click on the blue plus sign to add more conditions.
Sending to Customers with Varying Billing Status
14. Using the Billing Status and Operators to Fine-tune Your Filters
Two new conditions were added:
- Customers with status equal ‘due’ and ‘past due.’
- An ‘AND’ operator connects the VA Group (tagged Residential) with the first ‘due’ status.
- Meanwhile, an ‘OR’ operator connects ‘due’ and ‘past due’.
Explanation: A customer cannot have both ‘due’ and ‘past due’ statuses simultaneously, but they can be a residential customer with either status. Thus, the setup uses both ‘AND’ and ‘OR’ operators to handle different billing statuses.
Click on Update Filter to save your changes.
Personalize Your Email Before Sending
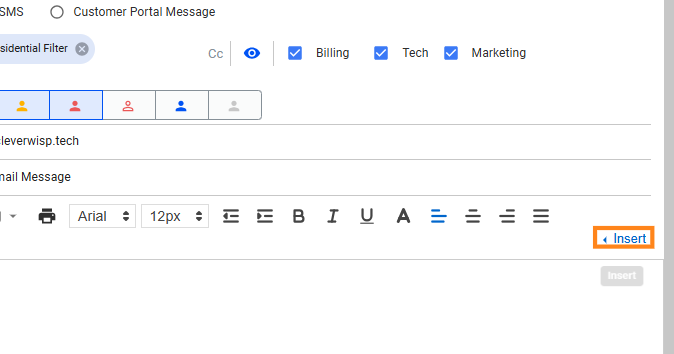
16. To personalize your message, click on the Insert link on the right side of your email toolbar.
The Insert link opens the available merge codes for your message. These codes allow you to personalize parts of your message, like using the customer’s first name.
For each customer who receives the message, their first name will be used as a greeting.
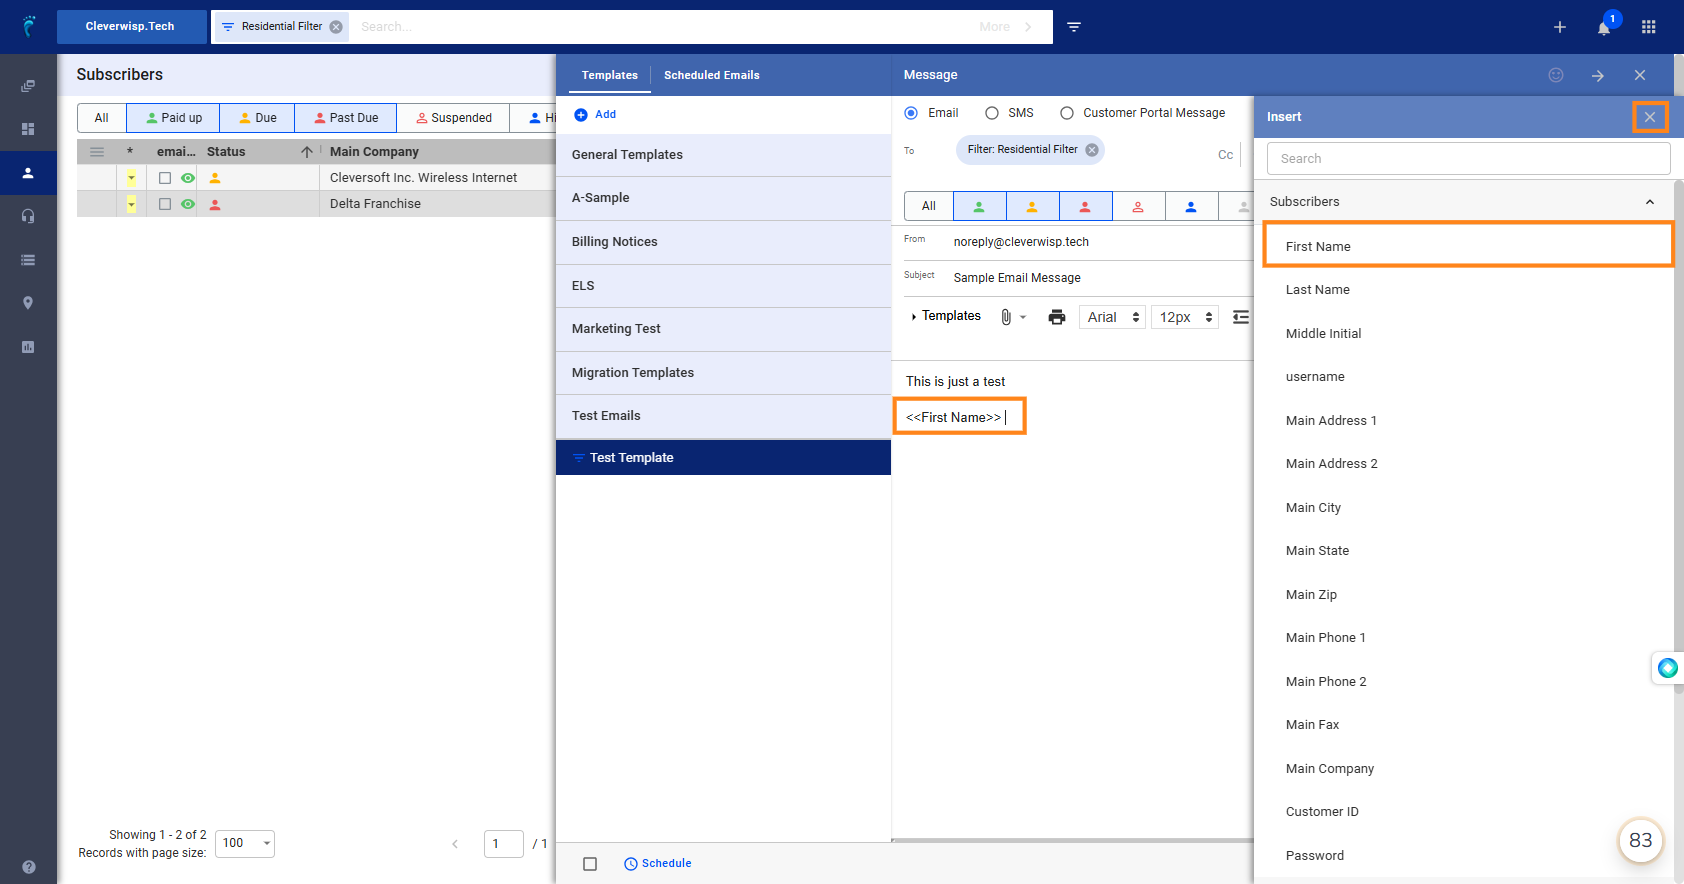
17. In this example, we select the First Name of the customer.
After selecting “First Name,” the merge code will appear in the body of the email. Check your current format; for example, add greetings or “hello” before the < merge code.
Personalize only the desired sections of your message. Once you’ve added the merge codes, click the ‘X’ icon beside ‘Insert’ to close the merge fields list.
Save your template when done.
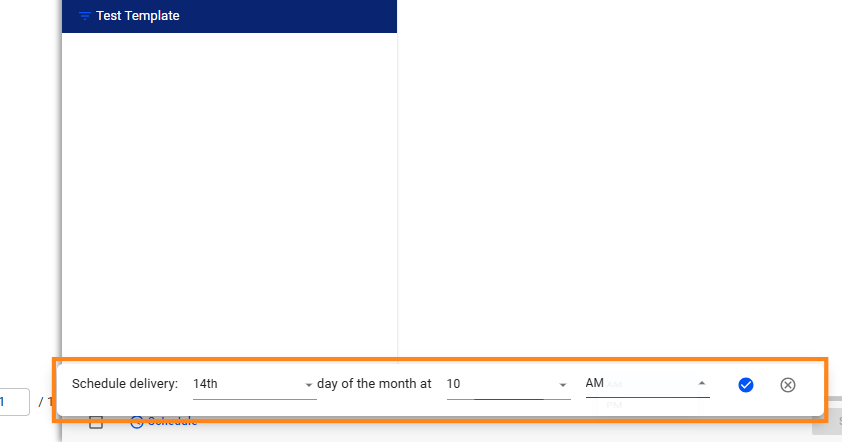
Schedule Your Message
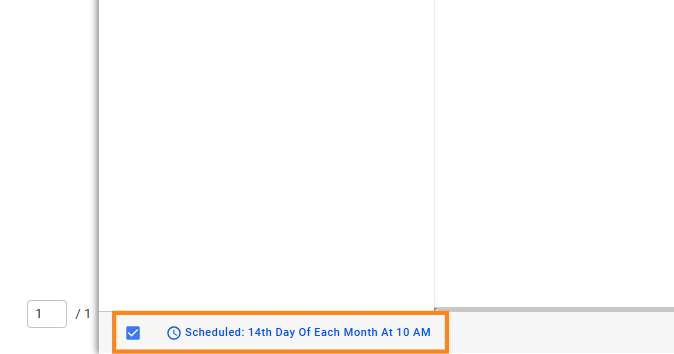
18. Enable this option to schedule your message for sending.
The settings here allow the message to be sent on a specific day and time each and every month .
Click on the blue check mark to save the schedule.
Save the template when done.
Once you schedule the template, it moves to the Scheduled Emails list. This is where you can find all scheduled and triggered templates in the system.
IMPORTANT: Scheduled templates are date-based, whereas triggered emails are sent by specific events or actions.
Save the changes after updating the schedule on a template.
Other Important Reminders
22. Click on highlight
💡 For more information about this and all other features in Visp, reach out to your Visp Client Success Team today.
Phone: 541-955-6900Email: success@visp.net
Open a ticket via www.visp.net/ticket