

Introduction to SSL Manager
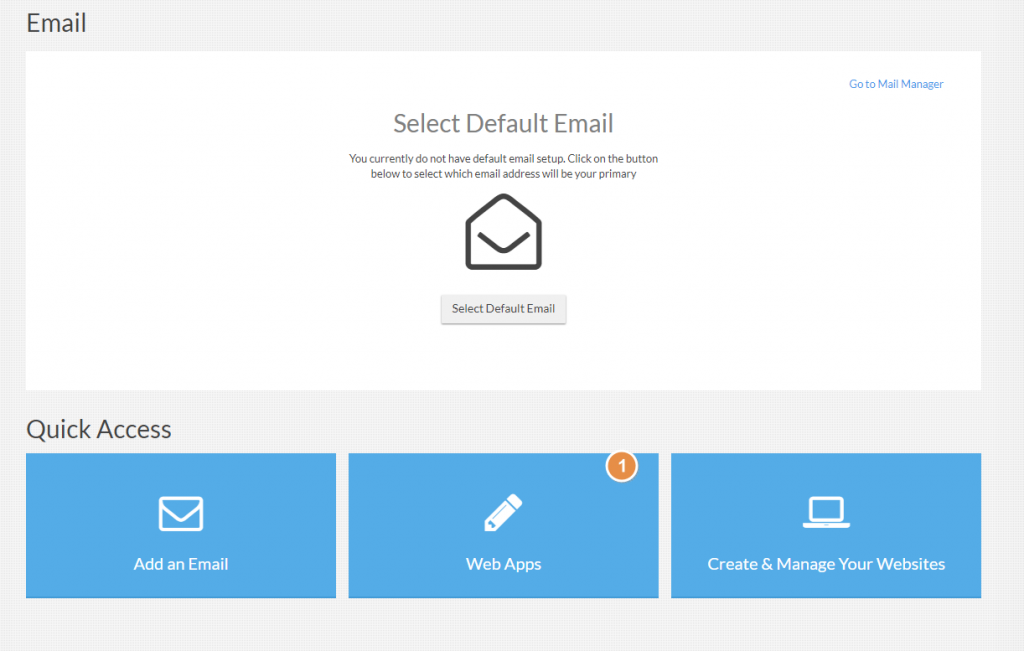
1. Log in to your website control panel under Quick Access; click on Web Apps
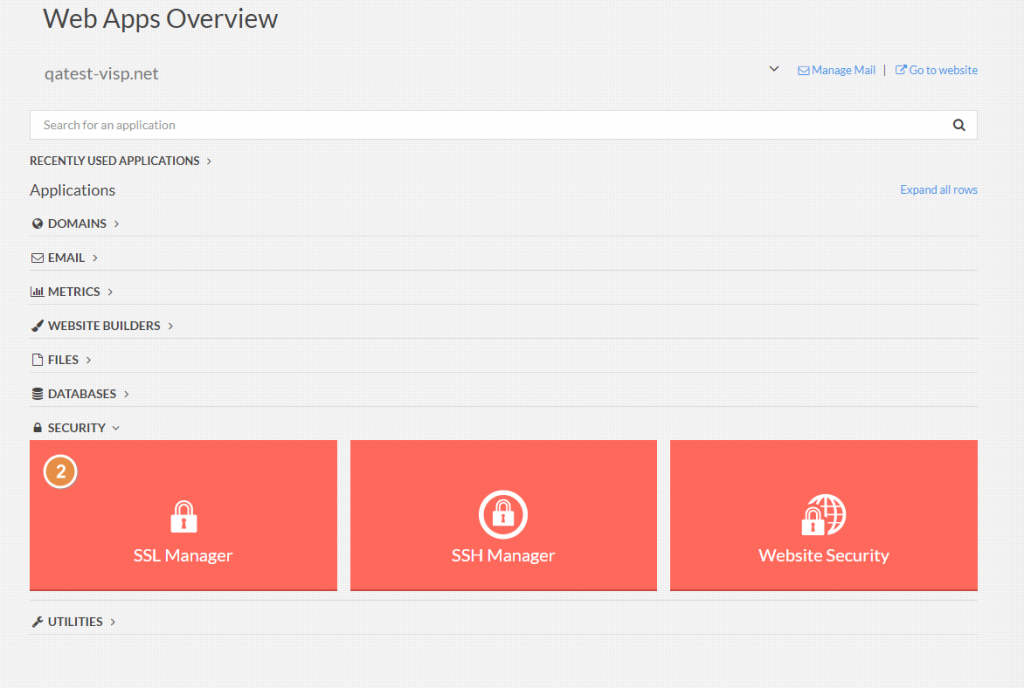
2. From the Web Apps Overview Menu, open the Security toggle tab and select SSL Manager.
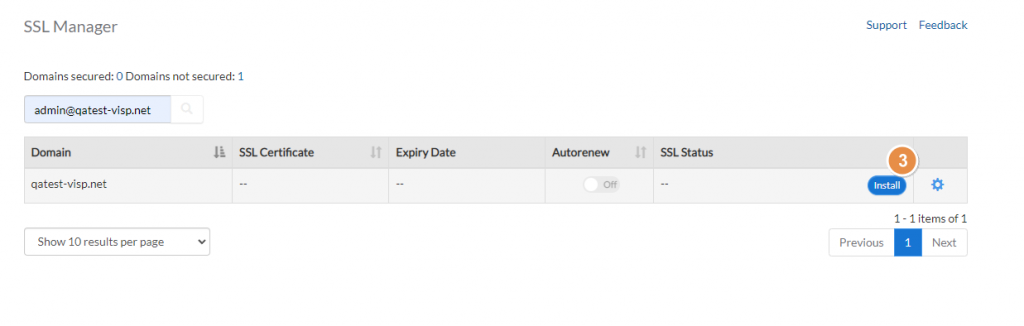
3. To get to the SSL Manager, click Install.
It is recommended that you select the Private or Vanity SSL certificate.
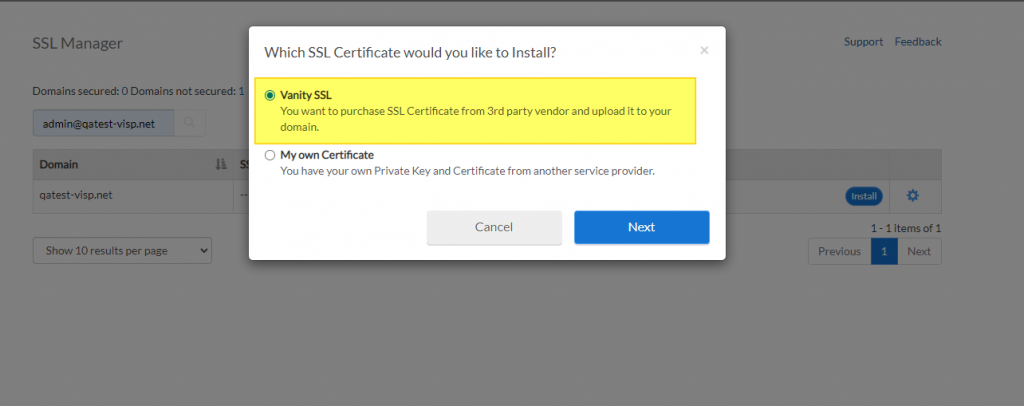
A Private or Vanity SSL is recommended for business or e-commerce sites since you can use your domain and branding. This lets your customers and viewers trust your website more when processing payments or submitting data online.
Setting up a Private SSL Certificate
Step 1: Generating the SSL key and certificate
The first step in setting up your private SSL certificate is to generate a key and Certificate Request (CSR) using the SSL Manager. Select the “Generate a Certificate Signing Request (CSR)” radio button from the SSL Manager page and click the “Next” button. A form will be displayed that allows you to enter the required information for generating the key and CSR.
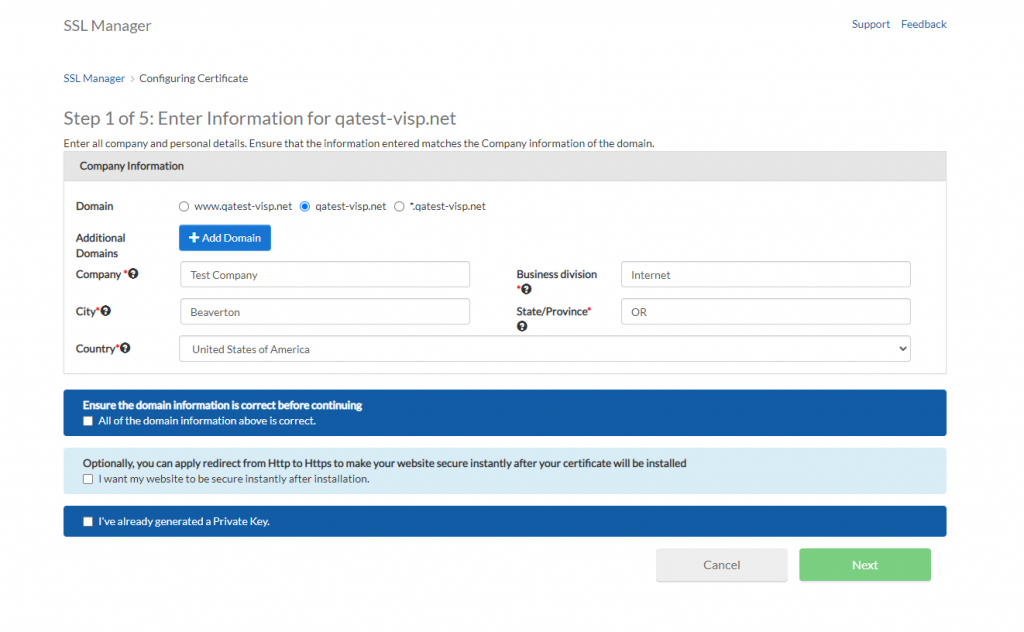
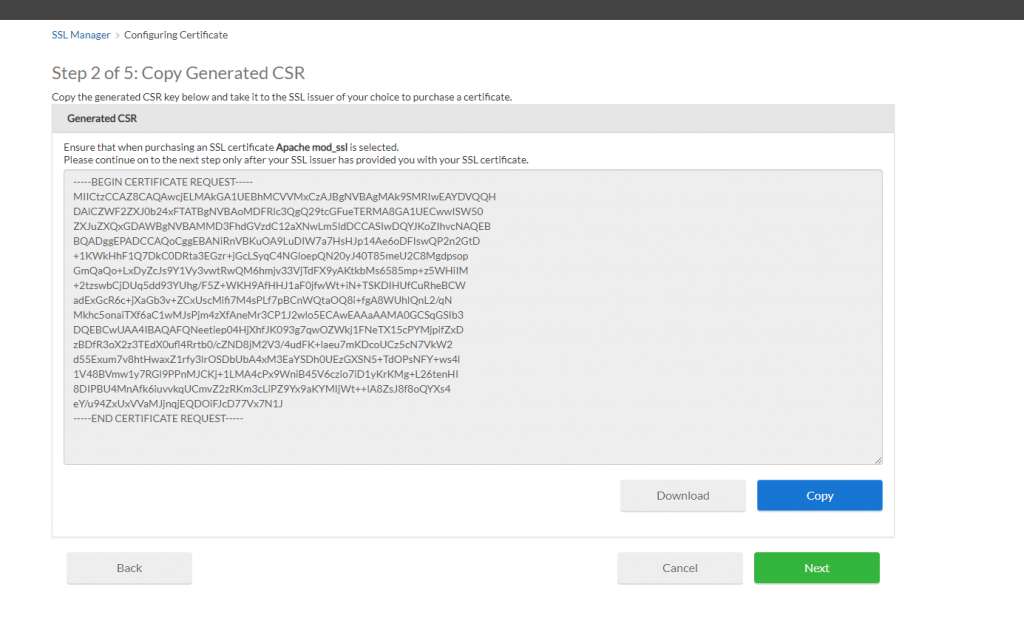
Fill out the form and click the “Next” button. The information you entered will be displayed. Click the “Back” button to make any changes to this information. If the information you entered is correct, click the “Next” button. A CSR and key will be created, and your CSR will be displayed. This is your self-signed certificate; you can use it temporarily while waiting for an actual certificate. Click the “Next” button to set up the CSR on our servers. The operation’s result and your certificate file’s name will be displayed. Click the “Finish” button to exit the SSL Manager.
Click the “Cancel” button anytime during the process to exit SSL Manager without saving the changes made during that step.
Step 2: Purchasing the Certificate
To purchase the certificate, email it to a Certificate Authority with your “Proof of Organizational Name” and “Proof of Right to use Domain Name.” In most cases, the “Proof of Organizational Name” is a copy of your company registration documents or certificate of incorporation. In most cases, the “Proof of the right to use Domain Name” is a printout of your whois information. There are exceptions to both proofs. Contact your Certificate Authority for their exact specifications before sending any documents.
The Certificate Authority may ask you about the server type on your certificate that will be installed. Our server type is “Apache with mod_SSL“
To purchase the certificate later, log into the “SSL Manager.” Select the “View your Certificate Signing Request (CSR)” radio button and click the “Next” button. The CSR will be displayed. Copy the certificate and send it to the Certificate Authority along with the documents described above.
The following is a list of some Certificate Authorities for your reference:
Name.com SSL
GoDaddy.com SSL
Thawte.com SSL
Entrust.net SSL
NameCheap.com SSL
3. Uploading your purchased certificate
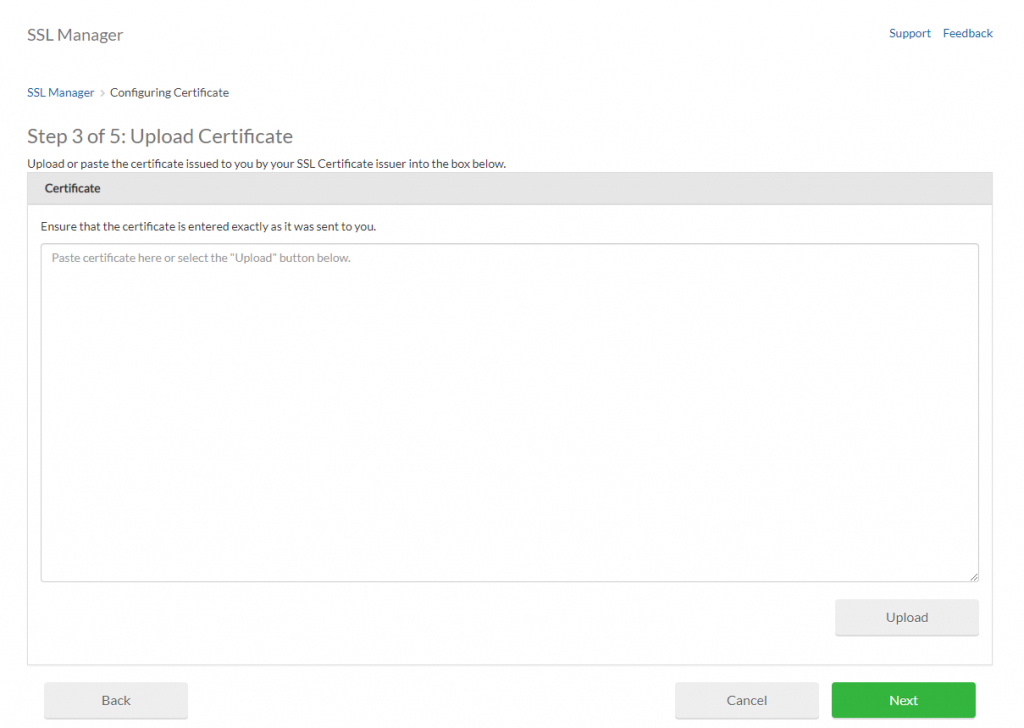
The last step of creating a secure site is to upload the certificate you receive from your Certificate Authority.
After receiving your certificate from your Certificate Authority, you need to upload it to our servers for us to set up your secure site.
Select the “Upload your certificate ” radio button to upload your certificate and click the “Next” button. A form will be displayed. Paste the body of the certificate in the text area. Click the “Next” button to complete the operation. The result of the operation will be displayed. Click the “Finish” button to exit SSL Manager. Your certificate will be set up the next business day.
Click “Cancel” to cancel the upload and exit the SSL Manager.
Checking your secure site
SSL Manager allows you to verify if your certificate has been set up.
To verify that your certificate has been set up, select the “Secure site status” radio button and click the “Next” button. The status of your secure site as well as a link to your secure website, will be displayed.
Click the “Back” and return to the SSL Manager main page.
You may also visit your website after domain propagation to see if you’re loading an HTTPs page.