1-541-955-6900

success@visp.net

Login

Documentation Series

Learn About VISP App Dashboard

Help Documentations / Welcome to Visp!

Welcome to Visp!

1. Here’s an overview of your Onboarding Journey
Welcome to Visp

Important Tips for Your Portal and Email Settings During Onboarding

2. VIEW PAGEWhite-Label your VISP Account Manager and Signup Portal
White-label your VISP Signup Portal or Account Manager link

      • To point a domain or sub-domain to your VISP portal, log in to your domain registrar and update your DNS by pointing an A-record to this IP address 34.215.110.115.
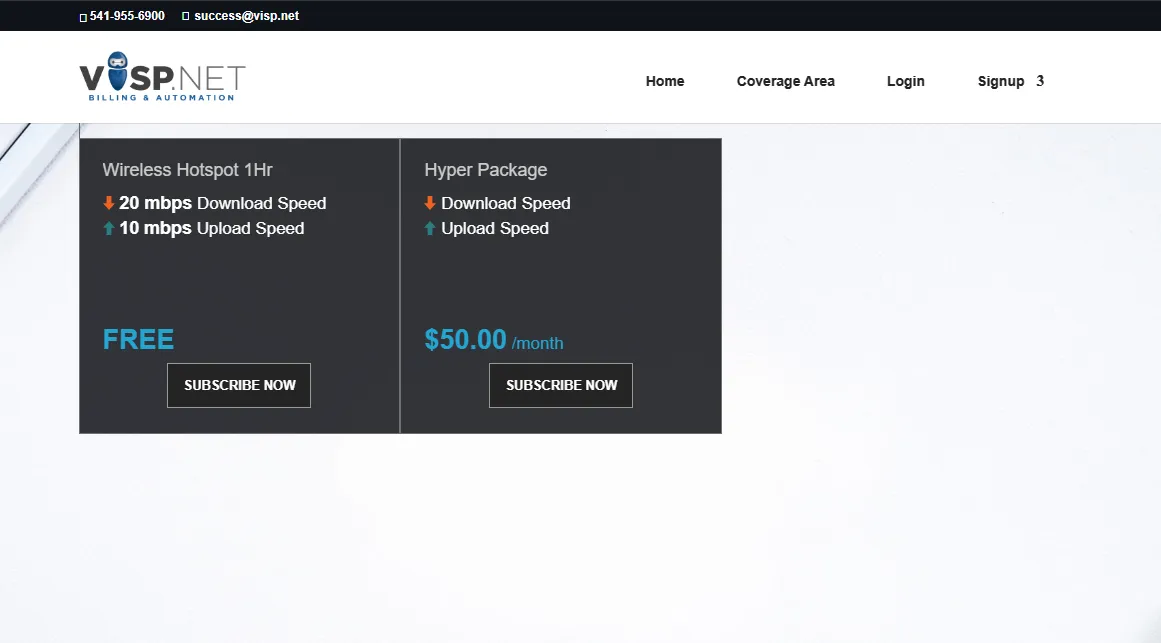
      • The portal allows prospects to register for service and lets subscribers access and manage their account, usage, bills, payments, and update payment methods.

Click or open the link on this step to view our sample portal.

Welcome to Visp

3. VIEW PAGEMass Email for Customer Payment Notifications

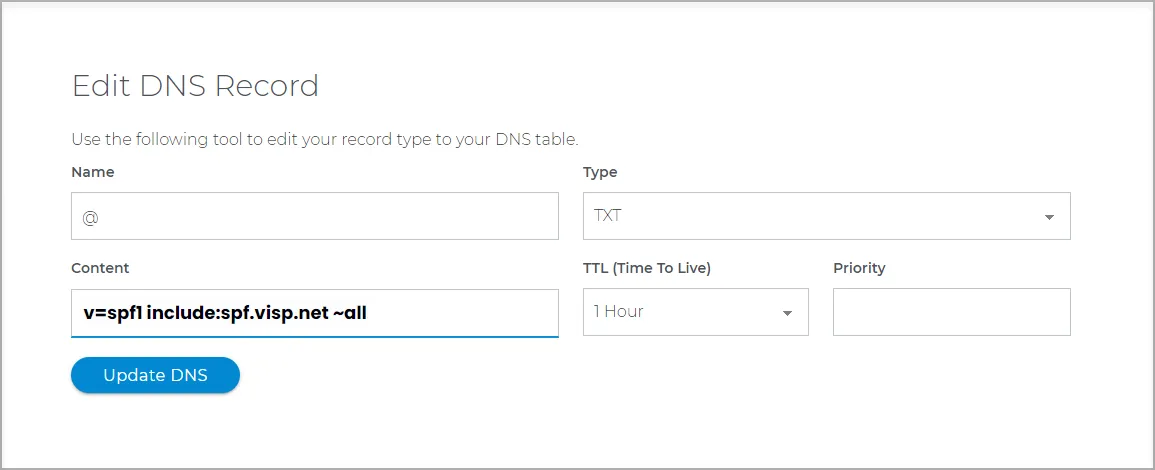
To enhance email delivery from VISP.NET server to your clients’ inbox, add or make an SPF record for your domain.

      • To create a new SPF record, make a TXT record in your domain’s DNS editor with the necessary information.
      • v=spf1 include:spf.visp.net ~all.
      • If your domain has an existing SPF record, you need to append “include:spf.visp.net” to it.
      • Here’s an example of multiple domains added to an SPF record:
      • v=spf1 include:_spf.hostedemail.com include:spf.visp.net ~all

Welcome to Visp - edit DNS

Training and Resources

💡 Add Packages and Services
This guide is comprised of the following items: (link)

      • Create a Package
      • Set Pricing
      • Configure Basic Details
      • Package Speeds

💡 Manually Add and BIll Customers

    1. Add Prospects or Subscribers
    2. Add a Package to an Account
    3. Add Charges and Send an Invoice

💡 Customer Transactions

    1. Add a Quote, Create a New Custom Invoice, or Void an Invoice
    2. Add a Credit Memo or a One-time Discount

💡 Payment Processing

    1. Process a One-Time Subscriber Payment
    2. Save a Card on File
    3. Enable Autopay and Automatic Payment Retry

💡 Create and Manage Tickets

    1. Parts of the Service Desk (link)
    2. Create a Ticket
    3. Basic Ticket Fields (link)

💡 Setup Your Merchant and Auto-Pay Settings

    1. Review the Supported Merchant Processors.
    2. Enable and Configure Global Autopay Settings

💡 Online Signup Form and Account Manager

    1. View the link to the Online Signup Form | Sample: Demo ISP , Live ISP
    2. View the Account Manager Link
    3. View Subscriber Username and Password
    4. Use a Custom Domain for your Account Manager and Signup Portal.

💡 Advanced Sessions

    1. Full Configuration for Package Settings
    2. Configure Mass Email Templates and Settings
    3. Infrastructure Resource Management (IRM) Overview
    4. IRM Setup and Configuration

💡 Onboarding Meetings

    1. Schedule Team Training
    2. Schedule RADIUS Configuration

💡 Visp Client Success Teams and Channels

    1. Live Support: Ringcentral / Glip account.
    2. Phone: 541-955-6900
    3. Email: success@visp.net
    4. For details on our Hours of Operation and After-hours support policy, click here.

Resources

💡 Links

    1. CEO Roundtable
    2. Your Production Environment (app.visp.net)
    3. Your RingCentral Live Support Channel
    4. Reset your Visp Account Password

1. Invoicing

Your billing system is made easier with VISP — just take note of these important items: There are now two types of billing cycles in VISP – Fixed and Flexible. Fixed billing means you schedule invoicing to happen on a specific day of the month for all of your…

2. Auto Actions

Auto actions are simply automated actions, designed to streamline recurrent processes such as non-payment suspension. Automating them would ensure consistency and lessen the chances of error. To set it up, go to the Main Menu > Auto Actions. Tick the “Set the…

3. Payment

Accounting Controls Accounting controls allow you to select different options when closing invoices and affect how statements will be displayed. To access it, go to the Main Menu > Payments > Accounting Controls. Closing an Invoice Toggle or select how you want…

4. Forms

Personalize the appearance of your invoices, statements and receipts, which includes adding logos and personalized messages. Invoice Message – Message that will appear in subscribers’ invoices. Statement Message – Message that will appear in subscribers’ statements….

5. Time Zone

For UBO or desktop (Java) version, refer to this link. Set the time zone being used by your ISP to customize the date and time logs throughout VISP. Go to the Main Menu > Timezone Select from the available time zone options listed in the drop-down menu. The date…

6. Application Security

For UBO or desktop (Java) version, refer to this link. To enable additional access security for your subscriber and ISP data, specify the default IP range for network locations from which application users (App Users) can access VISP. Note: You should be an Admin User…

7. Marketing Source

or UBO or desktop (Java) version, refer to this link. Gather marketing details to analyze where your subscribers learned about your ISP or the reasons why they want to cancel their account. In the Main Menu > Marketing, there are two marketing details that you can…

8. Mail Delivery

The mail servers provided by VISP are included by default with your service. Your single and mass emails are delivered via the same mail servers. To ensure and improve email delivery from the VISP.NET mail server, create an SPF record for your domain. If your domain…

9. Custom Fields

For UBO or desktop (Java) version, refer to this link. Set up Custom Fields to track all types of subscriber data that do not have corresponding default VISP fields. You can hide fields, select formatting, choose display color, set data type, rename the field or…

10. Resetting VISP App User’s Password

Did you or a team member forget the login and password to the VISP software? There are three ways to solve this problem and login again to the software. 1. Click on “Forgot your password?”. Provide your VISP username and the email address on file for your account. 2….

11. Setting up and Managing Application Users

Add App Users to VISP You may have associates who require access to the software. As the administrator, you can make them Application Users – that is, you can let them use the software but only with certain rights that you get to choose for them. For example, you want…

12. My VISP

My VISP settings include primary contact, billing contacts, payment information, and account history. You can also pay your remaining balance amount in this window. To update this information, go to Main Menu > My VISP. Primary Contact Most of this information is…

13. Add New Employees to VISP

To View, Search, and Manage Current Users Go to the Menu Click on Users To search for a specific user, type the name, username, or IP address in the search field. You can filter to see All Users or switch between Active and Inactive users. You can set the user as…

14. Aw Snap, Timeouts, or Out of Memory Errors

Troubleshoot and Resolve the Aw Snap: Out of Memory Error. Do you see: A blank, white space when opening the VISP Web App. Timeouts or memory errors when you open specific pages.
?